

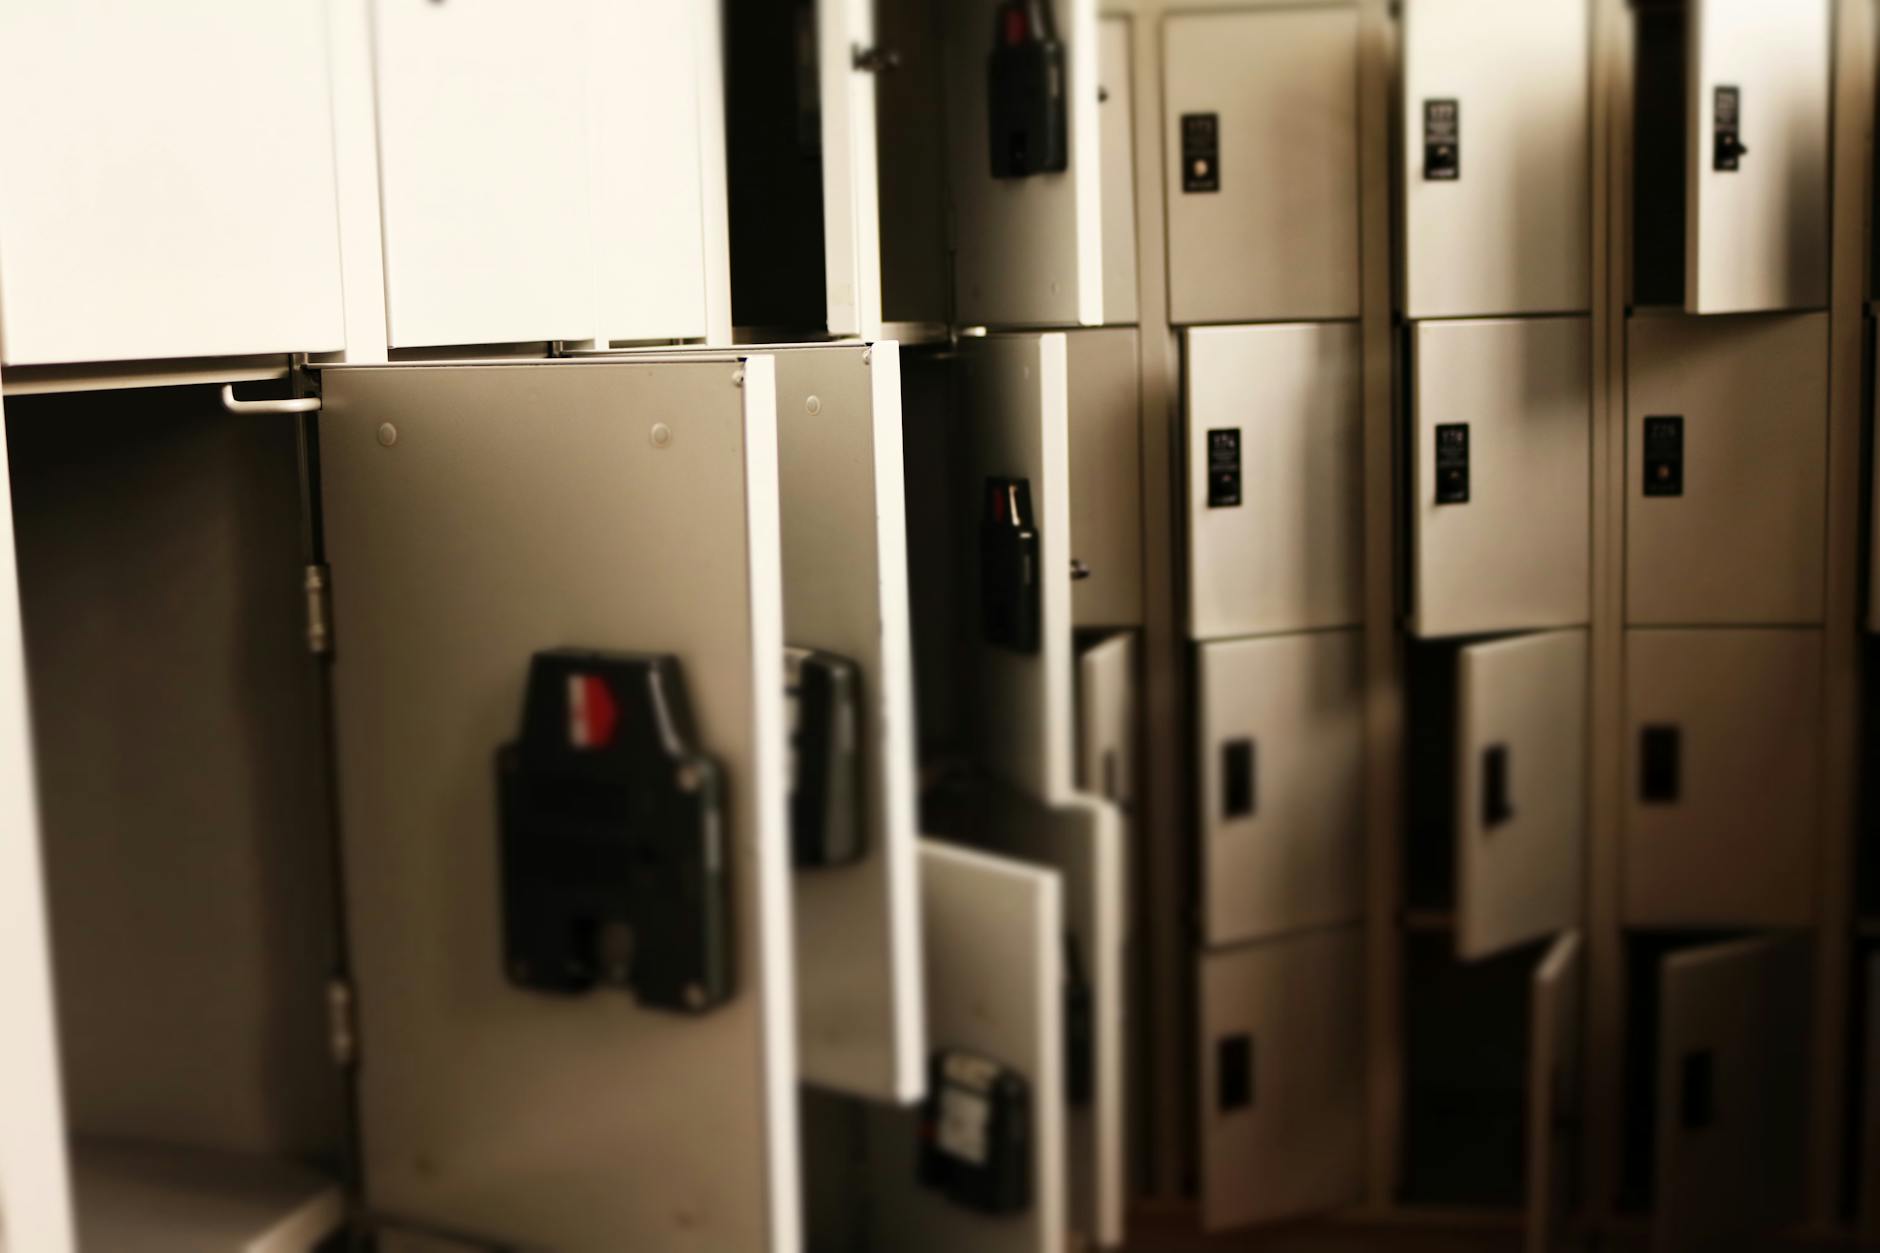
Wähle einen schlüsselbetätigten Schließfach in der zentralen Halle innerhalb weniger Minuten nach deiner Ankunft; das hält deine Hände frei und macht deine Reise reibungslos. Die meisten Bahnhöfe bieten diese Einheiten an, und viele Vorhallen haben denselben Aufbau, sodass du dich schnell zurechtfindest. Einige Schließfächer sind während der Wartung außer Betrieb, damit du weißt, dass das Fenster etwa zwischen 2:00 und 4:00 Uhr morgens ist, was dir hilft, deine Abgabe oder Abholung entsprechend zu planen.
Schließfächer gibt es in kleinen, mittleren und großen Größen, mit Preisen von etwa 300-500 Yen für klein, 500-700 Yen für mittel und 700-900 Yen für groß pro 24 Stunden. Die maximale Mietdauer beträgt in der Regel 24 Stunden; in vielen Bahnhöfen können Sie die Zeit durch erneutes Bezahlen am Automaten verlängern, sofern Sie vor Ablauf der Zeit zurückkehren. Wenn Sie viel Gepäck haben, wählen Sie am besten das größte Schließfach; es fasst zwei Koffer und mehrere Rucksäcke.
Planen Sie voraus: Verorten Sie die Schließfachstandorte in der Umgebung, bevor Sie ankommen. Bewahren Sie Ihren Schlüsselcode für das Schließfach griffbereit auf und machen Sie ein Foto des Etiketts der Einheit. Bei Ankünften in der Nacht akzeptieren die meisten Automaten Münzen oder IC-Karten, und das Personal an den Informationsschaltern kann helfen, falls etwas schiefgeht. Dass Sie über Verlängerungsoptionen Bescheid wissen, hilft Ihnen, Gebühren zu vermeiden. Für Familien oder Gruppen senkt das Teilen eines Schließfachs die Kosten und hält alle Gegenstände beieinander; wenn Sie einen schnellen Wechsel benötigen, können Sie die Gegenstände in ein zweites Schließfach in derselben Halle umlegen.
Diese Tipps funktionieren für Reisende, die einen reibungslosen Plan haben möchten: Planen Sie zwei oder drei Stationen mit Schließfächern im Voraus; vergleichen Sie Preise und Größen in der Stadt; wenn Sie in einer neuen Stadt ankommen, ist der größte Vorteil, dass Sie keine schweren Taschen zwischen den Sehenswürdigkeiten herumschleppen müssen, und Sie können sie sicher verstauen, damit Sie frei herumlaufen können. An den Yamato-Hubs sind die Schließfächer gut gekennzeichnet, was es für internationale Reisende einfacher macht. Wenn Ihr Plan einen zweiten Stopp oder einen Tagesausflug nach Yilan beinhaltet, können Sie hier eine Tasche verstauen und leicht reisen.
Gepäckschließfächer in Japan und Gepäckschließfächer am Seoul Station: Ein praktischer Reiseführer für Reisende
Reserviere einen Schließfach in Japan über ecbo, bevor du ankommst, um Platz während eines Zwischenstopps zu garantieren. Das verringert einfach das Risiko, dass die Schließfächer an belebten Bahnhöfen ausverkauft sind, und ermöglicht es dir, direkt zur entsprechenden Bahnsteigebene zu gehen, ohne Gepäck hinterherzuschleppen. In großen Knotenpunkten befinden sich die Schließfächer in der Unterführung, und die nächstgelegenen Automaten sind in der Regel bei den südlichen und westlichen Ausgängen. Falls du unsicher bist, kann eine Auskunftsstelle dich zum richtigen Automaten lotsen und dir klare Anweisungen auf Englisch geben.
Japan Locker-Grundlagen: Die meisten Optionen sind münzbetrieben, aber ecbo ermöglicht es Ihnen, einen Platz im Voraus zu sichern. Einige Automaten akzeptieren IC-Karten wie ICOCA (wo unterstützt), andere erfordern Bargeld. Die Größen reichen von klein bis groß, mit einer Wandtafel, die zeigt, welche Option zu Ihren Taschen passt und den Preis für jeden Tag. Die Preise liegen oft in einigen hundert Yen-Bändern, abhängig vom Bahnhof und der Schließfachgröße, also überprüfen Sie die Tabelle, bevor Sie wählen. Eine Kaution ist bei älteren Modellen üblich, typischerweise eine kleine Münze, die Sie bei der Abholung Ihrer Gegenstände zurückerhalten.
Spezifische Routen zu beachten: In Ueno und entlang des Shinkansen-Korridors befinden sich Schließfächer im Untergeschoss in der Nähe der Transitstrecken. Sie sind gut beleuchtet, leicht zu erkennen, und die Anweisungen sind in mehreren Sprachen angegeben. Wenn du dein Gepäck abgibst, erhältst du einen Abholcode - bewahre ihn gut auf, denn du wirst ihn später benötigen, um das Schließfach wieder zu öffnen. Wenn du in der Nähe eines Bahnhofs für einen Tag bleibst, ist dies eine effiziente Möglichkeit, die Stadt zu erkunden, ohne Gepäck mit sich herumzutragen.
Seoul Station Gepäckschließfächer: Diese befinden sich im Untergeschoss außerhalb der Haupthalle und bieten schnellen Zugang für einen Zwischenstopp in südlicher oder westlicher Richtung. Sie sind in verschiedenen Größen erhältlich, wobei die meisten Standorte die Preise pro 24 Stunden in südkoreanischen Won angeben und englische Anweisungen am Automaten bieten. Die Bezahlung ist in der Regel mit Bargeld oder Karte möglich, und Sie erhalten einen Code zur Abholung. Bei Fragen können Sie sich an den nahegelegenen Schalter wenden oder einen Familymart innerhalb des Bahnhofsgebäudes aufsuchen. Der Prozess ist einfach und sehr unkompliziert, sodass ein kurzer Besuch vor einem späten Zug oder einem Morgenflug problemlos möglich ist.
Tipp für einen reibungslosen Ablauf: Machen Sie vor dem Einzahlen ein schnelles Foto der Schließfachreihe und der von Ihnen gewählten Größe; das hilft Ihnen später, es in dem unterirdischen Labyrinth wiederzufinden. Wenn Sie mit Kindern oder älteren Personen reisen, wählen Sie ein kleineres Schließfach in der Nähe eines besetzten Automaten, damit Sie schnell Hilfe anfordern können. Bei längeren Aufenthalten verteilen Sie die Gegenstände auf zwei Schließfächer (diese sind oft in nahegelegenen Buchten verfügbar), um ein Überpacken einer einzelnen Einheit zu vermeiden. Die meisten Stationen veröffentlichen eine verständliche Karte oder ein Diagramm in der Nähe der Schließfächer, und das Personal kann Sie zur nächsten geeigneten Option führen.
Lockerschränke an JR-Bahnhöfen in ganz Japan (Tokio, Osaka, Kyoto und mehr) finden
Reserviere mit ecbo im Voraus oder nutze die Münzgarderoben an JR-Bahnhöfen; mit drei Größen kannst du die passende Kapazität für deine Taschen wählen. In der Halle von Shinjuku in der Nähe der Haupttore siehst du meist Schließfächer mit den Beschriftungen S, M und L. Wenn du deine Taschen nicht den ganzen Tag mit dir herumtragen möchtest, bieten dir diese Schließfächer mehr Flexibilität und schonen deinen Rücken.
An den großen JR-Knotenpunkten - Tokio, Osaka, Kyoto und anderen - befinden sich Schließfächer in der Haupthalle und in den Umsteige-Korridoren. In Tokio gibt es Optionen in Shinjuku, am Bahnhof Tokio und in der Nähe der großen Umsteige-Korridore; in Osaka Station City und Shin-Ōsaka sieht man Schließfachreihen entlang des zentralen Gehwegs; in Kyoto Station befinden sie sich an der JR- und Karasuma-Seite. Die Beschilderung leitet Sie zur richtigen Reihe und zum Check-in-Bereich, um Ihren Code zu erhalten, wenn Sie zurückkehren.
Zahlungen variieren je nach Standort; die meisten Münzschränke akzeptieren Münzen, und einige akzeptieren IC-Karten. Mit ecbo können Sie eine Reservierung eingeben und online bezahlen, dann Ihren Beutel mit einem Code am Automaten oder am Schalter des Personals abholen. Wenn Sie vor dem Check-in herumreisen möchten, hilft Ihnen das Gepäckdepot, sich frei zu bewegen; wenn ein Schrank nicht verfügbar erscheint, versuchen Sie eine andere Station in kurzer Gehentfernung.
Preise und Zeiten variieren je nach Station. Typische kleine Schließfächer kosten etwa 400-600 Yen pro Tag; mittelgroße etwa 600-900 Yen; große bis zu 1.200 Yen. Die Bezahlung erfolgt in der Regel bar, aber einige Standorte akzeptieren IC-Karten. Falls ein Schließfach voll ist, sind Sie nicht festgebunden - gehen Sie zu einem anderen JR-Schließfachzentrum oder nutzen Sie ecbo-Zentren in nahegelegenen Bahnhöfen; Sie werden wahrscheinlich eine Option innerhalb weniger Gehminuten finden. Dank dieses Systems können Sie Ihre Taschen abstellen, während Sie die Stadt erkunden, und dann zum Check-in in Ihrem Hotel oder zu Ihrem späteren Zug gehen.
Tipp: Suchen Sie nach Schließfachzentren in den Innenstädten und fragen Sie das Personal bei Bedarf um Rat. Bei mehrstädtischen Reisen, die Taiwan einschließen, können Sie einen Zwischenstopp in Taoyuan einplanen, um später Ihr Gepäck abzuholen; persönlich kann dies die Zeitaufwendung und Check-in-Fenster ausgleichen und Ihren Tag reibungsloser gestalten. Wenn Sie mehr Flexibilität wünschen, können Ihnen die Guides an den JR-Bahnhöfen Schließfächer, Hotels mit Gepäckaufbewahrung und ecbo-Dienste vergleichen, damit Sie entscheiden können, was am besten zu Ihrem Zeitplan passt.
Schlossgrößen und Kapazität: passen von kleinen Handgepäckstücken bis zu großen Koffern

Wähle für die meisten Reisen einen mittelgroßen Schließfach; es passt ein Standard-Handgepäckstück plus einen Tagesrucksack, sodass noch Platz für eine Einkaufstasche oder ein Souvenir bleibt. Wenn du nur mit einer kompakten Tasche reist, reicht ein kleines Schließfach; wenn du einen großen Koffer oder mehrere Taschen mitbringst, wähle ein großes Schließfach oder verteile die Last auf zwei Schließfächer, wo dies erlaubt ist.
Schließfächer gibt es in drei gängigen Größen an großen Bahnhöfen und Flughäfen: klein, mittel und groß. Ein mittelgroßes Fach fasst bequem einen Standard-Handgepäckkoffer und einen Rucksack, während ein großes zwei Koffer oder einen großen Koffer plus einen Tagesrucksack aufnehmen kann. Wenn du mit wenig Gepäck reist, reicht ein kleines Fach; bei mehr Gepäck wählst du lieber ein großes oder zwei Einheiten. Benutzte Schließfächer sind in der Regel deutlich gekennzeichnet, sodass du ein frisches auswählen kannst, wenn du Verschleiß oder Geruch vermeiden möchtest.
Preise und Gebühren variieren je nach Standort und Größe, mit typischen Bereichen: klein 300-500 JPY pro 24 Stunden, mittel 500-900 JPY und groß 1.000-1.500 JPY pro 24 Stunden. Einige Hubs bieten Mehrtagestickets oder eine feste Tagesobergrenze an, und Schilder im Gebäude zeigen die genauen Beträge, sodass Sie keine bösen Überraschungen erleben. Praktisch gesehen, planen Sie etwas Puffer ein, falls Sie Zugang zu späten Stunden oder nach einem Einkaufsbummel benötigen.
Schließfächer sind in Japan weit verbreitet, etwa an Knotenpunkten wie dem Bahnhof Ueno und anderen großen Bahnhöfen sowie an Flughäfen. Sie befinden sich in der Regel in der Nähe der Zugangshalle, meist mit klaren japanischen Hinweisschildern und englischen Erklärungen. In japanischen Räumlichkeiten sehen Sie Preise in Yen; in Taipeh stoßen Sie auf ähnliche Optionen mit der lokalen Währung. Spots in der Nähe beliebter Einkaufsviertel haben oft eine höhere Fluktuation, planen Sie also voraus, wenn Sie in ein überfülltes Gebiet gehen.
Zugangzeiten variieren: Die meisten Schließfächer sind von frühmorgens bis etwa Mitternacht geöffnet; einige Flughäfen bieten rund um die Uhr Zugang. Falls Sie nachts einen Lagerraum benötigen, können Sie den Gepäckraum am Bahnhof oder eine Hotel-Lobby-Option in Betracht ziehen. Die Öffnungszeiten sind an jedem Schließfach angegeben, und Sie finden in der Regel eine nahegelegene Automatenhalle oder einen Mitarbeiter, der Ihnen hilft, falls sich ein Tor nicht öffnen lässt.
Reisende sollten ein Abholfenster an ihren Tag anpassen: Geben Sie Gegenstände vor Ihrem ersten Museumsbesuch ab, dann holen Sie sie vor der Abfahrt Ihres Shinkansen oder Fluges ab. Bei Menschenmengen nutzen Sie ein Schließfach in der Nähe der Halle, um das Gehen zu minimieren und Schritte zu sparen. In Stoßzeiten können Schließfächer schnell belegt sein, daher sollten Sie die Taschen früher am Tag abgeben und sie nutzen, wenn Sie zwischen Orten wie Ueno, Einkaufsvierteln oder fotogenen Spots wechseln.
Andere Optionen sind kleine Schließfächer in kleineren Bahnhöfen oder in der Nähe von Einkaufszentren; diese Stellen bieten in der Regel einen schnellen Service, aber eine geringere Kapazität und kürzere Zugangszeiten. Wenn ein Schließfach genutzt wird, suchen Sie nach einer anderen Einheit in der Nähe oder fragen Sie das Personal nach einer Alternative im Gepäckraum. Einige Geschäfte mit späten Öffnungszeiten bieten möglicherweise einen kleinen Taschenservice an, eine praktische Backup-Lösung, wenn die Schließfächer belegt sind.
Für einen reibungslosen Ablauf plane eine Location in der Nähe deines Hotels oder eines Transitknotens, den du passierst, und prüfe Zeiten und Gebühren im Voraus. Mach ein schnelles Foto der Schließfachnummer und des Standorts, um das Vergessen zu minimieren, und halte deinen Plan flexibel, falls du mehr Orte besuchen oder spontan einkaufen möchtest. Diese Vorgehensweise hilft Reisenden, effizient unterwegs zu sein, Zeit zu sparen und den ganzen Tag im Griff zu behalten.
Zahlungsmethoden, Tarife und Öffnungszeiten nach Standort
Planen Sie voraus: Wählen Sie einen mittelgroßen Schließfach in der Nähe Ihres Ankunftshubs in Tokio, um Ihre Gegenstände sicher aufzubewahren, während Sie Ihre nächsten Schritte planen. Die Öffnungszeiten und Preise variieren je nach Standort, aber dieser Leitfaden gibt Ihnen typische Bereiche und akzeptierte Zahlungsmethoden für Reisende an Wochentagen und während Zwischenstopps an.
- Tokio-Bereich - Tokio Hauptbahnhof, Shinjuku und nahegelegene Knotenpunkte Zahlungsmethoden: Münzen für einfache Schließfächer; viele Automaten akzeptieren auch IC-Karten; einige Standorte unterstützen das Bezahlen per Kreditkarte. Eine Zahlungsoption im Geschäft über familymart (FamiPort) ist an ausgewählten Standorten verfügbar.
- Preise und tägliche Höchstbeträge: Klein 300-500 Yen; Mittel 500-800 Yen; Groß 900-1500 Yen; tägliches Maximum bei etwa 1500 Yen an den belebtesten Knotenpunkten.
- Betriebszeiten: Die meisten Schließfächer sind etwa von 5:30 bis 23:30 Uhr geöffnet; einige größere Standorte bieten begrenzt 24/7-Zugang, insbesondere in Terminalbereichen.
- Tipps fürs Einkaufen und die Planung: Besuchen Sie die englische Infoseite oder laden Sie die App der Website herunter, um die Verfügbarkeit und Änderungen der Öffnungszeiten in Echtzeit zu prüfen, bevor Sie losgehen.
- Haneda Flughafen und Transitbereiche Zahlungsmethoden: Bargeld in Yen für die meisten Schließfächer; einige Automaten akzeptieren IC-Karten; Zahlungen über FamilyMart können an Terminal-Kiosken auftauchen.
- Preise und Tagesmaximum: Klein 350-550 Yen; Mittel 550-900 Yen; Groß 1000-1400 Yen; Tagesmaximum liegt in der Regel bei etwa 1500-1600 Yen, abhängig vom Terminal.
- Betriebszeiten: Flughafenbereiche bieten oft 24/7-Zugang; stadtseitige Schließfächer schließen in der Regel gegen 23:00 Uhr.
- Praktischer Hinweis: Englischsprachige Informationen sind auf der Website verfügbar; Sie können Karten herunterladen, um eine kurze Strecke zu planen, ohne Ihren Zwischenstopp zu verlangsamen.
- Osaka-Bereich - Osaka Station und Namba Zahlungsmethoden: Münzen für die meisten Schließfächer; IC-Karten-Unterstützung an vielen Automaten; einige Standorte bieten Kreditkarten-Tap; familymart-Optionen verfügbar in ausgewählten Geschäften.
- Preise und Tagesmaximum: Klein 300-500 Yen; Mittel 600-900 Yen; Groß 900-1500 Yen; Tagesmaximum bei etwa 1500-1800 Yen an großen Knotenpunkten.
- Betriebszeiten: Meistens 5:30-23:00 Uhr, mit längeren Öffnungszeiten oder eingeschränktem 24/7-Zugang an wichtigen Verkehrsknotenpunkten.
- Kyoto-Bereich - Kyoto Hauptbahnhof und Stadtzentrum Zahlungsmethoden: Münzen und IC-Karten; einige Automaten unterstützen mobile Zahlungen; englische Informationen sind verfügbar, um bei der Orientierung zu helfen; die Nutzung von FamilyMart ist hier weniger verbreitet.
- Preise und Tagesmaximum: Klein 300-500 Yen; Mittel 500-800 Yen; Groß 800-1200 Yen; Tagesmaximum meist 1200-1500 Yen.
- Betriebszeiten: Die meisten Schließfächer sind von 6:00 bis 22:00 Uhr geöffnet; an stark frequentierten Knotenpunkten können einzelne Fächer möglicherweise verlängerte Öffnungszeiten haben.
Sicherheit, Zugang und Barrierefreiheit: Tipps für Sicherheit und Mobilitätsbedürfnisse
Empfehlung: Wählen Sie ein Schließfach in der Nähe der Theken mit einer hellorangen Tafel für schnellen Zugriff nach der Landung. Dies verkürzt den Weg und hält Sie in Sichtweite des Personals, falls Sie Hilfe beim Abholen Ihrer Gepäckstücke oder Gegenstände benötigen.
Schloss und Code: Verwenden Sie einen privaten 4- bis 6-stelligen Code, vermeiden Sie einfache Muster und schließen Sie das Schloss fest, bis das Bedienfeld mit einem grünen Licht bestätigt. Kratzen Sie das Bedienfeld nicht an oder teilen Sie den Code; das hält die verbleibenden Nutzer sicherer.
Barrierefreiheit: Wenn Sie mit Mobilitätseinschränkungen reisen, wählen Sie ein Schließfach im Erdgeschoss oder mit breitem Zugang. Achten Sie auf ein leicht bedienbares Touchpanel und nahegelegene Schalter für Mitarbeiterhilfe. Einige Einrichtungen kennzeichnen barrierefreie Schließfächer in Grün, um Sie schneller zu führen. Diese Anordnung ist besser, um schwere Gegenstände mit einer Hand oder einen mit Ausrüstung beladenen Rucksack zu transportieren.
Größe und Kapazität: Lesen Sie das Etikett mit der maximalen Größe des Schließfachs; die meisten Stationen bieten kleine, mittlere und große Räume an. Für Rucksäcke oder einen kompakten Koffer wählen Sie eine Einheit, die gut hineinpasst und noch Platz zum Schließen der Tür lässt. Wenn Sie zusätzliches Gepäck haben, nutzen Sie zwei benachbarte Schließfächer in der Nähe, anstatt eine Einheit bis zum Limit zu füllen.
Sicherheitshinweise: Bewahren Sie Wertgegenstände im Schließfach auf und behalten Sie den Beleg bis zur Abholung. Falls Sie eine Loch-in-der-Wand-Theke, eine Steckdose oder ein beschädigtes Paneel sehen, melden Sie dies dem Personal, anstatt selbst Hand anzulegen. Dieser Artikel zeigt, wie eine schnelle Kontrolle Ihnen beim Reisen Sicherheit gibt.
Öffnungszeiten und Zugang: Überprüfen Sie die Öffnungszeiten an Wochentagen an jeder Station; einige Einrichtungen sind rund um die Uhr geöffnet, während andere für ein tägliches Wartungsfenster schließen. Wenn Sie nach den Öffnungszeiten Gegenstände abholen müssen, wählen Sie eine Einrichtung mit klaren Betriebszeiten auf dem Display oder in der Nähe aus und planen Sie entsprechend. Das Personal ist nicht immer nachts verfügbar, also halten Sie Ihren Code und Ihre Quittungen bereit.
Internationale Reisende und Taoyuan: Internationale Reisende, die durch Taoyuan oder andere Drehkreuze reisen, werden die einfache Gestaltung vorfinden; die empfohlenen Schließfächer sind in Grün und Orange farbcodiert für schnelle Erkennung. Deshalb verwendet der Artikel einfache Farbcodes als Orientierungshilfe. Wenn Sie Ihr Gepäck für einen längeren Aufenthalt unterbringen müssen, empfiehlt der Artikel, zwei Schließfächer zu nutzen, um den Platz optimal auszunutzen, ohne ein einzelnes Fach zu überlasten, und sicherzustellen, dass jedes Ihren Bedürfnissen entspricht.
Hier erhalten Sie Hilfe: Das Personal an den nahegelegenen Schaltern hilft Ihnen bei der Auswahl des passenden Schließfachs für Ihre Rucksäcke und Ausrüstung. Falls Sie Einschränkungen in der Mobilität haben, bitten Sie um ein Schließfach mit niedrigerer Höhe; das Personal zeigt Ihnen ein Fach, das Sie erreichen können und das zu Ihren Platz- und Zugangsanforderungen passt. Falls Sie das Schloss beschädigen, zeigt Ihnen das Fach, wie Sie es schnell zurücksetzen können, damit Sie weiterreisen können.
Tipps, um den Prozess zu erleichtern: Entfernen Sie immer die Schlüssel oder Gegenstände, die Sie nicht ersetzen können; laden Sie ein Gerät nur an der Steckdose in der Nähe des Schließfachs auf, wenn die Einrichtung dies erlaubt; andernfalls behalten Sie die Geräte in Ihrer Tasche, während das Schloss aktiviert ist. Durch die Befolgung dieser Schritte können Sie Gegenstände während Ihrer Reise mit weniger Stress lagern und abholen.
Seoul Station Gepäckschließfächer: Standorte, Preise und Tipps zur Nutzung
Empfehlung: Bewahren Sie Ihr Gepäck selbst in den Hauptschließfächern des Seoul Hauptbahnhofes im Zentrum der Halle auf, um schnell zu den Bahnsteigen und Abfahrten zu gelangen.
Der Hauptschließfachbereich befindet sich in der Haupthalle des Seoul-Bahnhofs, in der Mitte des Gebäudes, mit einem zweiten Bereich im Untergeschoss in der Nähe der Bahnsteige. Achten Sie auf die blauen Markenschilder und die Reihe gegenüber der Auskunft auf der Südseite. Eine kleinere Option befindet sich in der Nähe des südlichen Eingangs, mit Schließfächern entlang des Umsteigegangs, der zum Untergeschoss führt. Wenn Sie sich in der Nähe des Bahnhofs umsehen, finden Sie in jedem Bereich Schließfächer, die für Taschen, Rucksäcke und Koffer geeignet sind.
Preise und Hinweise: Die Preise variieren je nach Größe und Standort; erwarten Sie etwa 3.000-9.000 KRW pro 24 Stunden, mit höheren Tarifen für größere Schließfächer. Die meisten Automaten akzeptieren Zahlungen mit KRW-Münzen oder Karten; Schilder geben die akzeptierten Methoden an. Hinweise: Die Schließfächer sind nur für Taschen bestimmt, nicht für verderbliche Waren oder Wertgegenstände über Standardgegenstände hinaus. Sie können den Gegenstand am selben Tag erneut abholen oder die Aufbewahrungsdauer durch Zahlung zusätzlicher Zeit am Automaten verlängern.
Die Nutzung der Schließfächer: Wenn du dich näherst, wähle ein freies Schließfach aus, folge dann den Bildschirmanweisungen, um die Größe auszuwählen, die Bezahlung einzugeben und einen PIN-Code festzulegen oder einen Belegcode zu verwenden. Nach dem Verschließen mache Fotos von der Schließfachnummer und deinem Code zur Sicherheit. Der Vorgang ist schnell, und du kannst die Karte herunterladen oder das Schild an der Wand überprüfen, um deinen Standort zu bestätigen. Wenn du in Süd-Seoul wohnst oder nur durchkommst, ist dies eine schnelle Option, um dein Gepäck vor dem Aufbruch zu den Abflügen oder Flughäfen abzustellen.
Hier die Übersetzung: Das Abholen und Tipps: Wenn Sie zurückkehren, geben Sie Ihren PIN ein oder zeigen Sie den Beleg vor; das Schließfach öffnet sich und Sie holen Ihre Taschen ab. Wenn Sie mehrere Taschen verwalten oder mit anderen unterwegs sind, können Sie anderen Nutzern den Zugang teilen, indem Sie ihnen den Code geben. Für zusätzlichen Komfort sind die Schließfächer um die Haupthalle herum und gegenüber den Anschlagtafeln platziert; dies hilft Ihnen, Warteschlangen während der Stoßzeiten bei Abflügen zu vermeiden. Wenn Sie bereits Schließfächer in Shinjuku in Tokio genutzt haben, bietet das System in Seoul eine ähnliche schnelle Benutzeroberfläche, auch wenn die Marke und die Geräte unterschiedlich sind.
Nützliche Hinweise für Ankünfte von Flughäfen: Lagern Sie Ihre Taschen am Seoul-Bahnhof, bevor Sie zu Zügen oder Bussen gehen, und holen Sie sie auf dem Rückweg wieder ab. Bereiten Sie Ihre Gegenstände mit ausreichend Platz vor und entfernen Sie verbotene Gegenstände vor dem Einlagern. Fotohinweise: Bewahren Sie die Schließfachnummer griffbereit auf, und Sie können sich mit den Wandschildern anmelden, falls Sie Anleitung benötigen. Für ein reibungsloses Erlebnis laden Sie die offizielle Karte herunter, nutzen Sie die Ortsschilder und befolgen Sie die oben genannten Schritte, um Ihre Taschen schnell wieder abzurufen.


