 Active Winter Tour – Ultimate Guide to Thrilling Winter Adventures">

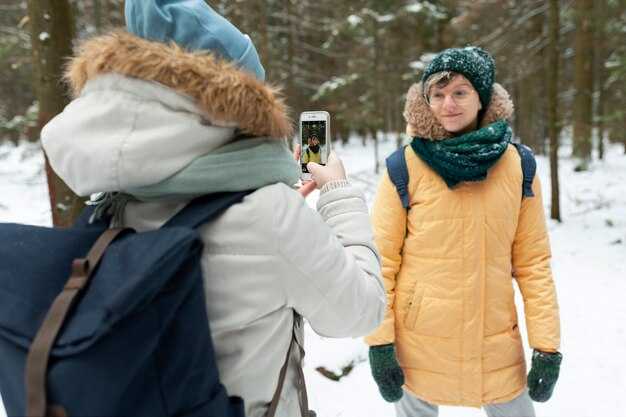
Start with a daylight-first itinerary: a 6–9 kilometers loop near the station, completed in hours 3–5. The route keeps exposure controlled, emphasizes consistent pace, and features downhill segments that finish near the トップス.
Local guides share tales of routes that thread through valleys and rise to exposed トップス, with viewpoints overlooking frost-coated slopes. If you want variety without overexertion, mix a trail circuit of 8–12 kilometers with a warm stop at a sauna or cabin. For groups, add an underground section in a frozen cavern and log 時間 spent moving between 所在地 on the network of trails.
Every day involves activities that balance exertion and recovery: a climb to overlook, a fast downhill descent, and a gentle trail loop to finish with fuel. The plan involves multiple short segments rather than a single grind, without heavy スポーツ gear, keeps 軽食 breaks handy, and ensures safe transitions through rugged terrain. A practical rule: keep to 2–4 時間 of continuous movement per day and a longer break at the location near the station.
When weather tightens, choose alternate trails within the valley network so you stay 見下ろす scenic valleys while staying safe. If you include a brief underground excursion, book slots ahead and carry extra dry 軽食. Always have a spare layover in a warm cabin to escape the cold and to discuss tales from the day.
Finish with a recap at the location that serves as a hub for future routes; the plan is designed to be flexible: it can stretch from a few kilometers to more than a dozen, depending on daylight and snowpack. The overall idea is to use a mix of activities that keep your heart rate up, without pushing beyond your limits, while respecting hibernation patterns in the higher alpine zones.
Practical planning and execution for winter adventures
Choose a snow-sure loop in rolling terrain, start at first morning light, and set a strict lunchtime turnaround to keep fatigue in check. Pack a compact safety kit, a map, a compass, and a phone with offline GPS, plus a small bivy or emergency blanket.
Gear should be compact yet complete: a snow-sure shell with insulation, waterproof pants, sturdy boots with ankle support, gaiters, a helmet, beacon, shovel, probe, headlamp with spare batteries, map, compass, and offline GPS. Include a compact bivy and emergency blanket and a basic first-aid kit. Carry 2–3 L water and high-energy snacks to sustain the range of terrain you plan to cover.
Plan the route through valleys and up into the mountains, matching the forecast and your group’s ability. Use a range of elevation around 300–900 m for easy to moderate days in snow-sure conditions. Set a clear turnaround if the pace slows or visibility drops. Keep everyone together–one lead, one sweeper, and ones at intervals to stay connected while you go through tricky sections. If visibility worsens, abort and return the same line.
Region notes: in kuusamo, trails run through spruce forests and around frozen lakes; in tannheimer, choose wide forest roads and meadow lines; in kvitfjell or alps, seek alpine trails with steady grades and reliable snow; easter periods often bring more sun but higher hut traffic, so plan logistics accordingly. Ensure you stay snow-sure by checking current snow depth and wind loading factors; look for sunshine windows during the day to maximize visibility and comfort.
Physical prep: maintain a cardio base with 3–4 weekly sessions, add leg and core work, and practice balance on snow using dry-land drills. Schedule rest after long days and stay hydrated. Pace should remain steady for 3–5 hours on easy to moderate routes; use breaks to stretch, dry gloves, and rehydrate. If you notice numb fingers or toes or shivering, stop and warm up before continuing.
Safety and teamwork: assign roles, keep comms clear, ensure everyone has a beacon and knows how to use it; track passed milestones; if the group drops behind by more than a few minutes or if weather deteriorates, retreat. After-action notes should be recorded to improve for next time and to share tales of success and mishaps with future ones going with you. Yourself and everyone should stay within capability limits.
After each trip, record what passed well and what to adjust; collect tales from the team to improve gear choices, pacing, and turnaround criteria for the next range across mountains and valleys.
Gear Checklist for Cold-Weather Tours: Outerwear, boots, poles, and packing lists
Start with a three-layer setup: base, mid, and outer covering. Choose a waterproof, windproof shell with sealed seams and ventilation; add a warm insulated layer for pauses and high-ridge winds, and ensure the fit allows full range of motion without compressing the base layer.
Outerwear choices balance breathability and warmth. A three-layer shell in a 2- or 3-layer construction with DWR keeps you dry on exposed sections; for a trip across mountains in mountopolis, pack a down or synthetic insulated jacket that packs compactly and stays toasty when you stop. Include a balaclava, a beanie, and gloves or mittens; gaiters help keep snow out of boots. Glorious alpine views demand reliable warmth and airflow during fast moves and long waits. This balance is important.
Boots must be waterproof and insulated, rated for sub-zero conditions. Pick a high-cut, stiff-sole model with room for thick socks and toe warmth; try with liners and consider gaiters for deep snow. Ensure compatibility with crampons if your route may require traction; carry a spare pair of socks and use moisture-wicking wools to prevent cold feet.
Trekking poles: adjustable length from roughly 100 to 140 cm, carbon or aluminum, with carbide tips for ice and rubber tips for boot tracks. Use anti-shock if you prefer a smoother transfer; keep straps snug and remember to release tension when crossing uneven ground.
Backpack 40–50 L with a waterproof cover; organize with dry bags and packing cubes. Essentials include a compact stove or fuel, cookware, and a dish for meals; bring at least 1.5 L of water capacity; a insulated bottle; energy bars; trail mix; spare batteries; first-aid kit; headlamp with extra batteries; map, compass, or GPS device; and a emergency shelter or bivy. For a destination like rittisberg, a ready-to-eat salmon dish can boost recovery after long days; add a set of utensils and a small towel.
Each traveler should adapt the list to their activities and weather. Early starts maximize light and reduce wind exposure; plan ahead for hut nights or saunas and hot drinks, and take advantage of the opportunity to dry gear at hand warmers. Pack extra batteries for headlamps in case you stay out after dark; a warm hat and second pair of gloves are handy for a couple of low-sun days on scenic routes near mountainous zones.
World-Class Cross-Country Trails: how to choose routes and regions
Start by selecting regions with reliable snow, clear signage, and dense trail networks, such as the alps or finland. Plan 2–3 day itineraries with daily distances of 20–28 km on groomed tracks, leaving room for shorter options if weather shifts. Look for routes that blend park sections, village stretches, and forest trails to balance pace and scenery, which can be wonderfully varied and offer rewarding experiences.
To choose routes, map terrain variety and accessibility. Favor networks offering easy train links, parking near trailheads, and nearby lunch options. In finland or the alps, seek tracks that are well marked, used regularly, and maintained by park services, with clear signage and frequent rest stops behind villages. If youve skied similar networks, you know what to expect. Although the mix can be demanding, it would suit a seasoned traveler.
Booking ahead is essential, especially in peak periods. Use regional tourism boards or local booking platforms to reserve beds, meals, and track passes. If youre travels between regions, map train schedules and day-by-day transfers to keep energy left for the next day.
Equipment matters: check gear before departure–wax, boots, and poles–plus a spare battery and a compact lunch kit for longer stretches. Keep a habit to charge spare batteries at mid-day when you pass through a village. anna store signs in trailside towns often stock wax and simple snacks, making it easy to top up on the go. After a day on the track, swap or recharge batteries as needed.
Course design tips: mix alpine climbs with lakeside flats to vary effort; if youre a sportsman, push hard on upland sections but ease on the downhill to finish strong. Try another route after a rest day to widen your experiences and keep motivation high. Leave time to enjoy bunny sightings along quiet loops.
Regional notes: alps offer high-altitude networks with long descents down to alpine valleys and tougher climbs; finland offers rolling tracks through pine forests and frozen lakes, great for steady progress and daily rhythm. Both regions provide reliable booking windows and opportunities to stay in small villages and guesthouses.
Where to begin: base in a valley near a park and a couple of villages, then loop to nearby tracks and return back to your lodging each night. This keeps logistics simple and avoids extra effort left for the next morning. Track quality and safety updates can be checked at local stores or online boards in anna store when you plan the next day.
Pacing, Rest Stops, and Daily Distances: plan 15–25 km days
Certainly plan daily legs of 15–25 km with a steady pace that preserves energy for the backcountry stretch and allows reliable stops, to help manage energy and prevent fatigue. Finish each segment with daylight to keep the mind focused for the next leg and to reduce fatigue.
- Daily distance target: 15–25 km; adjust for elevation gain and snow depth; stay flexible.
- First stop: a village located along the track, offering shelter, hot drinks, and a quick snack.
- Second stop: a lakeside hut or a resort for a longer rest with coffee and snack options.
- Backcountry shelter as backup when the next village is distant; plan for a safe exit point.
- For shorter legs or logistics, train transfers or local shuttles provide an option to shorten a day.
- Regional inspiration: karelia with lakes and forests; kuusamo serves as a gateway; hochrindl, zillertal, and bergkastel show alpine styles that can be mirrored on longer routes.
- Snack ideas: salmon slices, nuts, dried fruit; hot drink recharges energy.
- Finish time: head toward the next shelter by late afternoon to maximize daylight above the treeline.
Safety, Navigation, and Weather Prep: map skills, beacon use, and daylight awareness
Always carry a current topographic map, a dependable compass, and a personal locator beacon; rehearse a group search pattern for the entire team before departure. This setup gives you an opportunity to stay together and prevents overlooking group members when visibility drops.
Develop map skills by triangulation, pace counting, and resection. Mark trail waypoints, check distances to a destination, and keep a note of the time budget in hours. Use terrain features to confirm your route rather than relying on devices alone.
Check a trusted forecast and assess daylight awareness. Estimate sun angles and plan your exit to finish with enough daylight to reach the cosy shelter. Pack a headlamp with spare batteries and a backup lantern; aim to arrive at the next landmark before twilight, especially in areas with few signal points.
Beacon use requires practice: switch on, test, and set to transmit/search mode as part of your drills. In a group scenario, assign roles: one lead, one beacon operator, one searcher, one monitor. Keep a quick-access beacon in an outer pocket, not buried in a pack, to speed response if someone goes missing.
Pack gear strategically: map, compass, beacon, headlamp, extra batteries, whistle, first-aid, insulating layers, waterproof shell, and energy fuel such as lentil-based snacks. Stay hydrated and maintain a cosy core warmth; adjust layering to prevent overheating while keeping mobility intact.
When mapping routes, use landmarks such as foundries overlooking a frost-crusted valley, or a line of firs along the trail. If you are moving through dorset, konchezero, or rittisberg zones, account for snow depth and access points. Wildlife sighting, like bunny and squirrels, can appear; adjust your pace, especially your legs, to stay balanced on uneven ground forming a safe line. If you arrived at a junction and seen fresh tracks, you know you are in the right place; otherwise, backtrack to a known point and reassess. Flights of birds above may hint at changing weather, a surprise that alters timing and route highlights. This entire process might require adjusting plans on the move. It provides a fabulous experience; actually practicing equipment handling in frozen conditions sharpens readiness and reduces risk.
Nutrition, Hydration, and Layering for Long Winter Days
Begin with a 350 ml electrolyte drink at morning wake, then 150 ml every 25 minutes for the first two hours on the slopes to maintain charge and keep decision-making sharp for each session.
Hydration targets: 1,200–1,600 ml for a half-day, 2,000–2,800 ml for a full day; include 200–300 ml of hot beverage at midday to stabilize core temperature. Use fountains when taps function and carry a compact filter for longer kilometres on exposed routes; keep a spare bottle in a spacious pack. On quite cold days, pre-warm a 500 ml bottle in an insulated sleeve to prevent frozen hands during breaks. After years of field testing, this approach reliably shows steady energy and avoids fatigue on lengthy ascents.
Fuel should be delicious and easy to digest: dried fruit, nuts, whole-grain bars, banana, and a small chocolate square to restore glucose after stiff flights up the slope. Eat something every 45–60 minutes during high physical effort, and pair with salty snacks to maintain electrolyte balance and reduce cramping. This routine keeps you charged and helps the group stay together on long kilometres of track and ascent.
Layering keeps you comfortable across shifts in sun, shade, and wind: base layer (merino or synthetic, moisture-wicking), mid layer (fleece or light down), outer layer (3-layer shell). The base layer used daily keeps skin dry, while the centre pocket stores a small snack for quick access. The setup is simple; like itself, it has proven reliable after years on icy slopes. At rest stops or in underground warming rooms near the centre, diligently adjust layers to avoid overheating, especially in Easter trips around the Alps where opportunities to explore away from busy runs appear.
| 時間 | Hydration (ml) | Snack | Base Layer | Mid Layer | Outer Layer | 注記 |
|---|---|---|---|---|---|---|
| 06:30–08:00 | 400 | banana + gel | merino or synthetic | light fleece | waterproof shell | centre warmth, easy mobility on the slope |
| 08:00–11:00 | 500 | almonds, dates | base layer stays dry | mid insulated | windproof outer | maintain energy during ascents and flights |
| 11:00–13:00 | 400 | delicious bar | lighter base | mid fleece | shell or lightweight parka | rest, refill water |
| 13:00–15:00 | 350 | chocolate square | 同じ | optional extra | additional wind layer | resume on fresh track |
 ロシアの永住権 – 基準、メリット、申請方法">
 あなたのウォッカはどこから?起源、地域、製造">
 白い砂の島 – 白砂のビーチ究極ガイド">
 ロシアの北極圏への執着 – 北極圏における地政学、資源、そしてパワー">
 ロシア国籍 – 資格、要件、申請方法 – 2025年版ガイド">
 ロシアで銀行口座を開設する方法 – 外国人向けガイド">
 サンクトペテルブルクの自然 – 市内近郊のおすすめアウトドアスポット">
 クラスナヤ・ポリャーナの滝 – リゾートで最も美しく興味深い滝">
 世界の主要ビールブランド:グローバル市場のリーダーとトレンド">
 モスクワ観光ツアー - クレムリン、赤の広場、市内観光の決定版">