 How to Make Authentic Milk Kefir at Home – A Step-by-Step Guide to Traditional Fermentation">

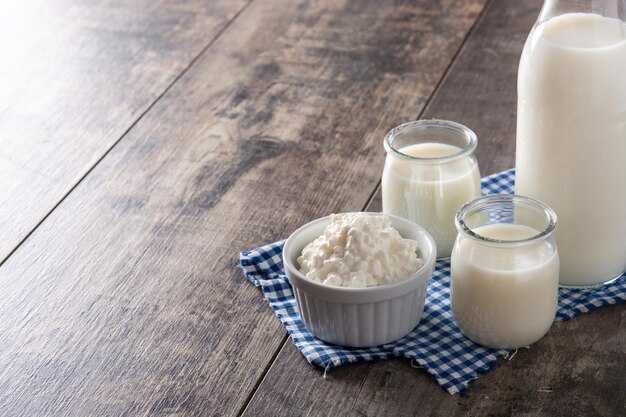
Begin with 2 tablespoons of live symbiotic grains and 1 liter of whole dairy, then let it sit at room temperature for about 24 hours. This yields a fizzy, probiotics-rich beverage with a gentle tang and a smooth texture. Once ready, you’ll notice a mild effervescence and a light dairy aroma. Never skip the initial enrichment; it forms the base for every batch.
Use a glass jar with a diameter around 10 cm and a wide neck to permit air exchange; cover with a breathable fabric and secure with a rubber band. Avoid metal lids, because acids can react. For best results, start with a russian-origin starter to keep batches consistent. Place the jar on the kitchen counter and avoid the fridge during the main culturing window, which typically lasts hours 20–28 depending on room temperature. Then proceed to strain when the surface shows gentle bubbles and the scent turns tangy.
After 24 hours, strain the drink through a plastic sieve, reserving the grains for another batch. Rinse grains briefly with clean water, then return them to the starter jar. This sustains a symbiotic culture; the flavor grows and carbonation appears even after the first run. If the room is cool, this can take longer; in warmer kitchens, expect the transition within 18–26 hours.
Transfer the strained beverage to the fridge to slow the process and develop a chill refreshment; over time it gains depth and a smoother mouthfeel. Consume within 5–7 days, using morning as a regular ritual. For best results, keep it plain, or blend with fruit, a pinch of salt, or a splash of plain yogurt. The drink contains probiotics and vitamins and may be enjoyed with simple cheese or as a base for smoothies; several batches will improve the overall balance.
With your hand, maintain cleanliness and avoid metal tools; always use clean jars and utensils. Where possible, measure ingredients with tablespoons and track hours for consistency. Never overfill the container and never rush the process–allow the calm bioprocess to unfold, and you’ll receive the freshest, best-tuned batch.
Milk Kefir: Practical Home Guide
Recommendation: Use a glass jar (0.5–1 liter), add 400–500 ml of a fresh dairy beverage and 1–2 tablespoons of a reliable starter, culture at 20–22°C for 24–36 hours, then strain and fill bottles for refrigeration.
Keep gear clean and avoid metal during stirring and handling. Stir with a wood spoon, strain through a plastic or stainless sieve, and transfer the liquid to bottles with tight caps. This approach minimizes contamination and keeps flavors stable; some households share starter in bags or jars across friends, which helps stay connected to a broader community and reduces worry about sourcing every batch.
Ingredient quality matters: aim for dairy with about 2–3% fat; ultra-pasteurized products can slow activity, so either choose pasteurized or lightly processed dairy. The culture is tolerated well by most dairy bases. As shown by many testers, a pinch of magnesium-containing minerals can improve texture. For a plant-based alternative, try almond or coconut beverage, noting that flavor and acid balance will differ. In warmer spring weather, culture tends to work faster, while cooler seasons require longer times; still, timing shows a predictable range of 24–48 hours with normal room temperatures.
Common problem: drink becomes too sour or too runny. If their flavor is not balanced, shorten the cycle or reduce starter, and ensure the container is clean. If an off-odor or mold appears, discard the batch and start with a new starter. After straining, you may notice whey separation; this is not dangerous and can be blended back or used in recipes. As shown by practical tests, adjusting time and temperature helps control acid levels.
Storage and reuse: strain and bottle, then refrigerate; you can reserve 2–3 tablespoons of starter from each batch to feed with fresh dairy for the next run. Bottles should stay capped and kept in a cool place; you can share starter with others, or secure a small supply from a trusted source. With careful care, your tradition can stay active for years; many households maintain active cultures by frequent feeding and occasional rest on the kitchen window ledge during spring sun. If you need a short break, the starter can be kept hung in a cool corner for up to a week. For further guidance, information about market options and shared tips from barcharov and other experienced makers helps you stay informed.
How to Make Authentic Milk Kefir at Home: A Step-by-Step Plan
推奨: keep a clean bottle, a strainer, and a yogurt-type starter ready; maintain the dairy beverage at a steady 22–25°C until you notice gentle foaming and a real tang, then bottle and refrigerate for best texture.
Phase one – preparation: sanitize glassware, set out a bottle with a breathable cover, and have a strainer on hand. Assemble the starter culture, a spoon, and a small amount of fresh dairy beverage. The essential rule is clean equipment to capture consistent results.
Phase two – culturing: pour the dairy beverage into the bottle, add the starter, and give it a gentle stir. Cover loosely to allow air exchange, then place in a warm spot away from direct sun. Depending on warmth, this session can take 24–48 hours; if you wanted a milder profile, shorten the time. Though you’ll see less foam with a lighter starter, the real goal is a balanced, yogurt-type tang.
Phase three – strain and bottle: strain the solids using the strainer over a clean container and press gently to collect the strained beverage. Transfer to a new clean bottle, leaving a little headspace, and cover. Label with the date and December or march batch numbers to help track flavor shifts over time. This step capture the clean, smooth texture you’re after, and the process becomes a repeatable routine.
Phase four – storage and use: refrigerate the bottled beverage and consume within 5–7 days, or longer if you prefer a firmer bite. Use the strained liquid as a base for smoothies or pour over cereal, and consider a double fermentation cycle if you want a stronger flavor–just know that longer leaving at room temperature increases acidity. The following tips help: stir gently before serving, avoid cross-contamination, and keep a separate utensil for scooping solids and liquids.
Notes: this beverage is commonly compared to kombucha for its tang and effervescence, yet it remains a dairy-based choice. If a question arises, start with a small batch and adjust the timing, then bottle for immediate use. This approach gives better results than rushing through cycles, and it doesn’t require any pill supplements to be effective. Thanks for reading; if you have more questions, reply with what you want to adjust, and I’ll tailor the plan accordingly, depending on your access to a clean strainer and a steady warm spot.
Step 1 Supplies: Gather milk, kefir grains, glass jar, and sanitation tools
Set up a clean, covered, wide-mouth jar and collect these items from a local source; this makes incubating predictable and safe. Keep a full workstation that stays organized; the difference shows after years of practice. Use a ratio of 2-3 tablespoons starter cultures per liter of dairy liquid; itll settle into smooth, tart profiles in 24-48 hours at 20-24°C. This setup is much better than an open bowl for consistency and flavor, and it preserves the vitamin-rich profile of the dairy.
- Container and cover: A 1-liter wide-mouth glass jar with a breathable cloth or paper lid secured by a rubber band; covered setup minimizes dust and air currents during incubating.
- Dairy liquid: Fresh, local dairy from a trusted source; pasteurized is fine, but non-homogenized options often yield a fuller body.
- Starter cultures: 2-3 tablespoons per liter; avoid excessive amounts, which can slow fermentation or lead to a thicker texture.
- Strainer: Fine-mesh, non-reactive to catch solids after incubating; rinse well between batches to prevent carryover.
- Utensils: Wooden or plastic spoon for stirring, measuring spoons, and a clean bottle brush for jars; avoid reactive metals.
- Sanitation tools: Mild soap, hot water, towels, and an optional food-safe sanitizer or 5% vinegar solution for quick sterilization; wash hands before handling.
- Thermometer or timer: A timer helps track time; a thermometer helps monitor incubating temperature for consistent results.
- Labeling and storage: Plus, use a waterproof marker or tape to note batch date, dairy source, and notes on texture; this aids in tracking popularity and future adjustments, like switching source or adjusting the ratio.
Keep notes by month; many makers notice higher activity in march and november. Wash hands before handling, check for a pleasant aroma, and watch for colonies; tiny buds may appear as activity increases. If itll produce an off taste, start again with a fresh batch and adjust the ratio accordingly.
Step 2 Preparing the Kefir Grains: Rehydrate, activate, and understand Grains of the Prophet
Begin by rehydrating dried grains: soak 1–2 tablespoons in 1 pint of clean, non-chlorinated water at room temperature for 6–12 hours. Stir halfway through to ensure even hydration. After soaking, drain the liquid, rinse with clean water, and place the grains in a clean jar. Let them rest for 1–2 hours to regain flexibility before the next stage. In the region around nancy, area markets sometimes capture a good blend of strains; kristen from bauman’s circle has documented sources that have been reliable for this step.
Activation: Move the rehydrated grains to a neutral base (about 1/2 cup water with a pinch of sugar) and keep at 20–25 C. Stir gently every 8–12 hours and avoid carbonated liquids. After 24–48 hours you should see a creamy coating at the surface and a mild, yeasty aroma. This exactly signals readiness for the main cycle. Rinse once more with clean water before proceeding and store the grains in a cool, clean area between batches to stay active. If a busy schedule hits, letting them rest briefly between rounds helps keep them ready.
Understanding: Grains of the Prophet consist of multiple strains; the most resilient ones produce a smooth texture and a light sparkle in the finished beverage. They have been consumed by many testers and can be multiplied with each batch, provided you supply steady temps and clean supplies. To keep them in good shape, let them rest only briefly between cycles and then plus reintroduce them to fresh liquid. For best results, use spring water when possible, and note that the region’s water profile can influence flavor. Occasionally someone separates a small portion to keep as backup, then returns the rest to the main jar; this helps to stay prepared under a busy schedule. The bauman project and kristen have contributed knowledge on how to lead this practice, and the exact handling tends to capture consistent results over time.
Storage and notes: Keep the grains in a clean jar, and store in the fridge if not using daily. Letting them come to room temp before use is recommended. In short, a quick turn of care keeps the process easy. The supplies you choose–quiet area, clean spoons, and glass jars–make the lead easier, ensuring you capture the most consistent results for the next rounds. Remember: you can maintain as many as needed by refreshing with a short cycle after each brewing session. Before you start, verify that you have whole, unbroken grains and a spare pint of water; this helps you stay in control and avoid wasted batches.
| ステージ | アクション | Time / Notes |
|---|---|---|
| Rehydrate | Soak grains in 1 pint clean water; stir mid-way; drain and rinse | 6~12時間 |
| Activate | Transfer to neutral base; keep at 20–25 C; stir every 8–12 hours; avoid carbonated liquids | 24~48時間 |
| Assess | Check for creamy surface and mild aroma; ready for main cycle | after activation |
Step 3 Feeding the Grains: Choose milk, portioning, and regular feeding routine
Use a pasteurized dairy beverage as the nourishment source for the grains. For a single batch, start with 1 pint and add 1 tablespoon of grains per cup of liquid. This little ratio is taught for consistency; if isnt tasting balanced, adjust on the next cycle. Beginning with a stable base makes it easier to track changes across november and december flavors.
Be selective about your dairy beverage type. For a smooth, full-bodied result, choose a source with stable protein and fat content; full-fat options yield a creamier texture, while low-fat variants can require longer fermentation. If you’re shopping at the market, read labels for added sugars and gums; aim for the simplest ingredient list. In guidance from bauman and barcharov, acids develop based on the starting grade and sugars in the beverage; keeping the same source across cycles helps keep the flavor profile consistent. The keh-feer flavor profile often emerges when the base is consistent; many wondered about the impact of different beverages on taste, having the opportunity to compare side by side.
- Portioning and ratios: For each cup (8 oz) of beverage, use 1 tablespoon of grains. With a pint (2 cups), that’s 2 tablespoons. If you want to treat the batch as a test, you can begin with 1.5 tablespoons for 1.5 cups of liquid; record changes in your notebook. This approach lets you compare taste across cycles.
- 水洗いと手入れ:サイクル間で、冷ました濾過水で穀物を優しく洗い、膜や蓄積物を取り除きます。こすらず、軽く回してすすぎ、容器に戻してください。汚染物質が入らないように注意し、通気性のある清潔な布または蓋でジャーを覆ってください。.
- 発酵の手順:瓶を直接光の当たらない安全な場所に置き、周囲の温度を22〜25℃に保ちます。24時間後に瓶をそっと傾けて確認してください。表面に泡が出て、心地よい香りがするはずです。風味が強すぎる場合は、しばらく待ってから再度味見をしてください。味がマイルドすぎる場合は、サイクルを少し延長します。.
- 保存と輸送:お好みの味になったら、濾して瓶詰めし、グレインは再利用のために保管してください。瓶は冷蔵庫で保管し、1~2日後に炭酸と風味の発達を確認してください。密閉性の高い瓶を使用し、日付をラベルに記載してください。忙しいキッチンでは、11月か12月までにパイントサイズの容器がいくつかたまり、さまざまな風味が混ざってしまうことがありますが、多くの家庭ではよくあることです。.
好みの味になる飲料と比率を記録して、後で好みのプロファイルに戻れるようにしましょう。基本を終えたら、サイクルごとに器具をすすぎ洗いして乾燥させ、ボトルのシールを確認し、ルーチンに合った安定したペースを維持してください。.
ステップ 4 カバーと発酵:容器のセットアップ、蓋、安定した温かい発酵の維持
広口で清潔な透明な1〜2Lのガラス瓶を用意し、通気性の良い蓋、または柔らかいバンドで固定した綿のチーズクロスで覆います。これにより、汚染のリスクを軽減しながら、ガスがゆっくりと放出されます。最適なコントロールのためには、非金属製の蓋またはエアロック装置を選択し、密閉しないでください。室温が変動するキッチンをお持ちの場合は、直射日光を避け、室内の朝の暖かさの当たる安定した場所に瓶を置き、温度変化を最小限に抑えるために軽いタオルで包んでください。.
容器を22~28°C(72~82°F)程度の穏やかな場所に置いてください。直射日光や風通しの良い場所は避け、オーブンや冷蔵庫のドアに触れない棚に置いて、日々の温度変化を最小限に抑えてください。室温が低い場合は、容器を穏やかな熱源の近くに置くか、空気を通しながら保温するために軽いカバーで断熱することができます。.
ガス交換は、密閉ではなく、布やエアロックを通して行う必要があります。発酵が活発な場合は、蓋を少し緩めて圧力を逃がしてください。乳糖不耐症の場合は、午前中の発酵後に濾過してホエイの含有量を減らすことができます。サハロワとバルチャロフは、異臭やカビのリスクを最小限に抑えるために、セットアップを清潔で乾燥した状態に保つことを強調しています。.
清潔な器具と瓶で衛生状態を保ちましょう。熱湯で洗い、文化に影響を与える可能性のある石鹸の残留物を避けてください。側面から穀物全体に、清潔な器具で軽く混ぜて、形成される塊を均一に保ちます。見慣れない成長や異臭がする場合は、そのバッチを捨てて、より良い備品とすぐに使えるグレードの容器で新たに開始してください。.
プロセスが完了に近づいたら、そのまま飲むか、濾過して乳清を分離し、よりライトな飲み口にすることができます。2つの方法の違いは、テクスチャと香りです。そのまま飲むと濁りが残り、酸味が強くなりますが、濾過すると透明になります。注意深く管理することで、一貫性があり、バランスの取れた結果が得られます。朝一番に、自分のキッチンで作ったものを新鮮な状態で飲むのが一番です。大量に作る場合は、温度を安定させ、より予測可能な結果を得るために、2つの瓶に分けてください。この方法で、次のバッチを強く、風味豊かに、そして週末に友人や家族とテイスティングする準備をしておきましょう。.
 モスクワの伝説的なソビエト時代のカフェとレストラン5選 – 歴史ガイド">
 太平洋に銀色の輝きあり–ロシアで獲るべき魚とは">
 モスクワ一日観光:必見アトラクション究極ガイド">
 ロシアのスキーリゾートベスト15選 – カレリアからサハリンまで">
 ロシア旅行に最適な時期 – 季節、天気、旅行のヒント">
 モスクワのアルバート通り – 市内で最も有名な通りを巡る旅">
 ロシア旅行ガイド – モスクワ、サンクトペテルブルク、そしてその先の究極のヒント">
 モスクワ近郊、都会を逃れて楽しめるおすすめキャンプ場トップ5">
 深夜のシェレメチェボ空港からモスクワ市内中心部への行き方 — モスクワフォーラム">
 食通のためのモスクワ – 市内最高のレストランを巡る美食の冒険">