 野生生物の池 – 鳥類、両生類などの生息地を作る">

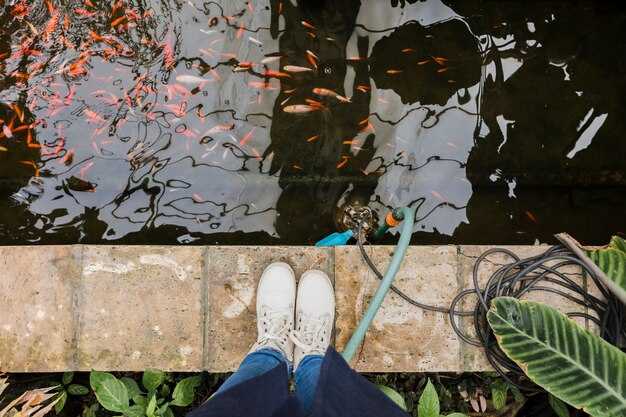
鳥類と両生類の生息を支えるため、水深に変化をつけ、不規則な縁を持つ浅い水場を設置すること。. 含む グリル設置済 縁に沿って水鳥のとまり木や水の流れを誘導するものを設置し、 砂利 底に水はけ用の層を作る。生育ゾーンをデザインし、 より小さい プールと レベル 水面を、よじ登る サイズ エッジハビタットを維持しながら、敷地制約に対応する。.
計画は、以下によって裏付けられるべきです。 情報 ローカルより アセスメント data and road 通路に関する検討事項;見積もり レベル 水と サイズ 各水域を鳥類や両生類が最大限に利用できるよう調整する。 公園 近隣に合わせるため、地域団体と road ネットワークと公共アクセスを確保し、サイトが迅速に設計されるようにする 注 取得と継続 アセスメント, 周辺を訪れる人間を認識しつつ、最新の設備については適合性と安全性を評価すること。.
野外実習からのベニングのメモは、エッジの多様性の価値を強調している。ズッカーマンの観察もこれらのパターンと一致しており、多様化したマージンが捕食者の避難場所と獲物の利用可能性を高めることを示している。これは具体的な victory 都市緑地における個体数サイクルの再確立について。余白を維持 きれい, 、含みます 砂利 ベッドを確認 軸受 銀行が流出や歩行者の往来に耐えられる能力.
最新版では 注, これらの水場がどのように機能しているかを評価し、鳥類や両生類の再訪を追跡し、監視を行う。 情報 産卵場所について、そして調整する リソース それに応じて割り当ててください。 簡単に アセスメント 最新の生息地が利用されているか、また近隣の道路騒音や公園の活動が占有にどのように影響しているかを確認し、結果を地域社会と共有できる。 公園 レポート。.
建築業者とボランティアのための実践的なチェックリスト:決定する サイズ そして レベル 水、場所 砂利 そして 芝 マージンを確保する きれい 水を与え、簡単な記録で進捗状況を文書化します。 注 各シーズン終了後、調査結果を共有する。 公園 マネージャーおよびローカル リソース コーディネーターがより広範なものを構築するため アセスメント フレームワークを維持し、プロジェクトを維持する。 sure 継続的なサポートを提供します。.
野生生物の池 プランニングガイド
洪水のリスクを軽減するため、緩やかな傾斜のある水路の近くの場所を選びましょう。土壌、排水、およびキャンプ場や遊び場などの近隣の場所での活動の評価を行い、攪乱の程度を測ります。人間と犬の安全を優先しながら、その場所と周辺地域との調和を目指しましょう。.
デザインアプローチ:自然な地形が不十分な場合は人工的な池を使用。無毒のライナーを使用するか、または土を掘り起こして利用する。縁の周りに水深5〜20cmの浅い棚を持つ段状のエッジを作り、中心部の水深60〜90cmの深いゾーンに接続して、多様な種を支える。.
水やり戦略:雨水貯留または清潔な水源からの制御された流入を設置し、オーバーフローは植生に向けます。最適な時間帯に日光が当たるようにし、水質を維持するために重要な時間帯には日陰を作ります。湿気を好む生物を維持するために、湿った縁辺部を含めます。.
連結性:水域を近隣の生垣や森林とつなぎ、動物相の移動を可能にする。流出をろ過するため、水路沿いに緩衝帯を維持する。この計画をパットン・キャンプ場の運営など隣接する用途と連携させる。ウチー・コミュニティの覚書を考慮し、地域の価値観や安全基準に沿うようにする。.
アクセスと安全性:道路付近を通るルートには、必要に応じて低い柵を設置する。パー3施設やゴルフコースの近くにある場合は、管理者と協力して衝突を避ける。トレイルの一部として、左手でアクセス可能なルートを端まで設ける。犬はリードにつなぐこと。ゲートに分かりやすいルールを掲示すること。この注意書きは、人々が安全にエリアを利用するのに役立ちます。.
維持管理とモニタリング:最初の1年間は月次点検を実施。ライナー、縁、斜面を点検し、侵食がないか確認。瓦礫を除去。水深と植生の成長を追跡。ゲートに標識を立て、訪問者に規則を周知。最良の結果は、日常的な点検、地域社会からの意見、タイムリーな調整によって得られます。.
野生の池:鳥類、両生類などの生息地を作る
緩やかな傾斜の掘削された池を頑丈なライナーで設置し、縁近くに浅い棚を追加し、可能な場合は近くの水路に接続します。これにより、メンテナンスを容易に保ちながら、季節や水位に応じて利用できるようになります。屋外での使用に適した良質な機器を使用し、設置が安全性と生態学的価値を考慮して計画されていることを確認してください。地域全体の情報については、地域のガイドラインと許可されている慣行を確認してください。.
断面は、3つの識別可能なレベルで設計します。水分を好む下草のための5〜15cmのマージン、暖かく日光が当たる水のための20〜50cmの浅いゾーン、そして涼しい避難場所と多様な生息環境を提供するより深いコア(60〜100cm)です。地形への配置を検討し、構造物がしっかりと固い土壌に据え付けられ、敷地の支持力を超えて過負荷にならないようにしてください。この配置により、年間を通して異なる時期や気象条件で、多様な種が利用できます。.
Water quality depends on inputs and surrounding land use; integrate a simple overflow or gravity-fed drain to keep levels stable. Often, a minimal circulation system is sufficient to preserve invertebrates and plant life. Please review information from local environmental bodies; the plan includes buffers to filter runoff and maintain steady moisture without harsh chemicals.
Alternative builds include rigid tanks, pre-formed basins, or reinforced concrete shells. Check soil bearing and site requirements before digging to ensure the foundation can support the weight when full. When using liners, keep edges smooth and well-seated to prevent punctures. This approach is popular in compact plots where space is limited and where a straightforward build helps beginners get started.
Beginners can start with a popular, ready-made tank setup or a shallow excavation followed by a simple lining. Confirm state or municipal requirements before digging and obtain any needed permissions. Please plan the installation to minimize disruption to the yard and utilities, and to maximize opportunities for wildlife to interact with the water feature.
Maintenance practices focus on stability and safety: inspect edging and liners monthly, top up during dry spells, and monitor algae growth and wildlife activity. Establish a schedule with seasonal events such as spring replenishment and autumn vegetation management. Use non-toxic cleaners and avoid chemical treatments that can harm the ecosystem; keep stress on the system low for long-term success.
| コンポーネント | Purpose | Specifications |
|---|---|---|
| Excavated basin | Foundation for cross-section with stable levels | Shallow margins 5–15 cm; deeper core 60–100 cm; ensure smooth sides |
| Liners | Containment and water retention | Durable, UV-stable; edge protection; consider one-piece or roll material |
| Tank option | Alternative for small plots | Prefabricated, sturdy, easy to install; verify bearing state |
| Water input | Controlled replenishment | Rainfall capture, gravity feed, spill path to drain; keep sediment out |
| Vegetation margins | Habitat and filtering | Low-growing perennials at the edge; damp-tolerant options |
| Monitoring equipment | Information gathering | Water tester, level gauge, debris screen; simple, non-toxic |
Site Selection: Sunlight, Water Access, Soil Drainage, and Surroundings
Start with a sun-rich patch offering 6–8 hours of direct daylight during the warm season, aligned on a bearing that maximizes light while allowing shade windows in the hottest hours.
Ensure water access from nearby watercourses or reliable catchment; install liners to curb seepage and maintain a stable water level; use a straight inlet path to deliver inflows from the source and minimize turbulence around adjacent edges.
Assess soil drainage and texture; if heavy clay or compacted zones exist, apply modification such as a gravel underlayer and geotextile, then set the feature on a gentle slope of about 1–2% away from the center to promote drainage and reduce pooling around edges.
Surroundings matter: position adjacent to open areas with low sediment input; keep sides clear for maintenance, straight access routes, parking, and potential play areas for visitors; if a campground is nearby, place the feature away from main circulation and ensure a safe buffer. If marchant services are available nearby, align supply access to avoid crossing pedestrian paths.
Permits and review: review the proposed layout with authorities, obtain required permits, confirm safety around edges and paths, and check bearing and drainage requirements; assess changes that may be needed in response to site conditions.
Operation and adjustments: once installed, monitor activity levels, water quality, and edge stability; reasons for changes should be documented; if performance lags, consider an alternative configuration near the same water source; maintain straight access to the facility and good parking and signage; this approach can be perfect to serve campers visiting the site.
Container Ponds: Sizing, Liner Type, Drainage, and Safety for Families
First, size for family use: target 700–1,200 gallons depending on space, with a depth of 18–24 inches. In practice, an 8×6 ft footprint at 2 ft depth yields about 720 gallons; a 10×8 ft footprint at 2 ft depth yields about 1,190 gallons. Choose based on available area and intended use, keeping in mind proximity to a floodway or other water channel.
Liner options should prioritize long life and reliable seams. Use EPDM flexible liner (0.75–1.0 mm) for durability under sun and UV exposure; a thicker 1.0–1.5 mm version adds resilience for high-traffic areas. If budget is tighter, heavy-duty PVC is acceptable but may require more frequent inspection for shrinkage or puncture. Layer the liner on a non-woven geotextile underlayment to protect against sediment and sharp bottom edges; ensure all seams are heat-welded or solvent-welded with proper overlap (at least 12 inches) to minimize leaks. For a ready-made option, consider a preformed basin with integrated edging, but confirm supports are rated for outdoor use and safe for wildlife-friendly design.
Drainage must include a controlled flow path. Install a buried bottom drain connected to a valve, with an overflow that empties into a channel or floodway designed to handle runoff. The discharge path should be regulatory-compliant: obtain a permit when required, and verify local rules before any installation. If the site sits near a campground entrance, boating dock, or a church property along an avenue, expect additional inspections or stipulations from the regulatory body; this is where here guidance and a click-through permit checklist can help you stay compliant.
Maintenance planning should address sediment and bottom cleanliness. Schedule sediment removal at least twice per year, or as needed after heavy rains; use a gentle siphon or pump to avoid disturbing aquatic shelves that benefit wildlife-friendly habitat features. A sturdy, low-profile bottom design reduces debris buildup and makes cleaning easier for caregivers and visiting carpenters who may assist with covers or edging. A well-placed discharge valve on the left side eases access for seasonal shutdowns and winterization, reducing risk of staining or damage at the bottom.
- Safety first: install a lockable lid or a sturdy fence enclosure; ensure a stable, smooth surface around the rim to minimize trips.
- Access and visibility: keep maintenance access water-tight and clearly labeled; provide a shallow shelf around the edge to reduce the chance of slips.
- Access aids: a small ladder or stepping stones can help families supervise children safely by the water; avoid steep drops into the main basin.
Implementation steps and suppliers should consider local guidelines and available market options. When purchasing materials, obtain quotes from a local marchant or supplier, and verify warranty terms for liners and valves. If a custom lid is needed, a carpenter can craft a frame and cover that remains secure under strong sun and weather. For owners near shared spaces–campground avenues or community properties–coordinate with the property manager to align with scheduled maintenance windows and safety signage; this reduces conflicts and ensures consistent upkeep.
Habitat Features: Native Plants, Shelters, Varied Depths, and Perimeter Edges
Plant a layered border of native stock along the shoreline to attract avian guests and support diverse life. Include tall shrubs that provide cover, mid-height perennials that supply nectar, and low groundcovers that stabilize the margin and create access paths along the water’s edge.
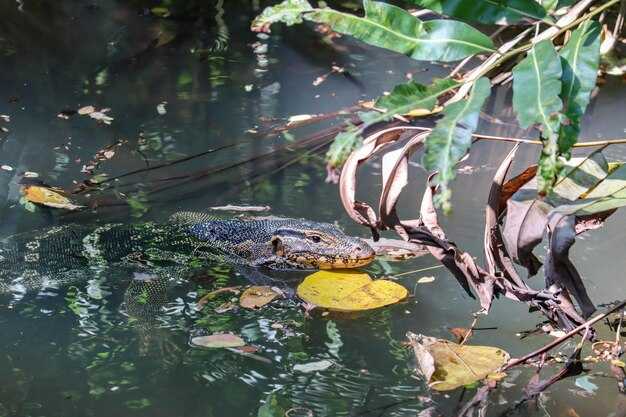
Install natural shelters: log piles, rock clusters, and brush piles at the damp margins. Position them to catch prevailing winds and to produce shaded zones that welcome small mammals, reptiles, and wandering invertebrates.
Establish varied water depths by shaping the margin with gradual shelves from a few centimeters to around 20–30 cm, a mid-depth zone of 60–90 cm, and a small deeper pocket that remains cooler during hot periods. Consider a low-profile tank or container to store seasonal rain and sustain the margin during droughts.
Edge features: mix reeds, sedges, and flowering grasses along the margin; shape moderate slopes and shallow shelves to encourage edge-dwelling creatures while filtering runoff from nearby terrain. Use rock or log barriers to slow water and provide shelter during storms. Plenty of microhabitats around the perimeter improve resilience across the site.
Please verify local permits where required; purchase native stock from reputable sources; prepare a waiver if needed; implement a simple annual post-change assessment; monitor shifts in watercourses across the property and adjust plantings, shelters, and depths accordingly.
Permits & Legalities: Jurisdictional Dams, Non-Jurisdictional Dams, and Paperwork
Check with the local water authority immediately to confirm whether the planned impoundment triggers jurisdictional dam rules. If height, storage, or obstruction of streams meet the criteria, obtain a formal assessment and permit before any constructing or modification activity. As references, Zuckerman, Ingersoll, and Kings illustrate typical thresholds and filing steps that beginners can follow when preparing documents.
- Determine status
- Ask whether the plan creates an impoundment that affects streams; if so, it may be jurisdictional. A jurisdictional determination triggers a formal assessment and permit before constructing or modifying anything.
- 障壁の高さ、元の底面標高、横断面を記録し、閾値が適用されるかどうかを評価します。.
- 書類を作成する
- 平面図と断面図を含む敷地計画を提示してください。底面等高線、斜路の位置、余水路の経路、土砂抑制対策、およびこの構造物がどのように景観に組み込まれるかに関する注記を含めてください。.
- リスクと体力評価、安全計画、緊急時の措置、屋外へのアクセスに関する考慮事項を含めること。公園エリアにピクニックゾーンがある場合は、公園スタッフとの連携について言及すること。.
- 所有権の証明を添付;定期検査;必須の料金;責任者の指定。.
- 送信して確認
- 適切な機関に提出し、すべての図面を添付してください。必要に応じて、近隣住民または公園管理者からの手紙を提出してください。追加の評価項目の要求に備えてください。.
- 実施とモニタリング
- 承認後にのみ作業を進めること。可能な限り元の状態を維持すること。断面と底部標高を確認すること。堆積物の移動と河川への障害を監視すること。その後、進捗状況のアップデートと竣工後の評価を提供すること。.
屋外アクティビティ計画者向け注意点:近隣施設への影響が最小限となる場所を選定すること。訪問者への告知のため、現場に掲示物を設置すること。スロープ、底部、余水路が安全基準に適合し、特にピクニックエリア付近での公共利用を妨げないようにすること。.
メンテナンスと重要事項:季節ごとの作業、モニタリング、よくある落とし穴
春のベースラインから開始: 池の縁、アクセススロープ、側面の縁を点検し、隙間を修理し、排水ジョイントを締め、安全なエントリーを確保し、生物がこの場所にアクセスできるようにします。このステップは、体力を作り、ここに信頼できる基盤を築くはずです.
敷地全体の春の作業には、堆積物の除去、植生の剪定、および9ホールの排水グリッドが機能しているかの確認が含まれます。サイズと最新のコンポーネントがフットプリントと一致していることを確認し、アクセスルートが安全基準を満たしていることを確認してください。所有者は、利用を案内するために、ここに明確な標識を掲示する必要があります。.
夏のモニタリングでは、水の透明度、藻類の兆候、および入口標識の状態に焦点を当てます。堆積物の堆積を縁に沿って追跡し、詰まりを防ぎます。これにより、イベントの発生を減らし、魚やその他の水生生物を健康で活発な状態に保ちます。.
秋には、側面の傾斜が安定しているか、掘削した箇所に浸食がないかを確認し、要件の調整に関する所有者からの以下の提案を検討する必要があります。浸食の可能性がある場合は、安全を確保するために、道路沿いおよび端に沿って再gradingしてください。.
冬期の作業:凍結後も入り口が通行可能であることを確認する。標識とサインを更新し、サイズ、レイアウト、基準が安全基準を満たしていることを確認する。最新の部品を使用し、低温条件に耐えられるようにする。現場全体で安全に注意し、堆積物が移動しないように注意する必要がある。.
よくある落とし穴として、季節的な堆積物管理を怠ると、適合性が低下し、場所全体に影響が及ぶことが挙げられます。アクセス計画の不備や不明瞭な標識は、安全性を低下させ、不適切な利用を招きます。所有者はこれらの点を見直し、そのような誤りを避けるべきです。また、掘削区域を投棄場として使用することも避けてください。堆積物が移動し、標識や進入路を脅かす可能性があります。提案はすべて、その地域の水景を安全に運用するための以下の基準および要件に適合するようにしてください。.
 モスクワのおすすめスイーツ店28選 - 人気デザートと穴場スポット">
 都会の美しいスカイラインを捉えるための12のヒント – 必須ガイド">
 モスクワ旅行安全のヒント2025 – 必須ガイド">
 米国と欧州のトップテクノロジー都市 – ハブ、トレンド、そして機会">
 モスクワの最も美しい建物20選 – 息をのむような写真とともに">
 – 必携ガイド") 2020年モスクワのおすすめ食品マーケットトップ5 – 必見ガイド">
2020年モスクワのおすすめ食品マーケットトップ5 – 必見ガイド">
 ロシア旅行3日目 – モスクワ、北へ。ソ連時代のショーケースと環状道路へ">
 いつも素晴らしく、滅多に混まないパリの美術館5選">
 クリスマスと新年シーズンにモスクワですべきこと – おすすめプラン">
 救世主ハリストス大聖堂ガイドツアー – チケット、時間、見どころ">