 집에서 정통 러시아 트보로그 만드는 방법 – 단계별 가이드">

Heat whole milk to about 85°C, then add lemon juice until it curdles, and let it sit through 5–10 minutes for firm curds. If you wont wait, you can speed things to about 5 minutes, but the longer rest yields drier, more coherent bits. Point of this version is to keep texture fine across all parts of the process.
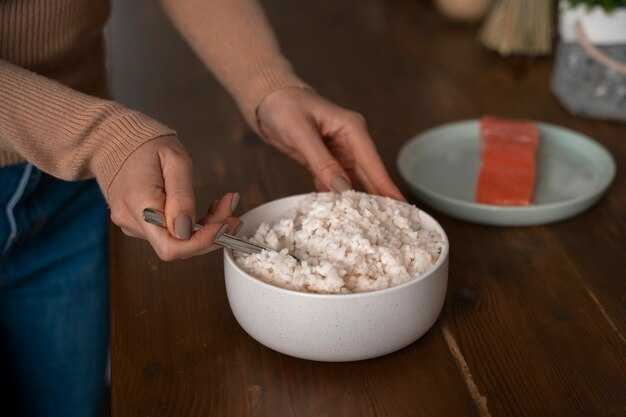
Pour the curds and whey into a fine cloth, drain through 15–20 minutes, then gather the fabric and press lightly to keep the whole mass together. The stock of moisture is the whey; you can save it for buckwheat porridge, or discard. They say this cheese is versatile and it can be paired with herbs or a pinch of salt for a quick, soft version. This method doesnt require special equipment and can help you keep texture consistent across parts of the batch.
For texture variety, adjust pressing time: a light press yields a softer cheese, a longer press yields a drier block. A brief baking step on a very low temperature can help set the surface, then chill for stock and storage. Literally, this gives a comparison with store options.
They say the aroma and texture pair well with buckwheat or rye bread. In this version, salt is kept light; you can add chopped dill or chives for a bright note. Please keep the cheese wrapped or stored in a container to maintain freshness. They sometimes add herbs, for example, paired with greens to taste.
Compared with shop options, this version is made with clean ingredients and a fresher aroma. Yield depends on milk quality, with a range of roughly 200–260 g per liter; known factors include fat content and acidity. Literally, the simpler the steps, the more predictable the stock of curds.
Core steps and practical techniques
Recommendation: start with fresh whole milk from cows and a probiotics starter. Heat to 75-80°C, hold briefly, then cool to 36-38°C. Inoculate with probiotics, handle gently, and allow separation of curds from whey. Keep a kitchen journal or journalism-style notes on temp, timing, and texture to reproduce results around there.
- Milk prep: choose 1 liter of pasteurized whole milk from cows, without additives. If market quality varies, buy from a trusted source and warm only what you’ll use the same day.
- Heat and control: in a heavy pot or multi-cooker on the low setting, bring to 75-80°C and maintain for 2-3 minutes. Use a thermometer; avoid scorching. If using a multi-cooker, choose the temperature hold function to keep steady.
- Cool to incubation: cool the milk to 36-38°C quickly but gently, using a water bath or air fan. Handle the pot with mitts to prevent skin burns around there.
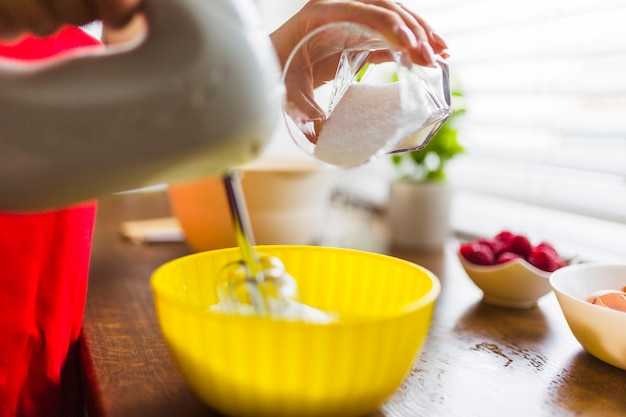
- Inoculation and souring: whisk in probiotics starter (2-3 tablespoons of live-culture yogurt or powder) or, as an optional acidifier, 1-2 tablespoons of lemon juice or vinegar. Stir softly with a whisk to distribute; avoid aggressive movement that breaks future curds.
- Coagulation and separation: after 10-25 minutes, curds will form and begin to separate from whey. If you see distinct peaks in the curd, that indicates good structure. If not, a touch more acidifier can help. This phase is about separation, not rapid boiling.
- Drain and shape: line a colander with cheesecloth, pour in the curdled mix, and let whey drain. Press lightly to remove extra liquid; the result should be a firm yet pliable mass. Use clean hands or a spatula to gather curds into a compact form, creating a disk or block that holds its shape (tvorozhok texture).
- Flavor and storage: salt lightly if desired (around 1/4 tsp per liter). Transfer to a container and refrigerate. Some people prefer to blend in a touch of sour cream for creaminess. Use in salads, smoothies, or soft cheeses; beets and other beets-based dishes benefit from its mild tang in salads. Consume within 3-4 days for best texture and taste.
Tips for consistency: use less agitation to keep curds intact, drain longer for a firmer product, and stir gently when shaping. Names differ by region, but the core is the same curd-and-whey separation. For quick testing, whip a small portion with a whisk to compare texture before scaling up. This approach helps produce a reliable, versatile base for foods, toppings, and spreads, including a smooth addition to beets or greens, and a creamy base for tvorozhok-based spreads.
Milk selection and acid source for authentic texture
권장 사항: Use whole milk from the refrigerator and kefir as the acid source to achieve a tangy, firm texture that stays cohesive after draining.
If kefir isn’t available, you can use lemon juice or white vinegar as acid; add 2-3 tbsp per liter for lemon, or 1-2 tbsp per liter for vinegar, after cooling the milk to about 40-45C. Either option yields curds with a crisp tang; kefir will contribute probiotics during fermenting and post-fermentation stages.
Milk quality matters: a popular, reliable choice is standard pasteurized whole milk found in most stores. Avoid ultra-pasteurized varieties, which can resist curdling and yield a softer texture. Please keep milk in the refrigerator until use; this needs careful handling to maintain the right temperature.
Instructions: heat milk to about 40-45C, then whisk in the chosen acid source. For dairy acid, use 2-3 tbsp per liter if you want moderate tang; stir gently and let stand 10-15 minutes until curds separate from whey. If you see stringy clumps, you’re on the right track.
Equipment setup: line a colander with cheesecloth or a fine strainer placed over a bowl; you’ll pour the curdled milk into it and let it drain. For a firmer texture, let it drain 20-40 minutes in the cool air of the kitchen or in the refrigerator post-drain; you can press lightly to remove more whey.
Finishing and storage: once drained, transfer curds to a clean container. youll notice the texture around mealtime; you can call the result “homemade curd” if you like. For a gentle finish, blend in a pinch of salt or a little sugar; to vary taste, blend in raisins. If you want the same texture every time, develop a habit of using the same milk and drainage duration. This approach minimizes risk of over-acidification and preserves probiotics when kefir is part of the mix. Post batch, store in the refrigerator.
Precise heating: temperatures, timing, and avoiding scorch
Heat milk to 72°C and hold 15 minutes, then cool to 38°C before introducing starter. This concrete target reduces scorch risk and yields firm curd. Just keep the heat evenly distributed and use a turning motion while stirring to prevent bottom sticking.
- Heating phase – equipment and controls: Use a heavy-bottom pot or enamel cast with a calibrated thermometer. Target 65–75°C and maintain for 10–15 minutes; keep stirring and turning every 2 minutes to ensure even heat distribution and prevent scorching.
- Cooling phase – bring to fermentation temperature: Move the pot to an ice bath or cooler surface to drop to 38–40°C within 5–8 minutes; avoid letting it drift above 42°C or fall below 34°C, which can hinder fermentation.
- Fermentation/curd formation – timing and texture: Hold at 38–40°C for 30–90 minutes until the curd visibly separates from whey; resulting curds should hold shape when touched, not slide away.
- Draining and texture control – strainer use and duration: Line a strainer with cheesecloth; drain 6–12 hours in the fridge to reach your desired firmness. For a firmer product, extend drain time; for creamier, shorten.
- Volume notes – yields and practical tweaks: From 1 gallon (3.8 L) of milk, expect a substantial batch with whey; milk from cows varies in fat, so adjust drain time accordingly. The parts of the process work together to keep consistency across batches; literally, small temperature drifts matter.
Hints: if scorching appears, lower the heat further and use a wider pan; keep the bottom clear, and turning helps. Many didnt realize how tiny temperature shifts alter texture, so trust a reliable thermometer and check often. Here you’ll find online hints and links to corroborate your method, and you can test alongside others who share tips; miss a step and you risk a runny result. Serve with berries or spread on bread to enjoy the fresh flavor, and store the rest in a clean container alongside a tight lid. With careful control and patience, the resulting curd will be firm, smooth, and ready for daily use. Cow milk from cows can vary; keep notes each batch to know what works best in your kitchen.
Coagulation and curd handling: resting, breaking, and separating whey
Rest the curd for 12–15 minutes after coagulation. Upon resting, moisture redistributes and curds firm slightly; essentially the whey settles and youll see clearer separation.
Cut the curd into uniform pieces about 1–2 cm using a clean knife, then stir gently to keep small, creamy clusters intact. The speed of breaking matters: slow cuts yield even, delicate curds; fast chopping can push you toward large, uneven pieces. Either way, stop when all pieces are roughly the same size to control texture.
Choose your acid wisely: lemon juice is common, or a light vinegar solution. Add a pinch of salt and a small charge of lemon to start curd formation, then monitor acidity; too much acid didnt just sour the batch, it can cause curdles that are hard to manage later.
After initial coagulation, gently heat the mixture to about 70–75°C (158–167°F) while stirring slowly. This speeds whey separation and helps curds firm; upon reaching target temperature, turn off the heat and let the mass rest 5–10 minutes to finish separating.
Line a small sieve with cheesecloth and set over a bowl. Pour the curd, then drain slowly to avoid squeezing out excessive whey. For a smoother, more控制d texture, gather the cloth and let whey drain for 5–10 minutes, then press lightly with a baby-weight or your hands. If you want a firmer result, use a larger weight and drain longer.
Post-drain handling matters: transfer the curd to a clean container, fold in extra flavor if desired (a few chopped herbs, or a tiny pinch of your favorite spices), and refrigerate. Save the separated whey for dairy smoothies or to brighten tea and soups; this extra liquid is often a lightweight base rather than waste.
Drainage, pressing, and moisture control for consistent texture
Drain the curds for 15–20 minutes in a fine strainer lined with cheesecloth to separate whey efficiently; then place the strained mass under a weight of 0.8–1.0 kg for 10–15 minutes to achieve full, smooth texture.
Set the strainer over a bowl and move the setup to the fridge during pressing if you want steady cooling; this helps control moisture and prevents over-softening in warm kitchens, which could otherwise produce runny textures. This article highlights practical drainage and moisture handling, which could help understand the part science behind texture.
Moisture management is a part of a reliable product; the science behind separating whey is simple: enough pressure removes liquid while preserving curds, and the exact time depends on milk fat and freshness. The method works for many foods and recipes, and you could understand that each batch needs a small adjustment.
Hints: use a clean weight that stays stable, don’t crush the curds, and turn them occasionally to equalize pressure; a few drops of lemon juice can aid separating and add a subtle sour tang, but use sparingly so you keep the fruit flavors natural and none of the dairy sweetness is overwhelmed.
Storage: after pressing, transfer to a container and keep in the fridge; you probably want to consume within 3–4 days, or freeze portions for longer; this approach is common in Slavic foods and can be a base for smoothies, sauces, or post-workout snacks; you can find this technique described in many articles and recipes that discuss post-press texture control.
| 단계 | 액션 | 시간 | 무게 | Texture outcome |
|---|---|---|---|---|
| Drain | Drain curds in cheesecloth over strainer | 15–20분 | – | Whey separated; moisture level reduced |
| 프레스 | 질량에 무게 적용 | 10–15 min | 0.8–1.0 kg | 질감이 촘촘하고 매끄러워집니다. |
| 테스트 | 펼치고, 커드를 뒤집고, 필요한 경우 무게를 조절하세요. | 5분 | – | 균일한 수분 분포 |
| 진정해 | 사용 전 냉장고에 넣어 단단하게 굳혀주세요. | 20–30 min | – | 슬라이스나 토핑에 적합할 정도로 단단함 |
최상의 신선도를 위한 맛내기, 냉장 보관 및 보관 팁
완성된 커드를 볼에서 꺼내 20분 안에 식혀 질감과 신선함을 유지하세요. 온도를 빠르게 낮추면 과도한 수분 분리를 방지하고 크리미한 맛을 대부분 보존할 수 있습니다.
향료는 물기를 뺀 후, 구운 베리류로 밝은 맛을 내거나, 요거트로 톡 쏘는 맛을 내거나, 바닐라 한 방울을 넣는 식으로 묶어서 첨가해야 합니다. 부드럽게 섞는 것이 관건이며, 반죽 같은 질감이 아닌 매끄러운 마무리를 만드는 비결입니다. 베리류가 잘 익었다면 시럽을 추가하지 않아도 주스가 커드에 자연스럽게 섞이므로 예상보다 설탕을 적게 넣을 수 있습니다.
식혀서 보관하기: 깨끗한 볼이나 유리병에 옮겨 담고, 단단히 밀봉하여 적정 온도에서 냉장 보관하십시오. 뚜껑을 덮지 않으면 수증기로 인해 얇은 막이 생길 수 있으니, 저어준 후 덮어두세요. 최상의 결과를 위해, 향후 다시 혼합할 수 있도록 풍미 첨가물의 이름을 라벨에 적어두세요. 이는 마치 주방 노트에 저널리즘과 같은 명확성을 유지하는 것과 같습니다.
보관 기간: 최상의 풍미를 위해서는 3–4일 이내. 시간이 더 필요하다면 다시 살짝 물기를 빼서 질감을 단단하게 한 다음 냉장 보관하세요. 식품 간 교차 오염을 방지하고 유제품은 자체 용기나 밀폐된 병에 넣어 다른 식품과 분리하여 보관하십시오.
장기적인 선택 사항: 작은 분량으로 얼려 포장에 라벨을 붙입니다. 냉장고에서 해동하여 딸기나 요거트 한 덩이를 섞어 신선하게 마무리할 수 있습니다. 이 방법은 수분 손실을 줄이고 더 부드러운 질감을 만들 수 있습니다. 사워도우 스타터가 있다면 아주 약간 넣어 풍미를 되살릴 수 있습니다. 그렇지 않으면 바닐라를 살짝 섞으면 됩니다. 인스턴트팟으로 우유를 데워 베이스로 사용하면 시간을 절약할 수 있지만, 과열은 피하십시오. 결과물의 질감은 부드럽고 거칠지 않아야 합니다.
 Five Legendary Soviet Cafes and Restaurants in Moscow – A Historic Guide">
 There’s Silver in the Seas – Which Fish to Catch in Russia’s Pacific">
 One Day in Moscow – The Ultimate Guide to Must-See Attractions">
 15 Best Ski Resorts in Russia – From Karelia to Sakhalin">
 Best Time to Visit Russia – Seasons, Weather, and Travel Tips">
 Arbat Street in Moscow – A Tour of the City’s Most Famous Street">
 Russia Travel Guide – Ultimate Tips for Moscow, St. Petersburg, and Beyond">
 Top 5 Camping Sites Near Moscow to Escape the City">
 Sheremetyevo Airport After Midnight – How to Get to Moscow City Center — Moscow Forum">
 Moscow for Foodies – A Culinary Adventure Through the City’s Best Eateries">