 야생 연못 - 새, 양서류 등을 위한 서식지 조성">

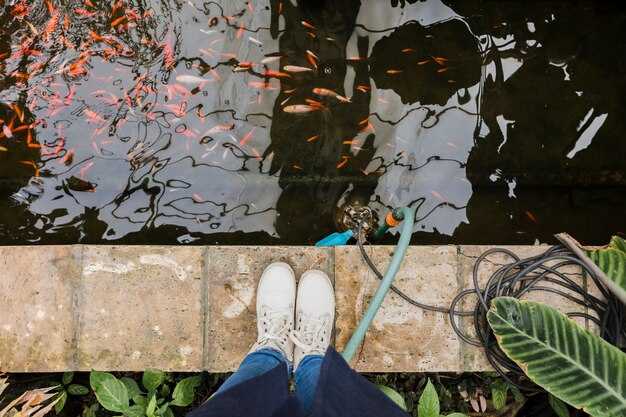
조류 및 양서류를 지원하기 위해 완만한 깊이와 불규칙한 가장자리를 가진 얕은 수생 환경을 조성하십시오. 포함 그릴 설치 완료 가장자리를 따라 물이 흐르도록 안내하고 자리를 잡을 수 있도록 자갈 바닥에는 배수를 위한 베드가 있습니다. 허용하는 구역을 설계하십시오. 더 작게 수영장과 레벨 물의, 확장하는 크기 가장자리 서식지를 보존하면서 부지 제약을 준수합니다.
계획은 다음의 지원을 받아야 합니다. 정보 from local assessment 데이터 및 길 복도 고려 사항; 견적 레벨 물의 크기 각 풀의 활용도를 극대화하여 조류와 양서류 종이 최대한 이용할 수 있도록 하십시오. 다음 사항과 협력하십시오. 공원들 인근 지역과 연계하기 위해 지역 사회 단체와 길 네트워크 및 공공 접근성을 통해 사이트가 신속하게 설계되도록 보장합니다. note 복용 및 지속 assessment, 인근을 방문하는 인간들에게도 알립니다. 가장 최신 설비들은 적합성과 보안성을 평가해야 합니다.
benning 현장 실습 노트는 엣지 다양성의 가치를 강조합니다. Zuckerman의 관찰은 다양화된 가장자리가 포식자 피난처와 먹이 가용성을 증진시킨다는 것을 보여주면서 이러한 패턴과 일치합니다. 이는 실질적인 victory 도시 녹지 공간에서 개체수 순환을 재정립할 때 여백을 유지하십시오. clean, 포함 자갈 침대, 그리고 확인 베어링 은행의 둑이 붕괴되거나 보행자 통행을 견딜 수 있는 능력.
최신 소식에 따르면, note, 이러한 수경 요소들이 어떻게 기능하는지 평가합니다: 조류 및 양서류의 재방문 횟수를 추적하고, 모니터링합니다. 정보 산란 장소에 대해 조정합니다. 자원 그에 따라 할당합니다. 간단한 assessment 최신 서식지 사용 여부 및 인근 도로 소음이나 공원 활동이 점유율에 미치는 영향 확인 후 결과를 커뮤니티에 공유할 수 있는지 확인 요청드립니다. 공원들 보고서.
빌더와 자원봉사자를 위한 실용적인 체크리스트 포함: 결정 크기 그리고 레벨 물, 장소 자갈 그리고 잔디 여백, 확인 clean 물, 그리고 간단한 문서로 진행 상황을 기록합니다. note 매 시즌 후; 결과 공유 공원들 관리자 및 로컬 자원 코디네이터들이 더 폭넓게 구축할 수 있도록 assessment 프레임워크를 유지하고 프로젝트를 유지합니다. sure 지속적인 지원을 제공합니다.
야생 연못 계획 가이드
홍수 위험을 줄이기 위해 완만한 경사를 가진 물길 근처의 위치를 선택하십시오. 이곳에서 토양, 배수, 캠프장 및 놀이터와 같은 인근 부지의 활동을 평가하여 교란 정도를 측정하십시오. 사람과 개의 안전을 최우선으로 하면서, 해당 시설과 주변 지역 간의 조화를 목표로 하십시오.
설계 접근법: 자연적인 지형이 불충분할 경우 인공적인 수조를 사용하고, 무독성 라이너 또는 노출된 흙을 파서 사용합니다. 다양한 종을 지원하기 위해 얕은 선반이 있는 계단식 가장자리를 림 주변에 5~20cm 깊이로 만들고, 중앙의 더 깊은 구역(60~90cm)과 연결합니다.
물 공급 전략: 빗물 받이나 깨끗한 수원으로부터 유입량을 조절하여 설치하고, 넘치는 물은 초목 방향으로 유도하십시오. 해당 지역이 하루 중 가장 좋은 시간대에 햇볕을 받고, 수질 유지를 위해 주요 시간대에 그늘을 제공하는지 확인하십시오. 수분을 필요로 하는 생물이 이곳에서 생존할 수 있도록 축축한 가장자리 구역을 포함하십시오.
연결성: 동물이 이동할 수 있도록 수역을 인근 생울타리나 삼림지대와 연결합니다. 유출수를 여과하기 위해 수로를 따라 완충 지대를 유지합니다. Patton 캠프장 운영과 같은 인접 용도와 이 계획을 조정합니다. 지역 가치 및 안전 기준에 부합하도록 유치 커뮤니티 요구 사항을 고려합니다.
접근성 및 안전: 도로와 인접한 경로; 필요한 경우 낮은 울타리 설치. 파3 시설이나 골프장 근처라면 관리자와 협의하여 문제가 발생하지 않도록 합니다. 트레일의 일부로서 왼손잡이용 접근 경로를 가장자리까지 제공합니다. 개는 반드시 목줄을 착용; 출입구에 명확한 규칙 게시; 이 사항은 사람들이 해당 지역을 안전하게 이용하는 데 도움이 됩니다.
유지 관리 및 모니터링: 첫해에는 매달 점검을 실시하고, 라이너, 가장자리 및 경사면의 침식 여부를 검사하며, 잔해물을 제거하고, 수심과 초목 성장을 추적합니다. 출입구에 기둥을 세워 방문객에게 규칙을 상기시킵니다. 최상의 결과는 정기적인 점검, 지역 사회 의견 수렴 및 시기적절한 조정에서 비롯됩니다.
야생 연못: 새, 양서류 등을 위한 서식지 조성
완만한 경사와 튼튼한 라이너를 갖춘 굴착형 저수조를 설치하고, 가장자리 근처에 얕은 단을 추가하고, 가능하면 인근 수로에 연결하십시오. 이렇게 하면 유지 관리를 간소화하면서 계절과 수위 변화에 따라 저수조를 사용할 수 있습니다. 실외 사용에 적합한 우수한 장비를 사용하고, 설치 시 안전과 생태적 가치를 염두에 두고 계획했는지 확인하십시오. 지역별 정보는 현지 지침과 허용된 관행을 확인하십시오.
Design the cross-section with three identifiable levels: a 5–15 cm margin for moisture-loving groundcover; a 20–50 cm shallow zone for warm, sunlit water; and a deeper core (60–100 cm) that provides cool refuges and a range of habitat states. The layout onto the landscape should be considered; ensure the structure sits firmly on firm soil and avoid overloading the bearing capacity of the site. This arrangement allows diverse use by species at different times of year and weather conditions.
Water quality depends on inputs and surrounding land use; integrate a simple overflow or gravity-fed drain to keep levels stable. Often, a minimal circulation system is sufficient to preserve invertebrates and plant life. Please review information from local environmental bodies; the plan includes buffers to filter runoff and maintain steady moisture without harsh chemicals.
Alternative builds include rigid tanks, pre-formed basins, or reinforced concrete shells. Check soil bearing and site requirements before digging to ensure the foundation can support the weight when full. When using liners, keep edges smooth and well-seated to prevent punctures. This approach is popular in compact plots where space is limited and where a straightforward build helps beginners get started.
Beginners can start with a popular, ready-made tank setup or a shallow excavation followed by a simple lining. Confirm state or municipal requirements before digging and obtain any needed permissions. Please plan the installation to minimize disruption to the yard and utilities, and to maximize opportunities for wildlife to interact with the water feature.
Maintenance practices focus on stability and safety: inspect edging and liners monthly, top up during dry spells, and monitor algae growth and wildlife activity. Establish a schedule with seasonal events such as spring replenishment and autumn vegetation management. Use non-toxic cleaners and avoid chemical treatments that can harm the ecosystem; keep stress on the system low for long-term success.
| 구성 요소 | 목적 | Specifications |
|---|---|---|
| Excavated basin | Foundation for cross-section with stable levels | Shallow margins 5–15 cm; deeper core 60–100 cm; ensure smooth sides |
| Liners | Containment and water retention | Durable, UV-stable; edge protection; consider one-piece or roll material |
| Tank option | Alternative for small plots | Prefabricated, sturdy, easy to install; verify bearing state |
| Water input | Controlled replenishment | Rainfall capture, gravity feed, spill path to drain; keep sediment out |
| Vegetation margins | Habitat and filtering | Low-growing perennials at the edge; damp-tolerant options |
| Monitoring equipment | Information gathering | Water tester, level gauge, debris screen; simple, non-toxic |
Site Selection: Sunlight, Water Access, Soil Drainage, and Surroundings
Start with a sun-rich patch offering 6–8 hours of direct daylight during the warm season, aligned on a bearing that maximizes light while allowing shade windows in the hottest hours.
Ensure water access from nearby watercourses or reliable catchment; install liners to curb seepage and maintain a stable water level; use a straight inlet path to deliver inflows from the source and minimize turbulence around adjacent edges.
Assess soil drainage and texture; if heavy clay or compacted zones exist, apply modification such as a gravel underlayer and geotextile, then set the feature on a gentle slope of about 1–2% away from the center to promote drainage and reduce pooling around edges.
Surroundings matter: position adjacent to open areas with low sediment input; keep sides clear for maintenance, straight access routes, parking, and potential play areas for visitors; if a campground is nearby, place the feature away from main circulation and ensure a safe buffer. If marchant services are available nearby, align supply access to avoid crossing pedestrian paths.
Permits and review: review the proposed layout with authorities, obtain required permits, confirm safety around edges and paths, and check bearing and drainage requirements; assess changes that may be needed in response to site conditions.
Operation and adjustments: once installed, monitor activity levels, water quality, and edge stability; reasons for changes should be documented; if performance lags, consider an alternative configuration near the same water source; maintain straight access to the facility and good parking and signage; this approach can be perfect to serve campers visiting the site.
Container Ponds: Sizing, Liner Type, Drainage, and Safety for Families
First, size for family use: target 700–1,200 gallons depending on space, with a depth of 18–24 inches. In practice, an 8×6 ft footprint at 2 ft depth yields about 720 gallons; a 10×8 ft footprint at 2 ft depth yields about 1,190 gallons. Choose based on available area and intended use, keeping in mind proximity to a floodway or other water channel.
Liner options should prioritize long life and reliable seams. Use EPDM flexible liner (0.75–1.0 mm) for durability under sun and UV exposure; a thicker 1.0–1.5 mm version adds resilience for high-traffic areas. If budget is tighter, heavy-duty PVC is acceptable but may require more frequent inspection for shrinkage or puncture. Layer the liner on a non-woven geotextile underlayment to protect against sediment and sharp bottom edges; ensure all seams are heat-welded or solvent-welded with proper overlap (at least 12 inches) to minimize leaks. For a ready-made option, consider a preformed basin with integrated edging, but confirm supports are rated for outdoor use and safe for wildlife-friendly design.
Drainage must include a controlled flow path. Install a buried bottom drain connected to a valve, with an overflow that empties into a channel or floodway designed to handle runoff. The discharge path should be regulatory-compliant: obtain a permit when required, and verify local rules before any installation. If the site sits near a campground entrance, boating dock, or a church property along an avenue, expect additional inspections or stipulations from the regulatory body; this is where here guidance and a click-through permit checklist can help you stay compliant.
Maintenance planning should address sediment and bottom cleanliness. Schedule sediment removal at least twice per year, or as needed after heavy rains; use a gentle siphon or pump to avoid disturbing aquatic shelves that benefit wildlife-friendly habitat features. A sturdy, low-profile bottom design reduces debris buildup and makes cleaning easier for caregivers and visiting carpenters who may assist with covers or edging. A well-placed discharge valve on the left side eases access for seasonal shutdowns and winterization, reducing risk of staining or damage at the bottom.
- Safety first: install a lockable lid or a sturdy fence enclosure; ensure a stable, smooth surface around the rim to minimize trips.
- Access and visibility: keep maintenance access water-tight and clearly labeled; provide a shallow shelf around the edge to reduce the chance of slips.
- Access aids: a small ladder or stepping stones can help families supervise children safely by the water; avoid steep drops into the main basin.
Implementation steps and suppliers should consider local guidelines and available market options. When purchasing materials, obtain quotes from a local marchant or supplier, and verify warranty terms for liners and valves. If a custom lid is needed, a carpenter can craft a frame and cover that remains secure under strong sun and weather. For owners near shared spaces–campground avenues or community properties–coordinate with the property manager to align with scheduled maintenance windows and safety signage; this reduces conflicts and ensures consistent upkeep.
Habitat Features: Native Plants, Shelters, Varied Depths, and Perimeter Edges
Plant a layered border of native stock along the shoreline to attract avian guests and support diverse life. Include tall shrubs that provide cover, mid-height perennials that supply nectar, and low groundcovers that stabilize the margin and create access paths along the water’s edge.
Install natural shelters: log piles, rock clusters, and brush piles at the damp margins. Position them to catch prevailing winds and to produce shaded zones that welcome small mammals, reptiles, and wandering invertebrates.
Establish varied water depths by shaping the margin with gradual shelves from a few centimeters to around 20–30 cm, a mid-depth zone of 60–90 cm, and a small deeper pocket that remains cooler during hot periods. Consider a low-profile tank or container to store seasonal rain and sustain the margin during droughts.
Edge features: mix reeds, sedges, and flowering grasses along the margin; shape moderate slopes and shallow shelves to encourage edge-dwelling creatures while filtering runoff from nearby terrain. Use rock or log barriers to slow water and provide shelter during storms. Plenty of microhabitats around the perimeter improve resilience across the site.
Please verify local permits where required; purchase native stock from reputable sources; prepare a waiver if needed; implement a simple annual post-change assessment; monitor shifts in watercourses across the property and adjust plantings, shelters, and depths accordingly.
Permits & Legalities: Jurisdictional Dams, Non-Jurisdictional Dams, and Paperwork
Check with the local water authority immediately to confirm whether the planned impoundment triggers jurisdictional dam rules. If height, storage, or obstruction of streams meet the criteria, obtain a formal assessment and permit before any constructing or modification activity. As references, Zuckerman, Ingersoll, and Kings illustrate typical thresholds and filing steps that beginners can follow when preparing documents.
- Determine status
- Ask whether the plan creates an impoundment that affects streams; if so, it may be jurisdictional. A jurisdictional determination triggers a formal assessment and permit before constructing or modifying anything.
- 해당 기준이 적용되는지 평가하기 위해 장벽 높이, 원래 하단 표고 및 횡단면을 기록하십시오.
- 서류 준비
- 상단 뷰 및 단면도를 포함한 부지 계획을 제공하십시오. 하단 윤곽선, 경사로 위치, 여수로 경로, 퇴적물 관리 대책 및 해당 기능이 경관에 어떻게 통합되는지에 대한 참고 사항을 포함하십시오.
- 위험/건강 평가, 안전 계획, 비상 조치, 외부 접근 고려 사항을 포함하며, 공원 구역에 피크닉 구역이 있는 경우 공원 직원과의 협조 사항을 기록합니다.
- 소유권 증명 첨부; 정기 검사 일정; 필수 비용; 책임 당사자 지정.
- 제출 및 검토
- 관련 당국에 제출하십시오. 모든 도면을 첨부하고, 필요한 경우 이웃이나 공원 관리자의 서신을 제공하십시오. 추가 평가 항목 요청에 대한 대비를 하십시오.
- 구현 및 모니터링
- 승인 후 진행, 가능한 한 원래 상태 유지, 횡단면 및 하단 표고 확인, 유사 퇴적물 이동 및 하천의 모든 장애물 감시, 이후 진행 상황 업데이트 및 시공 후 평가 제공.
야외 활동 기획자를 위한 안내: 인접 시설에 지장을 최소화하는 장소 선정; 방문객에게 알리는 안내문 부착; 경사로, 하단, 여수로가 안전 기준에 부합하고 공공 이용을 방해하지 않도록, 특히 피크닉 구역 근처에서 주의.
유지 관리 및 간단 정보: 계절별 작업, 모니터링, 일반적인 문제점
봄철 기초 작업 시작: 수조 가장자리, 진입로, 측면 여백을 점검하고, 틈새를 보수하고, 배수 연결부를 조여서 안전한 진입을 확보하여 생물들이 이곳에 접근할 수 있도록 합니다. 이 단계를 통해 적합성을 구축하고 이곳에 신뢰할 수 있는 토대를 마련해야 합니다.
부지 내 봄철 작업에는 퇴적물 제거, 초목 다듬기, 9홀 배수망 기능 유지 확인 등이 포함됩니다. 크기와 최신 부품이 설치 공간과 일치하는지 확인하고, 접근 경로가 안전 기준을 충족하는지 확인하십시오. 소유자는 이용 안내를 위해 명확한 표지판을 게시해야 합니다.
여름 모니터링은 물의 투명도, 조류 징후, 입구 표지판 상태에 중점을 둡니다. 막힘을 방지하기 위해 가장자리를 따라 쌓이는 퇴적물을 추적하십시오. 이렇게 하면 사고를 줄이고 물고기와 다른 수생 생물을 건강하고 활동적으로 유지할 수 있습니다.
가을 점검에서는 측면 경사면이 안정적으로 유지되는지 확인하고, 굴착된 포켓의 침식 여부를 검사하며, 요구 사항 조정을 위한 소유자의 다음 제안 사항을 검토해야 합니다. 침식이 예상되는 경우 안전을 유지하기 위해 가로수길과 가장자리를 따라 다시 경사면을 조정하십시오.
겨울철 작업: 출입구가 동결 후에도 접근 가능하도록 유지, 기둥과 표지판 재정비, 크기, 레이아웃 및 기준이 안전 기준에 부합하는지 확인. 최신 부품을 사용해야 하며, 추운 환경을 견딜 수 있어야 함. 전체 현장에서 안전에 주의를 기울여야 하며, 퇴적물이 이동하지 않도록 주의해야 함.
일반적인 함정으로는 계절별 퇴적물 관리를 소홀히 하여 적합성이 저하되고 전체 장소에 영향을 미치는 경우가 있습니다. 접근성 계획 불량 및 불명확한 표지판은 안전을 저해하고 부적절한 사용을 유도합니다. 소유자는 이러한 사항을 검토하고 이러한 오류를 피해야 합니다. 또한 굴착 구역을 투기장으로 사용하여 퇴적물이 이동하고 표지판이나 진입로를 위협하는 것을 방지하십시오. 모든 제안이 해당 지역의 수경 시설의 안전한 운영을 위한 다음 기준 및 요구 사항을 준수하는지 확인하십시오.
 모스크바 최고의 디저트 맛집 28곳 – 숨겨진 보석 같은 곳들">
 멋진 도시 스카이라인 촬영을 위한 12가지 팁 – 필수 가이드">
 2025년 모스크바 여행 안전 팁 – 필수 가이드">
 미국 및 유럽 최고의 기술 도시 – 중심지, 트렌드, 기회">
 모스크바에서 가장 아름다운 건물 20곳 – 멋진 사진들">
 2020년 모스크바 최고의 음식 시장 Top 5 – 필수 가이드">
 러시아 여행 3일차 – 모스크바 북쪽으로, 소련 시대 쇼케이스와 불바르 순환 도로를 따라">
 항상 훌륭하지만 붐비는 일이 드문 파리 박물관 5곳">
 크리스마스와 새해 시즌에 모스크바에서 할 일 – 최고의 계획">
 구세주 그리스도 대성당 가이드 투어 – 티켓, 시간 및 주요Highlights">