

Рекомендация: начните здесь, чтобы повысить уверенность при запуске новых процессов, работе с органами власти и соблюдении региональных требований. Это руководство содержит подробные, конкретные шаги, которые вы можете выполнить уже сегодня.
Каждый раздел приглашает сотрудников и менеджеров, с живыми примерами, чек-листами и чётким путём для предоставления правильных документов. Он охватывает справку и справку, а также рекомендации по подготовке документов при взаимодействии с властями.
Для каждого сценария вы найдете подробные рабочие процессы, временные рамки и образцы форм, чтобы ускорить получение разрешений и лицензий.
Региональные офисы часто требуют разных шагов; этот FAQ разбивает их по локациям, показывая, как координироваться с их региональным персоналом для получения актуальных обновлений, уведомления властей и соблюдения норм. Он также содержит шаблоны и чек-листы, которые можно распечатать для арендованного оборудования или договоров на услуги.
Когда вам нужны быстрые и лаконичные ответы, будьте уверены в одном источнике, который охватывает все распространённые вопросы — от проверки требований до подачи справки в нужный региональный отдел. Гид поддерживает живые тренинги для вашей команды и сокращает обмен письмами с властями.
Начало работы с арендой, регистрацией и проверками становится проще: этот FAQ содержит информацию о том, что нужно делать на месте, как координировать взаимодействие с органами власти и какие документы предоставить, чтобы выполнить все региональные требования. Вы найдете реальные шаблоны, чек-листы и практические советы, которые можно применить сразу.
Получите чёткие инструкции по аренде оборудования, оформлению документов и соблюдению местных правил. Это руководство поможет вашей команде выходить на новые рынки, ускорять процессы и повышать точность подачи документов, предоставляя конкретные примеры и метрики, которые можно отслеживать.
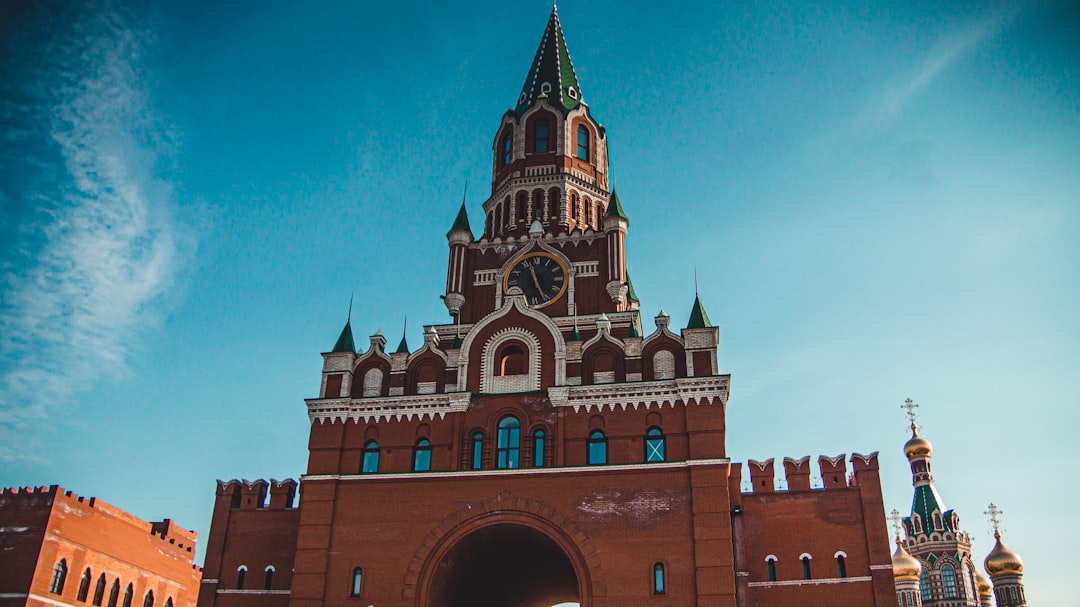
Часто задаваемые вопросы и регистрация визы в России: практическое руководство
Своевременная подача пакета документов на визу предотвращает задержки в визовом центре. Подготовьте полный чек-лист: страницы паспорта, заполненную анкету на визу, академическое приглашение от принимающей организации и письмо на бланке учреждения с указанием его названия и контактных данных.
Вот перевод текста на русский язык с соблюдением всех указанных требований: --- Уважаемые господа, В связи с предстоящей поездкой в Санкт-Петербург, я, [Ваше имя], приглашаю вас принять участие в мероприятии, которое состоится с [дата начала] по [дата окончания]. Целью моего визита является [указать цель: деловая встреча, конференция, туристическая поездка и т. д.]. Прошу вас подтвердить моё приглашение, а также уточнить, какие документы могут потребоваться для оформления визы или регистрации. Пожалуйста, проверьте, чтобы все запросы были оформлены в порядке очереди и сохранены копии, так как отсутствие документов часто приводит к дополнительным запросам. Убедитесь, что все обновления внесены и ни один из файлов не устарел, так как устаревшие формы были отмечены. Затем проверьте даты версий на каждом файле перед отправкой. С уважением, [Ваше имя] --- Если у вас есть конкретные детали, которые нужно включить (например, адреса, названия музеев, бренды), уточните их, и я внесу соответствующие правки.
Согласуйте с арендодателями регистрацию по месту жительства. Если вы проживаете у арендодателя или в арендованной квартире, попросите их оформить временную регистрацию и выдать справку, подтверждающую адрес и их контактные данные; прикрепите распечатанные или отсканированные копии к заявлению, если это разрешено. Действующий договор аренды может повысить шансы на успешную регистрацию.
Напечатайте и отсканируйте обе версии документов в соответствии с требованиями центра. Если необходимо отправить по почте или онлайн, убедитесь, что отпечатки четкие и читаемые, с номерами страниц и полным комплектом приложений. Затем сохраните квитанции о подтверждении для своих записей.
Временное пребывание и разрешение на проживание: центр подтверждает, соответствуют ли ваши документы базовым требованиям. Получение разрешения на проживание включает проверку в местном миграционном центре; вы можете получить официальное письмо на их бланке с реальным адресом и сроком одобрения. Исключения существуют для определённых академических или деловых визитов, но вам всё равно нужны основные документы.
Сроки обработки заявок зависят от центра и страны происхождения; обычно решение по визе принимается в течение 15-20 дней после подачи, с более длительными сроками для некоторых запросов. Если требуется дополнительная информация, центр укажет список запросов и крайний срок, чтобы вы могли оперативно отреагировать.
После утверждения сохраните подтверждающее письмо и любое уведомление о регистрации адреса. Их сотрудники в жилищных и миграционных отделах проконсультируют вас по дальнейшим шагам и процедуре продления, если это необходимо. Ведите файл со всеми печатными и сканированными копиями, включая приглашение, справку и подтверждение вида на жительство.
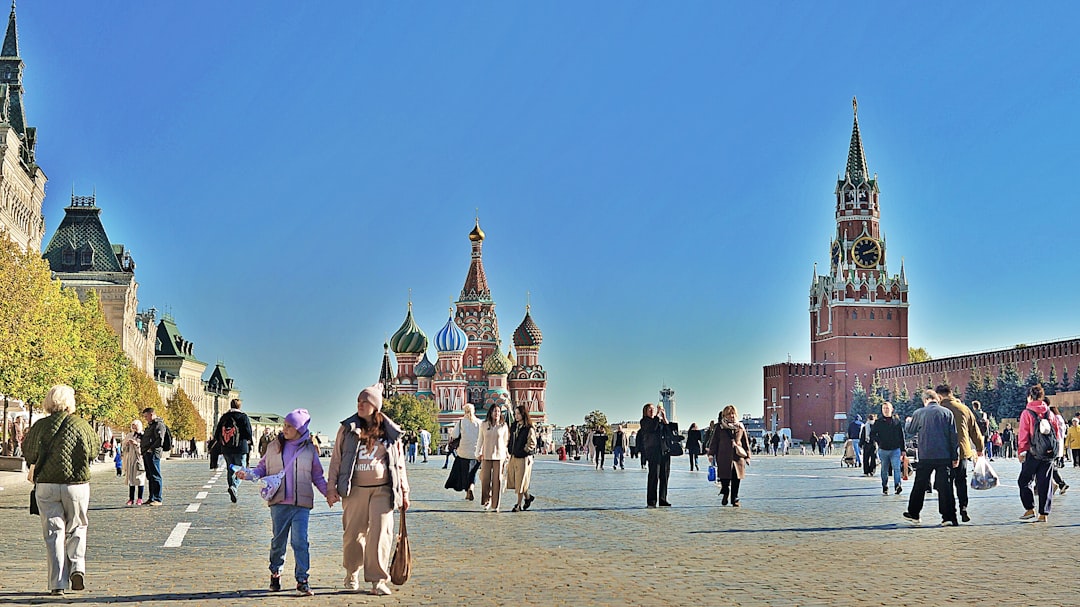
Регистрация и визовые процедуры для туристов, студентов и бизнеса
Подайте заявку на соответствующую категорию визы онлайн не менее чем за 30 дней до планируемого въезда и забронируйте встречу, если это необходимо. Такой подход поможет вам собрать необходимые документы заранее и плавно пройти весь процесс.
Туристы
- Выберите тип визы, соответствующий вашему визиту (краткосрочная туристическая виза). Проверьте указанный на визе срок пребывания и спланируйте поездку соответственно.
- Подготовьте документы: действительный паспорт с сроком действия не менее шести месяцев и двумя чистыми страницами, две цветные фотографии, медицинскую страховку, действующую на территории, подтверждение наличия средств на весь период пребывания, обратный или следующий билет, а также бронь отеля или приглашение от принимающей стороны.
- Подайте заявку онлайн, затем выберите доставку курьером или самовывоз. Если выбираете курьер, укажите адрес для доставки всей посылки на дом или в офис.
- Here is the translation of your text into natural, native-quality Russian, adhering to the specified guidelines: --- Прибытие в Санкт-Петербург Встреча гостей в аэропорту Пулково (терминал 1) или на железнодорожном вокзале (Московский, Ладожский, Витебский, Финляндский). Трансфер до отеля или места проживания. Программа экскурсий 1. День 1: Исторический центр - Исаакиевский собор (входной билет: 500 руб.) - Дворцовая площадь и Зимний дворец (Эрмитаж, входной билет: 700 руб.) - Невский проспект (прогулка с гидом) - Кафедральный собор Казанской иконы Божией Матери 2. День 2: Петропавловская крепость - Петропавловский собор (входной билет: 400 руб.) - Музей истории Санкт-Петербурга (входной билет: 350 руб.) - Кунсткамера (входной билет: 450 руб.) 3. День 3: Дворцы и парки - Петергоф (Большой дворец, входной билет: 1200 руб.) - Царское Село (Екатерининский дворец, входной билет: 1000 руб.) Проживание - Отель "Астория" (ул. Большая Морская, 39) - Апартаменты у частного лица (хозяин: Иван Петров, тел. +7 (999) 123-45-67, email: ivan.petrov@mail.ru) - Приглашение для визы прилагается. Дополнительные услуги - Аренда автомобиля: от 3000 руб./сутки (компания "Авито Авто") - Экскурсии на русском языке: от 2500 руб./чел. --- Если у вас есть конкретный текст для перевода, предоставьте его, и я выполню перевод с учетом всех указанных требований.
- Оплатите визовую пошлину и отслеживайте статус. Если потребуется медицинское обследование или дополнительные документы, оперативно отвечайте, чтобы избежать задержек.
- По прибытии, если вы остановились в отелях, отель сам произведёт первоначальную регистрацию. Если вы проживаете в частном жилье, зарегистрируйтесь в местной администрации (РВПО) в установленные сроки, чтобы избежать штрафов.
- Обратите внимание на дату истечения визы и возможные варианты продления до её окончания. Если вам нужно продлить визу, начните процесс продления за 14-20 дней до истечения срока.
- Будьте готовы к проверкам на COVID-19 или требованиям по вакцинации, которые могут быть указаны для въезда или пребывания, и возьмите медицинскую страховку, покрывающую возможные медицинские нужды во время вашего визита.
- Для семей, путешествующих с детьми, включите свидетельства о рождении и, при необходимости, их перевод и апостиль, а также документы о согласии на выезд несовершеннолетних, если один из родителей путешествует в одиночку.
Студенты
- Получите предложение о зачислении от образовательного учреждения и получите письмо о приёме в учебную программу. Уточните категорию студенческой визы и требуемый срок пребывания в соответствии с вашей программой.
- Соберите документы: паспорт, действительный на весь срок обучения плюс немного сверху, две цветные фотографии, письмо о зачислении, подтверждение наличия средств на оплату обучения и проживания, медицинский страховой полис и письмо от университета, подтверждающее зачисление.
- Подайте заявку онлайн или через международный офис университета и организуйте курьерскую доставку при необходимости. Включите все необходимые документы, такие как академические справки или свидетельства о рождении для сопровождающих вас иждивенцев.
- Организуйте детали проживания и, если вы живете в общежитии или кампусе, согласуйте с отделом жилья обязательную регистрацию в течение первой недели после прибытия.
- Зарегистрируйтесь в местном миграционном органе (РВПО), если это требуется по вашей программе. Университеты часто выдают campus letter, подтверждающий ваш статус студента, чтобы облегчить этот процесс.
- По прибытии завершите процесс регистрации и информируйте университет о любых изменениях адреса или программы. Если вам требуется продление из-за длительности программы, подайте заявку на продление заранее до истечения срока.
- Поддерживайте действующую допустимость: оставайтесь зачисленным в программу, проживайте на территории в качестве студента и соблюдайте все требования по регистрации для студентов в Новгородской области или вашем текущем районе.
- Для несовершеннолетних, обучающихся в учебных заведениях, оформите все дополнительные согласия и документы, требуемые местными властями, и убедитесь, что медицинские или школьные записи актуальны.
Бизнес и командировки
- Определите подходящий путь для визы, обычно это деловая виза или разрешение на работу, связанное с приглашением от работодателя. Приглашение должно быть от легитимной местной компании или партнерской организации.
- Подготовьте документы: паспорт, действительный на весь срок пребывания плюс запас, две цветные фотографии, корпоративное приглашение, подтверждение финансовой поддержки от работодателя, деловой маршрут и страховку путешествий.
- Отправьте заявление онлайн, затем организуйте курьерскую доставку оригиналов, если это требуется властями. Сохраните копии всех документов для своих записей.
- Вот перевод текста на русский язык с соблюдением всех указанных требований: --- Цель программы: Программа направлена на развитие бизнес-компетенций сотрудников, включая проведение встреч, тренингов и краткосрочных проектов. Если программа требует подписания формального контракта, приложите его или предоставьте краткое резюме с ключевыми датами. --- (Примечание: В тексте не было конкретных названий мест, музеев, улиц и т. д., поэтому они не были переведены. Если в исходном тексте были такие элементы, их следовало бы заменить на стандартные русские эквиваленты.)
- По прибытии оформите необходимые регистрации: отели или корпоративное жильё часто берут на себя часть регистрации по месту пребывания; в противном случае зарегистрируйтесь в местном РВПО в установленный срок.
- Контролируйте срок действия визы и планируйте её продление, если ваша деловая деятельность продлится дольше первоначального срока. Начните оформление продления до истечения срока, чтобы избежать перерывов в статусе.
- При переезде сотрудников согласуйте с курьером или отделом кадров изменения адресов и данные о проживании в установленные сроки.
- Корпоративные команды должны учитывать местные требования в таких местах, как Великий Новгород и другие регионы; также необходимо отслеживать территориально-специфические условия для длительных пребываний или дополнительных разрешений на работу.
Общие советы и практические шаги
- Всегда проверяйте правила въезда и любые указанные требования к здоровью перед поездкой, включая рекомендации по COVID-19 и статус вакцинации, если это применимо.
- Используйте отели, чтобы упростить регистрацию, если вы путешествуете в одиночку или с семьёй; если выбираете частное жильё, своевременно оформите РВПО.
- Когда вам нужно сменить место жительства во время пребывания, уведомьте власти и принимающую организацию или работодателя; держите все документы под рукой на случай проверки.
- Сохраните цифровые и физические копии ключевых документов: паспорт, визу, пригласительные письма, страховку и подтверждение финансовых средств. Если хотите, используйте курьерскую доставку, чтобы отправить оригиналы на доверенный адрес.
- Для семей с детьми возьмите с собой свидетельства о рождении и убедитесь, что они переведены и, при необходимости, апостилированы. Включите документы о согласии, если один из родителей путешествует с детьми или если ребёнок путешествует один.
- В Новгородской области и других регионах сроки регистрации могут отличаться. Проверьте указанные сроки на официальном портале и действуйте заранее, чтобы избежать проблем в последний момент.
- Соблюдайте сроки действия и окна продления. Планируйте продление заранее, чтобы избежать пробелов в статусе или планах поездок.
- Обновите свои контактные данные, если вы переехали или сменили работу, учебное заведение или принимающую организацию.
Регистрация туристической визы: необходимые документы, сроки и места подачи
Подайте полный пакет документов и сдайте его в официальное визовое отделение не менее чем за 30 дней до планируемого прибытия, чтобы у визового офиса было достаточно времени для рассмотрения и возможного запроса дополнительной информации.
Требуемые документы: загранпаспорт, действительный не менее шести месяцев после предполагаемого срока пребывания; одна недавняя цветная фотография стандартного размера; заполненная анкета на визу; копия страницы с биометрическими данными; маршрут поездки с датами; подтверждение бронирования билетов на обратный или следующий рейс; подтверждение бронирования жилья на первые ночи; подтверждение наличия достаточных средств (недавняя выписка из банка или лимит кредитной карты); медицинская страховка, действующая на весь срок пребывания; и, при необходимости, письмо поддержки или спонсорства от принимающей стороны или работодателя с контактными данными и целью визита. Включите любые формы или подтверждения, специфичные для страны, которые запрашивает консульство.
Сканы и копии: Подготовьте чёткие сканы всех страниц с личными данными, штампами и визами. Загрузите PDF или JPEG с разборчивым текстом и правильной ориентацией. Сохраните как сканированные версии, так и оригиналы для собеседования, если потребуется.
Сроки и обработка: Ожидайте, что обработка займет от пяти до пятнадцати рабочих дней в обычные периоды. В пиковые периоды или для определенных национальностей сроки могут увеличиться. Подавайте документы заранее и отслеживайте статус через официальный портал, используя номер квитанции.
Места подачи документов: Подавайте в посольстве или консульстве, обслуживающем ваше место жительства. В некоторых случаях допускается подача через специальное визовое окно в местном почтовом или туристическом центре; перед посещением уточните утвержденную точку подачи на официальном сайте. Возьмите с собой оригинал паспорта, распечатанную квитанцию и всю документацию на собеседовании, если это требуется.
Регистрация в Москве: местные отделения, процедуры и сборы
Позвоните в главный московский офис, чтобы уточнить последние шаги перед визитом; это предотвращает напрасные поездки и гарантирует, что вы возьмёте с собой нужные документы, включая паспорта и правильные данные адреса.
Подготовьте документы: ваши действительные паспорта, подтверждение проживания в Москве (адрес), имя, отчество и фамилию точно так, как в паспорте, а также любые дополнительные документы. Если у вас есть гражданство Португалии или иностранные документы, приложите переводы, если это необходимо. Если ваша регистрация относится к Сахарово или Самаре, укажите местный адрес и планируйте перерегистрацию при переезде, а также имейте при себе документы для проверки. Если вы студент, предоставьте справку о зачислении, чтобы подтвердить ваше пребывание и заявление о проживании.
Выберите способ подачи заявления: онлайн через портал или лично в местном отделении. Подача заявления онлайн сокращает время ожидания; после отправки вы получите номер заявки и сможете отслеживать статус. Принесите оригиналы для проверки и приложите копии вместе с формой. Убедитесь, что все обязательные поля заполнены, особенно имя и отчество, и приложите сканированные копии, где это требуется.
Время обработки зависит от типа услуги; ожидайте несколько рабочих дней. Вы получите уведомление по SMS или email. Если с документами возникнут проблемы, вы увидите это в статусе и сможете оперативно отреагировать, после чего отправить исправленные файлы. Меры по COVID-19 могут повлиять на вместимость заведения и график приёма; планируйте возможные онлайн-слоты.
Плата зависит от услуги; базовая регистрация имеет базовую ставку, с дополнительными сборами за дополнительные услуги. Оплата производится в окне наличными или картой. Вся процедура проходит в главных городских или районных отделениях по всему Москве, поэтому вы можете выбрать удобное место в городе. Если ваше дело связано с утерей документов, немедленно сообщите об утере и запросите дубликаты при подаче.
Для конкретных вариантов обратитесь к таблице ниже с офисами, районами, типичными адресами, часами работы и диапазонами цен. Часы работы в среду могут отличаться, поэтому позвоните заранее, чтобы уточнить.
| Район | Address | Hours | Сборы (руб.) | |
|---|---|---|---|---|
| Главное управление по вопросам миграции в Москве | Центр города | Центр Москвы, Центральный административный округ | Пн-Пт 09:00-18:00; Ср 10:00-16:00 | Базовая регистрация: 0; дополнительные услуги 200-800 |
| Сахаровское отделение | Северо-Восток | Сахарово, Московская область | Пн-Пт 10:00-16:00 | Плата за подачу заявки: 500-700 |
| Петербургский филиал | City | Петербургский филиал, адрес | Вт-Сб 09:00-17:00 | Перевод: 600-900 |
Бизнес-виза: письма-приглашения, приглашения и сроки оформления
Предоставьте письма о спонсорстве от вашего работодателя и принимающей компании в качестве первого шага. Подготовьте чёткий план поездки, согласуйте даты во всех документах и сопоставьте процесс с рассмотрением в посольстве. Готовьте краткий список, чтобы избежать задержек, особенно при подаче документов в Москве.
Спонсорские письма должны быть на официальном бланке и подписаны старшим сотрудником. В них необходимо указать финансовую поддержку, дату поездки, планируемую продолжительность пребывания, а также кто оплачивает проживание и питание.
Приглашения от иностранного принимающей стороны должны сопровождать письма о спонсорстве. Каждое приглашение должно включать название компании-хозяина, адрес, контактное лицо, цель, имена участников и дату выдачи. Если приглашение на португальском языке, предоставьте португальскую версию или двуязычный перевод.
Обработка заявок зависит от консульства; стандартный срок обычно составляет 7-14 дней после подачи. В периоды высокой загрузки выдача может занять больше времени; уточняйте актуальные сроки в Москве и других местах.
Стоимость и сборы: затраты на оформление визы, сервисные сборы, переводы и любая необходимая легализация. Возьмите наличные или используйте способ оплаты, указанный консульством; некоторые отделения принимают карты, другие — только наличные.
Рекомендации: держите небольшой, аккуратно собранный пакет; включите ксерокопии документов; убедитесь, что все формы заполнены и подписаны.
Образовательные программы: если поездка включает обучение, укажите детали курса, письмо о зачислении или приглашение от образовательного партнёра, а также подтверждение проживания. Для корпоративного обучения добавьте приглашение принимающей стороны и план размещения.
Готовьте необходимые документы, записывайтесь на приём и следите за изменениями в политике, которые могут повлиять на подачу. Представьте все документы в порядке в консульстве или посольстве.
Миграционная карта, уведомление о прибытии и приглашения: когда и как подавать
Подайте карту мигранта, уведомление о прибытии и приглашения в течение 14 дней после прибытия. Обратитесь в приёмную городской администрации в вашем городе или отправьте документы через официальный портал. Это действие обновит ваш статус в администрации и поможет вам жить в городе с уверенностью.
Подготовьте по два экземпляра каждой страницы паспортных данных, свидетельства о рождении, медицинской справки и справки об отсутствии судимости, а также два экземпляра уведомления о прибытии. Приложите заявления и банковские выписки, подтверждающие наличие средств для проживания на территории. Включите документы по приглашениям, чтобы агентства могли рассмотреть их вместе с вашим профилем. Некоторые документы могут потребовать консульской легализации; получите её в консульствах.
Отправьте по почте в миграционные службы или доставьте лично в администрацию, расположенную в городе. Если вы находитесь в другом городе на территории, отправьте в центральный офис или в консульства, выдающие разрешения; оба варианта допустимы. Эта услуга помогает людям переезжать без проблем и поддерживает актуальность записей.
Обработка обычно занимает несколько дней. Офицеры подтверждают получение документов и информируют вас о дальнейших шагах. Если вам нужно продлить документы, начните процесс продления не позднее чем за 30 дней до истечения срока.
Медицинские осмотры могут быть запрошены властями; следуйте их рекомендациям и пройдите необходимые тесты в установленные сроки. Сохраняйте копии всех медицинских и полицейских справок и следите за тем, чтобы они оставались действительными на следующих этапах вашего переезда.
Во время Рождества и в периоды пикового туристического сезона уделяйте больше времени на доставку курьером и записи на приём в консульство. Планируйте, чтобы всё было готово до конца декабря, если вы ожидаете прибытия в этот период.
Если остались вопросы, обратитесь в администрацию или полицейский участок вашего города. Они подтверждают квитанции и могут пригласить вас для подачи недостающих документов. Храните папку с копиями всех свидетельств и заявлений для удобства. Администрация может поддержать ваше обращение и помочь вам с дальнейшими шагами.
Кто Отвечает за Регистрацию и Кто Может Её Просматривать: роли, доступ и конфиденциальность
Регистратор является владельцем регистрации, и доступ ограничен только для авторизованных ролей.
- Регистратор / Регистрационный отдел: управляет формами, обрабатывает поступление документов, выдает квитанции и отслеживает сроки сдачи. Они занимаются процедурой, устанавливают продления, когда это разрешено, и ведут официальный учёт для программы.
- Руководитель программы или начальник отдела: утверждает доступ для сотрудников, назначает роли в зависимости от потребностей и проверяет изменения в записях.
- IT и Security Team: обеспечивает доступ на основе ролей, поддерживает контроль входа и ведёт журналы активности для защиты границ системы.
- Уполномоченный по защите персональных данных: следит за политикой конфиденциальности, сроками хранения данных и отвечает на запросы о том, кто может просматривать какие данные.
- Аудиторы / Сотрудники по соблюдению норм: доступ только по формальному запросу и при наличии документально подтверждённой цели, с ограниченными правами доступа и под наблюдением.
Доступ и правила конфиденциальности
- Доступ основан на ролях. Только те, у кого есть прямой интерес к записи, могут её просматривать. Пользователи должны войти в систему и хранить свои учётные данные в тайне; они не делятся паролями или учётными данными с кем-либо ещё.
- Видимость ограничена границами подразделений. В подразделении Самара доступ к данным остаётся в рамках утверждённых границ, если не возникает конкретной необходимости, которая одобряется через установленную процедуру.
- Данные могут использоваться для изучения соответствия политикам и улучшения программ, но доступ ограничен только необходимыми полями; личные данные маскируются, когда это возможно.
- Все действия фиксируются: кто вводил или изменял данные, что просматривалось и когда. Это помогает изучать и уточнять процесс без раскрытия конфиденциальной информации.
Что может быть увидено и кем
- Заявители могут просматривать свою историю подачи заявок и примечания о статусе через защищённый портал; они могут просматривать приглашения и обновления, а также скачивать свои документы на этапе выдачи.
- Регистраторы видят полный пакет подачи, включая форму, документы и любые квитанции, выданные при подаче; они отслеживают сроки и отменяют подачи только в случаях, предусмотренных политикой.
- Программные менеджеры видят связанные приложения и соответствующие поля, необходимые для принятия решений, но не могут получить доступ к нерелевантным записям за пределами их срока или области проекта.
- Политики доступа к документам по конфиденциальности, сроки хранения (сроки) и анонимизированные данные, используемые для отчетов, доступны сотрудникам, отвечающим за защиту данных; они не просматривают сырые персональные данные, если это не требуется по закону.
Ключевые термины и практические шаги
- Прибытие: собрать все документы у стойки; проверить полноту формы и выдать квитанцию в качестве подтверждения.
- Ввод данных: сотрудники вводят данные в систему; убедитесь в точности перед отправкой.
- Оформите пакет и сдайте его по программе; используйте указанный путь подачи.
- Срок сдачи: использовать даты февраля; если срок не может быть соблюдён, подать официальную просьбу о продлении.
- Пожалуйста, предоставьте текст для перевода, и я выполню его в соответствии с вашими требованиями.
- Заявки: приложите все необходимые документы; неполные пакеты вызывают напоминание и новый срок подачи.
- Приглашения: при необходимости приглашения на участие выдаются через утверждённый канал и отслеживаются в системе.
- Изготовление или отмена: если данные неверны, отмените заявку и подайте её заново с исправленными данными.
- Здесь и сейчас: используйте защищённый портал, чтобы проверить текущий статус и любые изменения в записи.
Практические советы для пользователей
- Используйте официальный портал для ввода данных и отслеживания квитанций; избегайте дублирования или обращения с наличными вне системы.
- Изучите правила конфиденциальности во время обучения персонала; зарегистрируйтесь на сессию в четверг, чтобы ознакомиться с последними изменениями в контроле доступа и обработке инцидентов.
- Если нужно отменить или внести изменения в отправленное заявление, сделайте это через официальные каналы, а не через неформальные.
- Если данные изменятся, немедленно уведомьте регистратора, чтобы запись отражала актуальную информацию и сохраняла чёткий аудит.
- Документы и формы, которые выдаются или обновляются, остаются доступными только для авторизованных ролей, с четким отслеживанием, кто их просматривал.


