

Begin at first light with map in hand and a light pack under eight kilograms. Since climbing begins above scrub toward cliffs, keep eyes on glade pockets and set a measured pace to protect yourself.
During midday pauses, a shallow pool reflects blue sky; snorkeling above submerged rocks reveals fish. For those vacation tempo, move with calm rhythm and practice stand-up balance on slick granite when crossings get slick.
As afternoon light slants through scrub, glade pockets loom, cloaked with ferns; a scent reminiscent of coastal lagoons drifts across moss. manatee imagery aside, these margins invite quiet observation.
Maintain safe distance from bears; carry a whistle and respect seasonal restrictions. If you encounter mine relics, do not disturb; maintain distance from mine shafts cloaked by scrub and leave no trace; protect habitat by sticking to established routes.
Above cliffs, distant views feel like paradise; this route maintains rhythm that could be repurposed for longer treks during a vacation. When cairns vanish, trust compass, and adjust pace to avoid fatigue; those who follow finish with a quiet glow and greater respect for country.
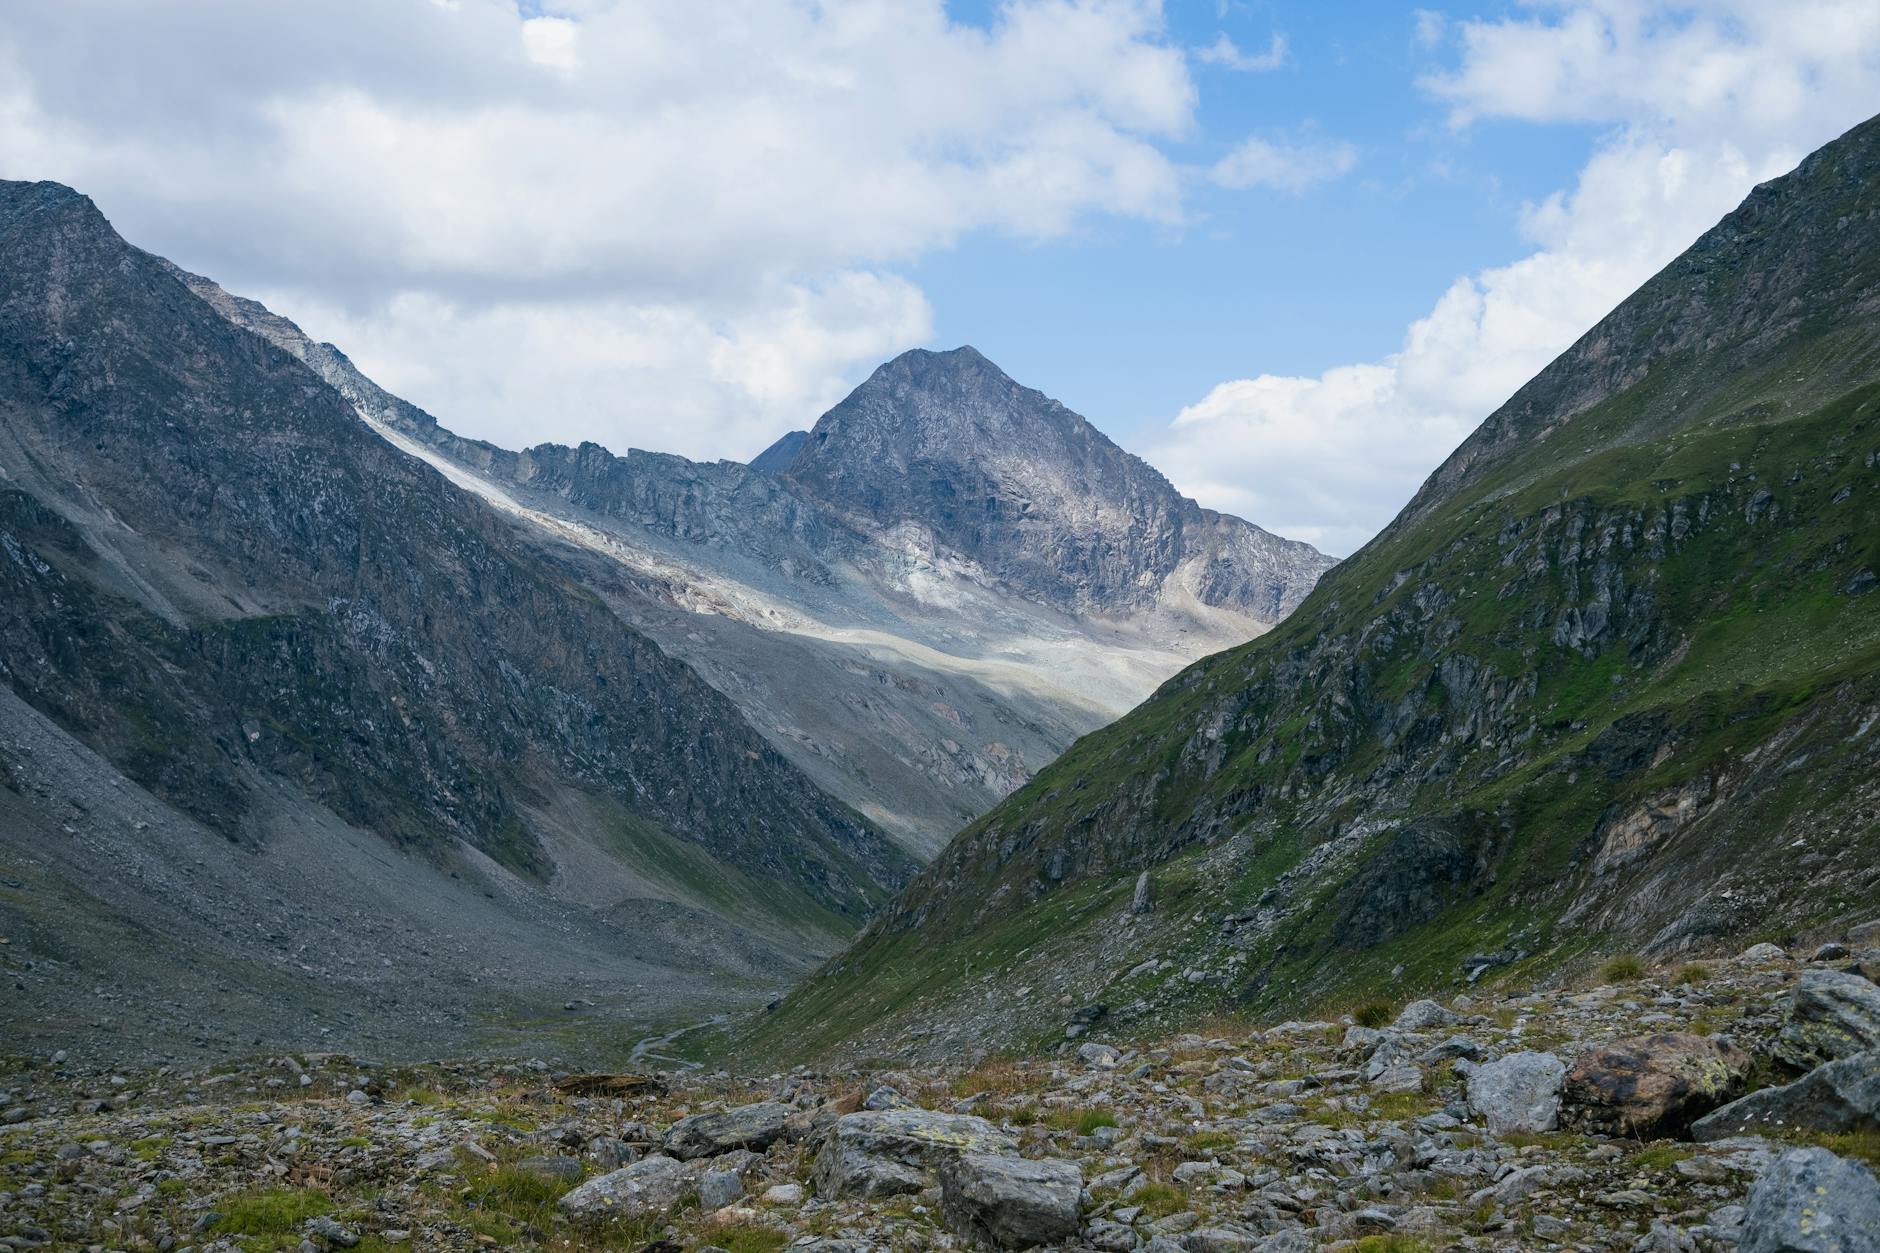
Into the Hidden Valley Walking the Budawang Range Part 1
Recommendation: start at dawn, move with steady rhythm, and adopt a conservative pace to conserve energy for a long day on a ridge system.
Experienced trekkers know terrain demands careful planning; choose a line that minimizes exposure, avoids long climbs after rain, and reduces chance of injury.
Plan for miles in two to four segments, gradually building to eight or more miles depending on conditions; features forest sections, basalt steps, and open flats.
Water plan: freshwater from springs near camps; verify purity, boil or filter; keep a landing point in mind after midday sun to recover.
Terrain features blue pools, prehistoric rock features, and narrow ledges; downhill sections demand low center of gravity and training in controlled descent; always avoid loose scree and use solid handholds. Grip, like tires on slick rock, improves safety on wet steps.
Sunlight exposure rises after mid-morning; plan sheltered pauses in patches with deep shade to keep moisture, avoid overheating, and refresh with cool air. If a pool invites a swim, take a quick dip mindful of depth and current; exit to shade to recover.
Landing in a safe spot near springs allows quick freshwater rinse; if you encounter an island mid-creek crossing, pause to assess passability ahead.
Horseback options exist in limited zones where allowed; in most cases gear remains on foot, using a compact pack, responsive to changing terrain.
Regardless of plan, stay flexible; discover safer options when weather shifts; terrain may be dominated by slick rock, dense scrub, or sudden drop-offs, so adjust route using a variety of choices rather than a fixed path.
Access and Trailhead Logistics: Parking, Permits, and Start Time
Recommendation: Start at dawn, secure a daily permit online day before, and park in open lot by reserve entrance; arrive at least 30 minutes before planned start to secure space.
Parking; open area accommodates most vehicles. During peak season expect 20-40 spots; overflow along access road may be needed. Use marked bays, keep engines off, and avoid blocking surface. Bike access is allowed in some zones; bring a lock and store bike at rack or gate if permitted.
Permits: required for entry beyond gates; purchase online via official app or website; carry proof and be prepared for on-site checks; daily pass valid for 24-hour window regardless of start time. Fees are modest and support reserve maintenance and wildlife monitoring.
Start time guidance: begin seasonal hikes at dawn to catch cooler air and quiet brush; in winter plan for earlier starts due to fading daylight; spring and autumn offer longer daylight; trail surface damp near streams and a waterfall; finish before dark to minimize wildlife disturbance.
Area notes: magical, grand feel with cliffs and rainforest pockets; wildlife frequent this zone; stay on surface and avoid dense brush; cloaked sounds of birds mark path; portal-like air near mossy boulders.
Seasonal reality: in dry periods, water points thin; in wet spells, streams rise quickly. Inspect area map for miles of trail, note open sections, and adjust pace to various levels of fitness. Carry maps that show reserve boundaries and avoid closed areas; sisters viewpoints and rock ledges offer distant views.
Safety and etiquette: never trespass near mineral mine zones; note absence of shortcut portals; obey signs, loggers' tracks remain off-limits; regardless of mood, inform others before leaving group; pack out all waste; do not light fires in brush prone areas.
Navigation and Route Markers: Using Maps, GPX, and Landmarks
Carry a current topo map and a loaded GPX track before departure.
Store a printed micro map in waterproof pouch and keep a digital copy on device for offline access when signal dies in rainforest canopies.
Study routes in google and Maps to plan terrain, then verify with on-ground markers such as cairns, blaze marks, ridges, rivers, or large boulders.
Label GPX waypoints clearly, and align them with distant landmarks like john, glen, and distinctive cliffs so your routes stay together.
In floridas regions, weather shifts quickly; heavy rain can erase prints, so provide reliable backups and keep bearings near area boundaries dominated by thick vegetation.
Keep camping within small acres near safe water, far from loggers areas; loggers will protect habitat and bears may patrol near eddies.
Since many expeditions rely on shared data, your routes will stay aligned if campers review markers together; think of a real-time glance via google satellite, confirm you near paradise zone and avoid risky sectors.
A few veteran tips: john and glen landmarks provide a quick glimpse of distant ridges beyond thick canopy; this really helps think ahead.
orlandos will fill camping spots quickly, plan deviations to stay clear of crowds while keeping routes together.
Water Strategy on the Ridge: Where to Find Water and How to Treat It
Carry a compact filtration bottle and treat all surface water. Boil for one minute; at higher elevations extend to three minutes. Alternatively, run water through a 0.2 micron filter, then disinfect with chlorine (2 drops per liter) or iodine (5 drops per liter) and wait 30 minutes before drinking.
Where to locate sources: eastside slopes yield surface flow in spring; glade pockets trap dew; hammocks harbor some seepage. Follow road verges toward trailhead positions where springs appear near sassafras stands and old loggers' grounds. In drier spells, those miles of ridgeline rely on small seeps that remains below surface until rain arrives.
Maintain a practical routine: keep kits dry, store treated water in clean bottles, label each container. Enthusiasts would schedule snorkeling trips or diving with seasoned divers who know local currents. Canoes work best on sheltered ponds or slow streams; glade pockets can host calm water after rain. When camping near sources, keep gear away from livestock and mud; tires require regular inspection after rough stretches.
Visitors arriving to enjoy nature should keep to safe routes, carry spare water, and respect signage near sensitive zones. Those who come via eastside access points often attract curiosity from day visitors and two-wheeled travelers; plan alternatives if weather shifts suddenly.
Locals felt risk lowered after improvements; signage kept visitors safe.
Opportunities expand along eastside corridors.
Many visitors are attracted by rugged grounds; soon after rain, springs deliver reliable water for canoes, hikers, and enthusiasts.
| Source | Reliability | Treatment | Notes |
|---|---|---|---|
| Spring or seep on eastside | Consistent after rain | Boil 1 min; 0.2 micron filter; chlorine 2 drops/L or iodine 5 drops/L; wait 30 min | Watch sassafras groves and moss |
| Creek below ridgeline | Seasonal flow | Filter 0.2 micron; chlorine or iodine; boil if possible | Contamination risk near livestock |
| Rainwater catch near camp garden | Good during storms | Boil then filter; chemical disinfection | Store away from sun; label containers |
Safety and Communication: Managing Weather, Exposure, and Emergency Plans
Carry a satellite messenger and file a trip plan with trusted contact; include daily check-in times, route sketch, turnaround estimates, escape points, and emergency numbers.
Weather in budawangs varies rapidly, primarily on exposed hill tops; conditions vary from cool mornings to warm afternoons, with wind gusts and sudden rain on rainforest slopes. Monitor forecast daily; if storms forming on radar approach, postpone climb or retreat to reliable grounds; keep escape routes and water sources identified for 2-6 hours of additional travel time.
Protect skin and eyes; sunscreen SPF 50+, sunglasses; windproof layer; dry underwear; change socks to prevent blisters. In humid pockets, Florida-like feel may occur; adjust pace to remain comfortable and conserve energy.
Emergency plans: carry PLB device or satellite messenger; file plan with reserve administration; provide two emergency contact numbers; maintain location markers showing namesake peak, iconic rock formations, and other key grounds; corroborate with sole route markers along trails; in areas with limited coverage, use whistle, mirror, and signal card; rescue operations may take hours, so plan margins; acres within reserve require respect for regulations.
Communication strategies: share plan; designate two meeting points; use two channels (satellite messenger plus phone); in varying conditions, check-in at daily windows; there are multiple ways to stay safe; do not rely solely on device; maintain paper map and compass as backup; practice with small group drills to keep readiness high; overall, safety improves when participants maintain calm, manage expectations, and respect environment as natural paradise, playground for explorers, and fascinating habitat.
Gear and Packing: Boots, Layers, and a Lightweight Day-Hike Kit
Choose versatile, lightweight boots with ankle support and a 20-25 L day-hike pack to cover 6-9 mile routes with moderate elevation gains.
- Boots and foot prep
- Fit: try with mid-weight socks; heel locked, toes with room for swelling; break-in window 2-3 sessions of 60-90 minutes.
- Sole: 4-5 mm lug depth suits mud, rock, roots; consider semi-stiff midsole for stability during climbing sections.
- Waterproofing: leather-synthetic mix; gaiters in rain or dusty conditions; spare laces carried.
- Traction: test grip on stone and limestone slabs; ensure bite on wet surfaces; toe bumper helpful on edges.
- Layers
- Base: merino or synthetic next-to-skin; avoid cotton; quick-dry fabric crucial after sweat.
- Mid: fleece or lightweight jacket; packable; warmth without bulk.
- Shell: lightweight windproof with DWR; breathable membrane optional; target 250-450 g depending on size.
- Strategy: add or shed layers with sun, shade, wind changes; vent zips aid moisture control.
- Lightweight day-hike kit essentials
- Navigation: map and compass or GPS; backup in pocket; mark route with waypoints using known landmarks to guide your path.
- Illumination: headlamp plus spare battery; night-time signaling kit optional.
- First aid: compact kit with blister care, antiseptic wipes, tape, meds; adjust to personal needs.
- Fire and shelter: lighter or waterproof matches; space blanket or ultralight bivy; compact tarp adds rain protection.
- Multi-tool: knife; signaling whistle; repair tape; cord stock wrapped in small sleeve; compact form.
- Hydration: plan for 2 L minimum; water filter or purification tablets; consider kayak-style dry bag to separate electronics or dry clothes.
- Food: high-energy bars, nuts, dried fruit; plan 300-600 calories per hour depending on pace.
- Protection: sunglasses, sunscreen, brimmed hat; lip balm SPF.
- Packing: dry bag for electronics; compact waste bag; spare socks in waterproof pocket.
- Access, safety, and environment
- Parking: arrive before opening; use designated spots; avoid blocking access or driveways near trailhead.
- Legal access: respect posted rules across areas managed by networks across states; some zones require permits or seasonal closures; advisory network offers guidance about parking and access; verify prior to outing.
- Crossings and streams: crossing points can be slick; grip needed; move together for balance; keep packs low and tight.
- Wildlife: deer sightings common; give space; avoid chasing or feeding.
- Terrain awareness: typical routes combine roads, forest paths, limestone outcrops; climbs may prove challenging; you would pace yourself to manage energy across long days; expect hundreds of feet of ascent.
- Weather and earth: monitor advisory forecasts; sun heats rock; shade available where opening appears; streams surge after rain, flows rise quickly.
- Water considerations: check river levels; avoid ford steps during high flows; plan alternate routes if needed.
- Group coordination: share responsibilities with others in party; split tasks; cross-check weather and navigation updates.
- Notes: million micro-decisions around footing, footwear, sun, wind accumulate; stay flexible.


