 The Eiffel Tower's Illuminations – Paris Nighttime Lighting Tips">

Starting in January, schedule an early evening walk along riverbanks to catch first glints of lights across iron silhouette's profile. For best results, head towards a bridge where clouds drift overhead, and city reflections turn copper.
Ticket desks open ahead of dusk; secure access near a favoured vantage just before crowds swell. Arrive early to claim a solid spot near a viewing point, then pivot to higher ground around an island for a broader frame. Once Crowds swell, vantage points shift and light reflections blur.
During your stroll, watch out lights bloom as particles trail in night air; long exposures can yield squid-shaped ghosts drifting above, especially when clouds thicken.
Parisian Travellers should explore along bridges, follow local signs to avoid blocking. people, and travel toward waterfront benches; walk sections allow better vantage. Tickets should be kept safe, and camoëns accents hint at seasonal colour shifts.
Starting times vary; in early evening, January notes suggest a calm rhythm emerges as crowds thin, letting travellers handle things with care. For travel plans, combine a walk with a warm beverage in a nearby cafe, then resume exploration at dawn or after clouds clear in Springbrook air.
Practical guidance for viewing, photographing, and understanding nighttime lights in Paris
Take a sturdy tripod, a fast wide-angle lens, and a remote shutter to stabilise long exposures and minimise noise.
- The best vantage points include riverfront terraces and elevated streets that frame a lit monument as a focal point; arrive before 8pm to bag a spot and watch the glow intensify.
- Look for visible reflections on the water and in shop windows; turn slightly to catch shimmering golds and cool blues without washing highlights.
- Nightfall yields dramatic colour shifts; schedule a 15–25 minute window after the first stars appear to capture subtle gradations in sky and façades.
Gear and settings
- Set RAW format; keep ISO 100–400, aperture around f/2.8–f/4 for wide scenes; experiment with f/5.6 for deeper street detail.
- Use a 14–24 mm lens for sweeping panoramas; switch to 24–70 mm for architectural segments that include water reflections; 70–200 mm isolates problem areas or bright signage.
- Manual focus via live view; zoom in for foreground details to ensure sharpness despite low light.
- Bracketing your exposure (for example -1, 0, +1 stop) lets you blend textures; this helps in areas with strong brightness contrast.
- Bring spare batteries and memory cards; cold months shorten battery life, so plan extra sessions.
Moisture and care
- Lens moisture is common; keep a microfibre cloth handy and use a dew heater on longer shoots in damp air.
- Protect electronics from a sudden shower; stow gear in a light cover when moving between viewing spots.
- Wipe the front element promptly if water spots appear; moisture on glass reduces contrast and creates halos around light sources.
Light behaviour and composition
- Capture golden glows on façades by delaying shutter release slightly after blue hour; this balance yields richer colour than pure neon.
- Frame water pipes, street lamps, and silhouettes to tell a narrative about the city’s nocturnal rhythm.
- Include a recognisable monument as a strong anchor, but allow surrounding streets and the river to create a natural path through the frame.
Tips for travellers and timing differences
- Holiday crowds can transform the riverfront into a social arena; plan for two sessions on different days to compare angles and light behaviour.
- From Sweden, Australia, and New Zealand, adjust expectations for duration of night hours; early departure yields calmer scenes and more room to set up.
- Check weather forecasts for humidity and wind; high moisture reduces clarity, while still air yields crisper reflections of lights.
- Bear in mind that some viewpoints are known for their jaw-dropping panoramas but require patience as crowds gather; be ready to wait for a clean shot.
- Aim for consistency: keep head level, avoid distortion, and ensure straight lines along riverfront streets; you're aiming for a professional look rather than a rushed snapshot.
Practical plan for understanding the scene
- Study how light wraps around stone and metal; colour temperatures shift with lamp design and nearby signage, producing a regal golden aura at last.
- Review your shots the next day; compare colour balance and sharpness, and claim adjustments for future days.
- As a photographer, experiment with long exposure stacks to reveal star-like points or motion trails on boats and pedestrians; worlds of detail emerge with patience.
- Remember to respect the area; do not block paths or entrances; head to a safe spot if crowds tighten the room you must work in.
Notes for curious visitors and enthusiasts
- Astrophotographers' interests can be satisfied here when skies are clear and humidity is low; nights near the river offer high chances of visible star trails above city silhouettes.
- Be sure to arrive with a plan, as the best angles shift with crowd movement and seasonal lighting; you might find a jaw-dropping view that was only a moment before inaccessible.
- If you've heard about a famous viewpoint, verify access times and weather, as last-minute changes can occur; this department recommends checking local updates before heading out.
- Beach-like reflections on the water can appear after long exposures; keep room for movement in the frame to avoid overcrowded compositions.
- People visiting from New Zealand, Sweden, or Australia often remark how the tone shifts across days; use that observation to plan a second session and compare results.
When the tower lights turn on and how long they stay visible throughout the night
Lights are turned on at dusk and stay visible until about 01:00, with summer nights extending to roughly 02:00 when skies are clear. In late autumn and winter, expect earlier end around 01:00 as crowds thin; plan to be on-site around civil twilight for best results.
What to shoot: bioluminescent glow on metal lattice, reflections on boats and waves; location choices along river banks offer strong lines, while spots near saint area provide open sightlines across water. A photographer should carry a 24-70 mm lens, tripod, and remote; early blue hour provides softer shadows before glow dominates; the glow arises from LEDs whose atoms control colour balance; they work in tandem with weather and water to render a gorgeous, dancing surface. traveltriangle notes help compare shots from domestic routes and northern destinations to capture light quality variations; toyama-like city lights add contrast in some frames, while cruises offer moving textures.
Locations worldwide influence light aesthetics; what you learn here translates to other places and moments. For Sweden travellers or northern voyages, you may notice a borealis-like shimmer occasionally mirrored on water; such comparisons help craft future itineraries and location scouting with walking routes along shorelines. Heard anecdotes from fellow travellers about late-evening light shows; their impressions confirm that careful timing yields gorgeous results across domestic routes and international cruises.
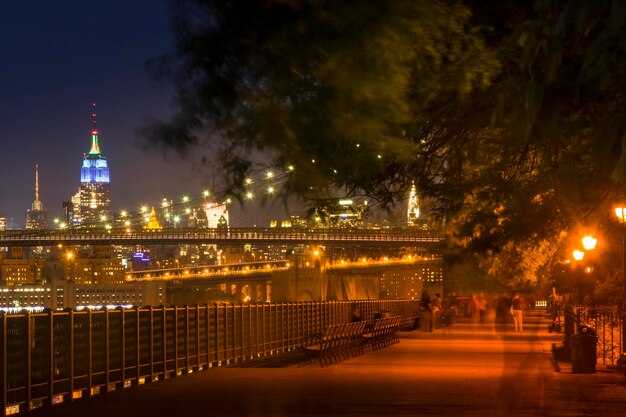
Best vantage points to capture the Eiffel Tower’s illuminations with minimal crowds
Starting at the terrace near the bridge by the river, arrive around 8pm to keep crowds minimal.
Best option: terrace on higher side of Trocadéro offers wide foreground, capturing entire silhouette against sky; arrive 21:00–21:15 for crisp alignment.
From the Pont Alexandre III, framing along the riverbank grants closer lines; once crowds ease after 10pm, they drift away, you can shoot between river glow and bridge lamps.
Nearby islands offer diverse backdrops; the small, well-known spots between island and quayside offer the best angles, while clouds drift and the moon rises.
Trip planning tips: your schedule should align with location gaps since they occur between vantage points; starting at one, move to next would cover both urban glow and darker margins.
Travel note: Maldives mood aside, coastal winds affect exposure; quickly adjust ISO and shutter between shots; background stays clean.
If memory has been shaped by Manasquan or Zealand trips, colour calibration across background tones can be fine tuned by Borealis glow in long exposure.
| Місцезнаходження | Best Time | Crowd Level | Примітки |
|---|---|---|---|
| Trocadéro terrace | 21:00–21:15 | low | widest foreground; moon, clouds provide optional backdrops |
| Alexander III Bridge | 20:30–21:00 | medium | Closer framing; water reflection enhances mood |
| Seine riverbank near island edge | 21:30–22:00 | medium | varying background depth; switch to longer exposure |
| Champs de Mars terrace | 20:45–21:30 | low | long exposures allowed; calmer atmosphere after 9:45pm |
Camera gear and night-shot settings to render the tower's glow clearly
A sturdy tripod, remote release, and RAW in manual mode deliver crisp long-exposure glow. A full-frame body or capable APS-C sensor handles shadows with less noise; pair with 24–70mm f/2.8 zoom or 35mm prime to cover framing from wide to tight. Both setups keep detail in spotlights while avoiding clipping.
Settings and technique:
- Set base ISO 100–400; shutter 2–6 s; aperture f/4–f/8; WB 3600–4000K; switch to manual focus via live view magnified to 100% and lock it.
- Enable exposure bracketing (3 shots: -1, 0, +1) to capture tone curve; or take single long exposure if sky remains calm.
- Use silent shutter option if available to reduce vibration; otherwise ensure tripod is sturdy and wind is minimised.
Gear checklist:
- Camera body: full-frame or strong APS-C sensor
- Lenses: 24–70mm f/2.8 or 35mm prime
- Tripod: carbon fibre or robust metal
- Remote shutter or intervalometer
- Spare battery and memory cards
- Lens hood and weather sealing
- Red-light head torch and microfibre cloth
- Table access: place on a table or bench to stabilise if tripod not usable
- Kayak-friendly bag and dry bag for puddle cruises; ensure safety
- Room to manoeuvre: space around setup for quick adjustments
- Compact tool kit for quick on-site fixes
Framing and colour notes:
WB around 3600–4000K helps preserve warm spotlights while blue sky remains pleasing; long exposures reveal texture on lattice and metal. October nights often offer calmer air; December nights may bring haze; January nights stay cold but skies clear after moonset. A nod to distant trips like Maldives can influence colour balance, encouraging warm tones during late-evening captures. Atmosphere shifts also mean atoms scatter light differently, which can subtly affect perceived glow.
Workflow and mindset:
Look long for clean glow; nothing sneaks past when you miss a focus shift. Both shadows and highlights illuminate details. Later, merge bracketed frames if needed; aperture adjustments to close slightly (aperture closes as f/8) help prevent bloom in bright spots. Above all, avoid overexposure of highlights by stepping down exposure. Blue accents can look perfect when mid-tones stay balanced. Love seeing results; many shooters hunt for crisp captures and tout this approach. Since you want ongoing guidance, subscribe for updates. These above guidelines would serve one look after another. These insights were heard by many in field tests and were refined by practice; because you practice, you would improve. Look into these notes to sharpen your eye, and embrace what works above all others.
Framing techniques: reflections, silhouettes, and balancing urban lights
Start with a rock-solid tripod. Shoot at dusk to secure perfect reflections on water or glassy surfaces; set ISO 100, aperture f/8, shutter 8–12 seconds; bracket exposures to hold both neon accents and golden tones.
Reflections bloom near calm sections by bridge head; frame between lamps and skyline; align horizon on lower third for symmetry; use 24–35mm equivalent to keep foreground and distant lights in view, and watch for parallel lines that guide eye towards midway glow.
Silhouettes emerge when exposing for bright signage; keep some shadows to create recognisable shapes such as pedestrians, boats, arches; place them against golden or blue backdrops; many silhouettes become bold against neon streaks, sometimes echoing street rhythms, giving room for them to breathe.
Balancing urban radiance with foreground interest requires dynamic range tricks; shoot a sequence across kilometres of riverfront; some frames blend midtones and highlights while others push shadows; cruises along neon-lit water add motion; tickets for night cruises grant fresh angles. Drawing inspiration from Waitomo, Zealand bioluminescent scenes and Springbrook caves, calibrate glow between dark shapes and bright signage; apply this approach to champ head vantage points along riverbank or on an island; for planning, consult TravelTriangle guides and scout options within kilometres distance.
Aurora borealis explained: causes, typical locations, and how it differs from Paris illuminations

Plan autumn-winter trips to maximise long, dark nights and clear skies for a full aurora display. Check solar activity forecasts and geomagnetic indices; those signals indicate whether conditions cooperate. Choose remote viewing spots away from town glow, and walking a short distance to a dark meadow or beside a monument for steadier, clearer bands. Between slow drifts, mind your arrival times so you catch the best moment.
Causes lie in solar wind streams carrying charged particles toward earth's atmosphere; collisions with atmospheric molecules excite atoms, releasing light in waves across oval curtains. Colours turn toward greens, pinks, and violets; greens originate from oxygen at 100–300 km, red from high-altitude oxygen, violet from nitrogen, with those hues turning based on altitude and density.
Locations cluster near high latitudes, including Sweden, Norway, Iceland, Canada, Alaska, and Greenland. traveltriangle guides help schedule reliable viewing windows. September often marks early chances, with nights deepening as autumn advances. Walking along beaches, fjords, and coastlines yields memorable moments, with sunset fading into darkness for an excellent frame. Blakely notes practicalities: dress warmly in layers, bring mosquito repellent when needed, and keep a room nearby for rest after late watches.
Compared with fixed city glow, natural auroral displays span vast sky canvases and follow geomagnetic rhythms, not a curated schedule. Colours shift with climate, magnetic activity, and air clarity, creating a mind-blowing, memorable spectacle. Observers often wait for a window of darkness, watching for arcs that sweep across the night between stars.
Practical steps: assemble a compact table of conditions, watch last-minute updates, and plan around a new moon for darker skies. Dress warmly in several layers, wear sturdy boots, and carry a tripod for steady night shots. Bring a camera with wide-angle lens and settings tuned for long exposures; in post, focus on bringing out colours as they turn across the oval horizon. Those choices increase the chances of a memorable, excellent sighting that travellers love, whether you stay near beaches or wander between monuments during September in Sweden.
") Moscow’s Wacky Street Art – Where to Find It (PHOTOS)">
Moscow’s Wacky Street Art – Where to Find It (PHOTOS)">
 Best Moscow Photo Spots for Stunning 2025 Pictures">
 20 Moscow Hidden Gems and Best-Kept Secrets – An Offbeat Local Guide">
 Old-School Moscow Pub Crawl – Classic Bars, Hidden Gems & Nightlife">
 Moscow – A Resort City – Luxury Travel, Wellness, and Culture in the Russian Capital">
 Tallulah Falls Location Guide – How to Visit Tallulah Gorge, Access Points, and the Best Viewpoints">
 Europe’s Most Beautiful Ferry Rides – Scenic Coastal Journeys">
 Ultimate Sledding Hill Guide – A Roundup of Slopes in the 419">
 Mystical Moscow Multimedia – Immersive Arts, Culture, and Tech in Russia’s Capital">
 The Most Breathtaking Hidden Gem Churches Across Europe">