 Los mejores lugares para practicar senderismo con raquetas de nieve: los mejores destinos de invierno">

Start here: Kick off your season with a week in the sayan highlands, where easy loops and well-marked paths suit families that love exploring together. Often the snow endures for months from December through February, delivering reliable conditions for short treks. Take a simple map, pack pants and warm layers, and plan a lunch break at a cozy restaurant before the kids tire out.
Beyond the Sayan, other regions offer different landscapes: forested ravines, open meadows, and ridgelines that slow pace and reward with views. Some locales offer cable access to trailheads, easing younger participants into longer routes. In ruso-speaking zones, guides and maps can be bilingual, making exploration smoother for first-timers. Look for routes with clear markers and frequent rest stops, while families split duties so one adult takes the lead, another keeps exploring with the kids, and a third carries snacks and a small first-aid kit.
après-ski culture matters for balance and motivation: many bases offer restaurants with simple menus, hot drinks, and warm lounges. For an activelifestyle vibe, choose locales that are suitable for beginners and intermediates, with short loops and longer options as skills grow. Some spots even host kid-friendly night walks, keeping the pace gentle and the focus on enjoying the outdoors rather than chasing distance.
Equipment and conditions data help you plan: in the core months, snow depth commonly ranges from 40 to 70 cm on mid-mountain trails, and temperatures hover around -5 to -15 C in the morning, moderating by afternoon. Take waterproof pants, insulated layers, and sturdy boots, plus gaiters to keep snow out of boots. Hotels and lodges frequently offer guided tours and rentals, yielding offers that are suitable for first-timers and returning explorers alike.
Practical tips for families: pick locations with short, forgiving routes and clear signage, and dress kids in layers with waterproof pants. Ensure you have a reliable map, a small first-aid kit, and a lightweight shelter; take regular breaks at cozy cafés that serve simple meals. ضرووووووووووي to confirm the day’s forecast and trail conditions before you set out, and look for restaurants offering easy meals after the trek.
Dolomites Italy: Snowshoeing Top Trails and Tips
Begin on the Seceda ridge loop for a concise, well-rounded intro to snow activities in the Dolomites; a five-km circuit with about 300 m of ascent, typically 2.5–3.5 hours on snow that packs well, with sunny mornings maximizing views.
Cinque Torri loop (6–7 km, 350 m gain) delivers a stunning alpine amphitheater of granite walls; access from Falzarego Pass, with rifugi there serving hot drinks; plan around 3 hours and keep an eye on frost at higher faces.
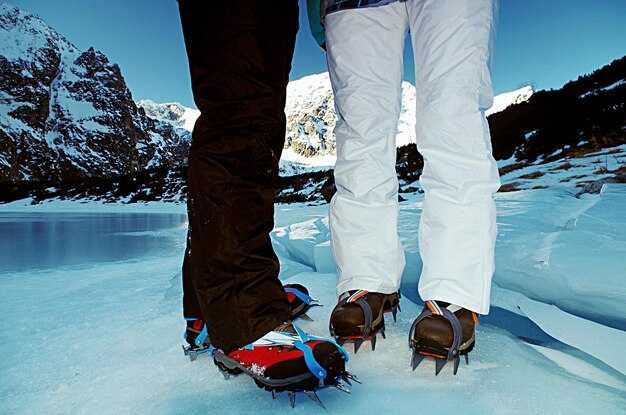
Sella Pass circuits (5–8 km, 300–550 m) offer broad panoramas across the alps and the Odle spires; start early to catch the best light; on firmer snow, crampons are a must, and always carry equipment such as map, beacon and extra layers.
Gear and clothing essentials: pants that wick and insulate, a waterproof shell, and a compact daypack; bring a lightweight helmet only if you intend to roam near exposed ridges; a pair of crampons for variable snow; always include a headlamp and extra batteries for late finishes; huts and hotels nearby provide warming stops, making it feasible to camp for a longer excursion if you want a true multi-day rhythm.
Safety and planning: hire an expert guide for unfamiliar terrain; theyre often the safest option on steeper slopes; check current snow conditions and avalanche forecasts; book through well-known hotels near Cortina, Ortisei or Arabba to secure access and transport; there are five main routes around the Sella and Odle groups that remain popular even on weekends.
Broader travel notes: sources from transylvania, cheget and ergaki sometimes contrast with elbrus experiences, offering perspective on cold-season trekking; exodus of visitors from urban centers turns the Dolomites into a quiet, well-structured place, especially if you stay in hotels and camp near rifugios; rusiadeelenaa and nikkismirnov post practical tips, while nakhazo threads focus on sunrise capture, camera settings and enjoying the morning light; with the right equipment and a patient guide, the payoff is stunning: the five towers against a blue sky, a moment you’ll want to capture and relive, often repeated by seasoned experts who know the route well.
Beginner-Friendly Dolomites Snowshoe Trails
Recommendation: Begin with Seiser Alm (Alpe di Siusi) for a 4–6 km loop with a 60–120 m ascent. The wide, groomed trails stay gentle, ideal for first-timers, and offer world-class alpine panoramas. Gear rental and simple guided options are available at nearby guesthouses; роскошный lodging options provide a comforting base after the walk. Check local tiktok clips for current conditions so you can adjust plans if winds shift.
Other beginner-friendly options include Val di Funes and Lago di Carezza. The Val di Funes loop runs 5–7 km with 100–180 m of elevation gain, crossing snow-blanketed meadows with the Odle peaks in view; Carezza’s lakeside paths run 3–5 km with about 40–90 m of gain. Both start from accessible villages with reliable bus connections, and they attract families who want a relaxed pace and steady scenery.
Practicalities: the window typically spans December through April, with snowpack varying year to year. Stay on marked trails, keep to land-based routes, and use a local supplier for gear if you want to test equipment before committing. A compact kit (boots, poles, layers) fits in a small daypack. For a multi-day option, camping (camp, camping) is possible at designated sites, or book stays in guesthouses along the routes; сутки rates are common for short itineraries. The regional basins–бассеин–and nearby taganai gear shops offer additional options if you want to refresh gear during a stay. The opportunity to combine several short walks in one trip lets you tailor a personal plan that suits spring weather changes and your want for variety and pace.
lodging and base camps: many guesthouses offer a balanced mix of comfort and access to trails, including options described as роскошный for travelers who want a higher level of service. They often host day trips to nearby alpine land features, and they provide storage for gear after snow sessions. They also serve as a hub for social sharing, including short clips on tiktok that showcase scenic portions of the trails, which helps guests plan future parts of their route. For snowboarding enthusiasts, the Dolomites zone delivers a compatible, world-class backdrop that complements snowshoe trails and expands options during a single visit.
| Trail | Área | Distancia (km) | Elevation gain (m) | Starting Point | Notas |
|---|---|---|---|---|---|
| Seiser Alm Loop | Alpe di Siusi | 4–6 | 60–120 | Compaccio or Santa Cristina | Gentle, groomed, family-friendly; high malevolence of views; easy access via gondola; ideal first day |
| Val di Funes Loop | Val di Funes | 5–7 | 100–180 | Santa Maddalena | Odle peaks in view; rolling sections; good for a relaxed pace |
| Lago di Carezza Path | Carezza Lake area | 3–5 | 40–90 | Carezza / Nova Levante area | Scenic lakeside route; flat to gentle grade; light crowd |
| Fiames/Pocol Alpine Loop | Cortina d’Ampezzo area | 6–8 | 120–200 | Fiames | Alpine surroundings; accessible by public transport; solid for a second day |
Day-Trip Snowshoe Itineraries from Cortina and Ortisei
Begin with the Lagazuoi loop from Falzarego Pass: take the cable car to Rifugio Lagazuoi, snowshoe across the plateau to the WWI tunnels, then return the same way. This roughly 6 km round-trip with about 350 m of elevation gain fits a half-day and suits families with kids. The route delivers broad Dolomites panoramas and several flat sections for those new to snowshoeing. Nearby guesthouses offer indoor drying rooms for boots after the outing, and refuges along the way provide hot drinks and soup. If you’re camping, designated areas permit stays near the passes; otherwise many families opt for a warm meal indoors at a rifugio before heading back.
For a compact Cortina circuit, Cinque Torri and the Averau ridge form a 4–5 km loop with 280–320 m of ascent. Start at Rifugio Averau, snowshoe to the Cinque Torri towers for dramatic photos, then descend through pine forest back to the car or continue to Rifugio Nuvolau for a short extra loop. The route is typically 2.5–3 hours; it’s well-suited to small groups and kids who are comfortable on gentle grades. The refuges at Nuvolau and Averau have indoor seating, and the area sits at a couple of passes with sweeping views of the Sella and Tofane. For social posts, this scene translates well to russiantiktok and acorner2discover feeds.
Ortisei offers family-friendly plateau walks on Alpe di Siusi: a 6–8 km loop from Compaccio or Sant’Antonio with 150–250 m of ascent, usually 2–3 hours. The wide, well-packed tracks are forgiving for beginners and kids; hot drinks and snacks are available at several huts, and indoor warm spaces are common at guesthouses at the plateau edge. If you want a higher vantage, a Seceda option via Col Raiser adds a 250–350 m climb over 5–7 km, taking about 3–3.5 hours. The ridgeline delivers striking views of the Dolomites’ Sella group and Seiser Alm panorama; add a Fermeda detour for a longer loop. Both Ortisei routes work well for a relaxed day and are easy to fit around lunch at a nearby campsite or guesthouse.
Practical notes: wear waterproof pants, pack spare socks, and bring a light headlamp for late finishes; harnesses and microspikes are often sufficient, but assess conditions with local guides. The Lagazuoi and Cinque Torri routes pass through sizable passes and peaks; use the cable for ascent where available. Indoor spaces at refuges make post-tour recovery simple, and some itineraries can be paired with a short camping stop for those seeking a compact multi-day shape. This mix suits those ranging from small families to larger groups seeking a scenic snowshoeing day with strong photo opportunities and easy access from Cortina or Ortisei. It’s a good way to sample a fraction of Elbrus-scale winter landscape without long drives, and is a good match for those browsing موسكو or russiantiktok content or following acorner2discover.
Gear Checklist for Dolomites Snowshoeing
Equip with sturdy three-season boots with stiff midsoles, integrated gaiters, and microspikes, plus an avalanche beacon, probe, and compact shovel for Dolomites snowshoeing.
A layered system: breathable base layer, warm mid-layer, and waterproof shell; spare mid-layer, knit hat, insulated gloves, and socks that stay dry; sunglasses and sunscreen.
Navigation gear includes map, compass, a GPS device, and a power bank; headlamp with extra batteries; carry a route plan and share it with a partner before departure.
Movement gear: trekking poles with adjustable length and snow baskets; a 25-35 liter daypack with hip belt; emergency bivy or space blanket; hydration system.
Photo gear and restrictions: drone use only where permitted; bring a compact tripod and spare battery; choose famous viewpoints and stay on marked trails.
Weather and timing: altaiweather forecasts help set the daily plan; clear mornings yield perfect light on Dolomites ridges; plan advance for longer loops or shorter routes depending on conditions.
Region-specific notes: the Dolomites region offers huts with facilities to rest and refuel; swimming opportunities exist in nearby alpine lakes, but verify conditions and permissions.
Consejos y oportunidades: busca asesoramiento previo de guías locales; descubre rutas que se adapten a tu estado físico y adaptación; la lista de verificación final debe confirmar los datos de contacto y el seguro.
Contexto global: La comodidad inspirada en Sochifornia puede dar forma a todo el conjunto, los viajeros de россия a menudo combinan las rutas de los Dolomitas con ciclismo o natación en lagos entre valles; espere refugios famosos y un servicio de nivel Michelin en algunos lugares, con políticas de drones que varían según la zona.
Seguridad y Conocimiento de Avalanchas en Terreno Alpino
Siga el pronóstico diario de avalanchas antes de comenzar y nunca viaje solo; si no está seguro, reserve un guía; lleve un detector de víctimas de avalanchas (DVA), una sonda y una pala, además de un mapa y una brújula; empaque una máscara para la nieve arrastrada por el viento y vístase con pantalones adecuados para condiciones frías; confirme el equipo con un proveedor de confianza y alinee los planes con todos los participantes.
Evalúa el terreno con ojo crítico: busca vistas despejadas a través de las laderas, evita placas de viento, cornisas y grietas recientes; elige rutas con amplios planos de descarga y nieve estable; entre las últimas tormentas y hoy, vigila las señales de inestabilidad, como sonidos huecos o colapsos "whumpf"; mantente en el rumbo con una brújula y un mapa, y mantén a los peatones y otros excursionistas espaciados de 20 a 30 metros.
En caso de emergencia, cambie a búsqueda con baliza y pida ayuda; si queda atrapado, suelte la mochila para mantenerse a flote, proteja a sus compañeros e intente orientarse hacia la superficie; los rescatistas deben realizar búsquedas simultáneas con balizas y líneas de sondeo; una vez que estén todos localizados, trasládense a una zona segura y ajusten los planes; tenga en cuenta las restricciones fronterizas en los corredores alpinos y los refugios de montaña con habitaciones separadas.
La preparación del equipo es crucial: pantalones impermeables; capas adicionales, guantes, gafas y una máscara; botiquín de primeros auxilios, linterna frontal, batería de repuesto y un kit de rescate compacto; practicar el uso de la baliza, la sonda y la pala con el grupo; compartir un breve relato de concienciación sobre riesgos con los recién llegados; usar traducciones en ruso o russo si tu equipo incluye hablantes no nativos; para rutas cerca de piedra caliza o en rosakhutor, altai o dolomitas, incluyendo exploración de itinerarios, confirmar opciones de refugio y transporte con tu guía o proveedor.
Cómo llegar, estacionamiento y logística local
Estacione en el aparcamiento del inicio del sendero de Stolby, junto al centro de visitantes, y comience el primer circuito antes de las 08:30 los fines de semana para evitar colas y asegurarse de que haya luz de día durante el ascenso.
- Cómo llegar: Desde el centro de la ciudad de Krasnoyarsk, conduzca de 15 a 25 minutos hasta la zona de Stolby. Los autobuses regionales conectan con la parada de Stolby, y luego una caminata de 15 minutos conduce al inicio del sendero. Si llega en avión, alquile un coche en el Aeropuerto Internacional de Krasnoyarsk o tome un taxi hasta la base; un corto traslado cubre la aproximación inicial.
- Aparcamiento y acceso: El estacionamiento oficial es compacto; en días de máxima afluencia se forman colas en los horarios de entrada. El estacionamiento adicional se realiza a lo largo de la vía de acceso. Para viajes de varios días, considere la posibilidad de dejar el vehículo en la ciudad y utilizar un servicio de transporte diario o un taxi para llegar al inicio del sendero cada mañana. Lleve monedas o una opción de pago móvil, si está disponible.
- Logística local: El sitio tiene un flujo de visitantes moderado. Las fuentes de agua están cerca del área base, así que abastecerse de líquidos para el día. En las secciones propensas al viento, refugiarse en los huecos sombreados a lo largo del borde del bosque. La luz del día suele durar desde media mañana hasta media tarde, así que planificar las escaladas en consecuencia. Son más desafiantes con las ráfagas; consultar el pronóstico antes de aventurarse en las crestas expuestas.
- Contexto del parque nacional y Putorana: Para las expediciones al Parque Nacional de Putorana, se requieren permisos y el acceso está limitado a ventanas específicas. Verifique las normas vigentes, las tarifas de entrada y las opciones guiadas en el sitio oficial. Asegúrese de tener un plan de varios días con el equipo adecuado y contactos de emergencia.
- Comida y reabastecimiento: En Krasnoyarsk, varias opciones de restaurantes cerca del centro preparan comidas rápidas antes de un día en la nieve. En Stolby, pequeños cafés cerca del inicio del sendero ofrecen bebidas calientes; para combustible en el sendero, lleve un suministro bien equilibrado. Para equipo de último minuto o refrigerios sobre la marcha, la ruta puede intersectar con oportunidades como the_bazar_sochi cuando las rutas pasan por centros más amplios; de lo contrario, abastézcase con un suministro para todo el día en los mercados de la ciudad. Están disponibles en tiendas selectas de la ciudad si necesita reabastecimiento rápido.
- Equipamiento y planificación: Las rutas para principiantes alrededor de Stolby ofrecen opciones moderadas. Para itinerarios de varios días, lleve consigo una estufa compacta, un mapa, capas adicionales y calcetines de repuesto. Los proveedores locales pueden proporcionarle equipo de alquiler y opciones guiadas cortas si desea un comienzo cómodo; confirme las condiciones actuales de la ruta en el centro de visitantes más cercano antes de salir.
 Los 10 mejores parques nacionales rusos para disfrutar de la naturaleza y la vida silvestre juntos">
 Los 9 mejores vodkas baratos: las mejores opciones económicas para un gran sabor">
") Mudarse a Rusia – Una guía esencial para expatriados (Visados, Costos, Vivienda)">
Mudarse a Rusia – Una guía esencial para expatriados (Visados, Costos, Vivienda)">
 Todo lo que necesita saber sobre los productos lácteos rusos: una guía completa">
 Los 10 mejores platos rusos que debes probar">
 Glamping: Camping con Comodidad – La Guía Definitiva para el Lujo al Aire Libre">
 La Guía de Campo de KegWorks para los Estilos de Cerveza Americana – Una Guía Práctica para los Estilos de Cerveza de EE. UU.">
 Cómo comer caviar: una tradición rusa atemporal, etiqueta y consejos">
 Dónde comer en Moscú: desde Teremok hasta el Café Pushkin">
 Los mejores acompañamientos para combinar con tu vodka">