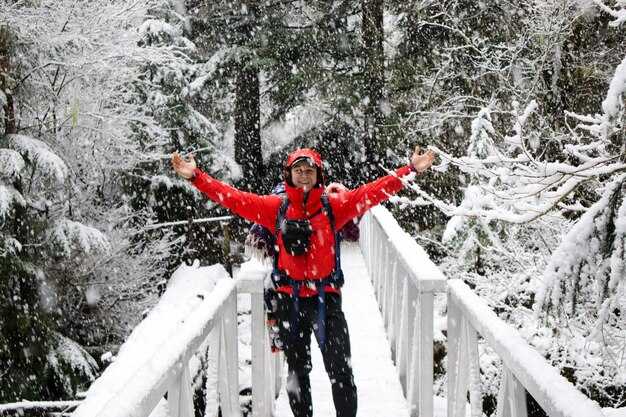
 Top Winter Photography Destinations – Best Places for Snowy Shots">

오로라와 삭막한 설경을 담기 위해 1월 여행 계획을 트롬쇠나 스발바르 같은 북극 거점으로 잡으세요. 이러한 선택은 다음을 드러냅니다. grandeur 빛 덕분에 바람이 강을 가로지르고 나무 주변을 스치는 긴 그림자를 드리우는 이곳이 더욱 우아하게 느껴진다. 가만히 앉아 조금만 인내심을 가지면 밤하늘이 잊지 못할 사진들로 가득 채워질 것이다. creates 다시 당신의 기억 속에 맴도는 질감.
북극권 너머, 라플란드는 선사합니다 호화로운 가문비나무가 늘어선 복도가 액자처럼 둘러싸인 눈 우아한 정사각형 빛의 조각들. 아이슬란드에서, 바람- 휩쓸린 해안과 빙하 석호는 강이 1월의 하늘을 비추는 극적인 장면을 연출합니다. 이 지역은 give 톤을 더욱 세밀하게 조절하여 정적인 미니멀리즘과 광활한 파노라마를 모두 연출할 수 있습니다.
실용적인 접근법: 밝은 단렌즈, 튼튼한 삼각대, 약간의 보온 장비를 챙기세요. 겹겹이 껴입을 수 있는 겉옷과 장갑을 착용하여 촬영하는 동안 편안함을 유지하세요. 빛이 희미해질 때 안정적으로 앉아 있는 것이 도움이 됩니다. 이 위도에서는 매직 아워가 30분까지 늘어날 수 있어 얼음 강과 유리처럼 맑은 호수에 비치는 반영을 통해 더 쉽게 구도를 잡을 수 있습니다. 배터리를 따뜻하게 유지하고 다양한 각도를 시도하면 촬영 결과물이 더욱 선명해질 수 있습니다.
고요한 마을에서든 탁 트인 평원에서든, 태양과 오로라의 호를 따라 계획을 세우세요. 각 장면에는 인내와 약간의 자제가 필요합니다. 외로운 나무 광활한 역광 하늘을 배경으로 하는 앵커가 되는 경우가 많습니다. 우아한 구도, 와 함께 정사각형 서릿불 비추는 땅이 균형을 잡아줍니다. 북극 바람이 장비를 시험할 것이니 렌즈 캡을 챙기고 결로에 유의하십시오.
여기에서 목표는 장면뿐만 아니라 분위기를 포착하는 것입니다. 이러한 장소들은 시간이 멈춘 듯한 느낌을 주는 사진을 만들도록 당신을 초대합니다. grandeur 넘어선 곳에 대한 감각을 느끼게 합니다. 1월의 햇살은 강렬한 모서리를 부드럽게 만들어 강을 리본으로 만들고 풍요로운 눈 위를 스치듯 지나갑니다. 다시 돌아오면 각도의 작은 변화가 전체를 얼마나 바꾸는지 알게 될 것이고, 앉아서 기다리는 연습을 하면 더 쉬운 방법이 있다는 것을 알게 될 것입니다.
겨울 집중 촬영 계획: 설경 명소와 검독수리 촬영
구체적인 계획으로 시작하세요. 12월에 황금 독수리가 꾸준히 바다 기둥, 대성당 같은 얼음 아치, 바람이 조각한 고원을 순찰하는 세 곳을 목표로 하세요. 이 세 곳은 믿을 수 있는 빛, 극적인 배경, 그리고 반복해서 사용할 수 있는 워크플로우를 제공합니다.
400–600mm 범위의 긴 망원 렌즈, 튼튼한 삼각대, 흔들림 없고 피로감을 줄여주는 원격 트리거를 준비하세요. ISO 320–800으로 설정하고, 앉아 있거나 다이빙하는 독수리의 경우 셔터 속도를 1/2000–1/4000으로 시작하고, 날갯짓이 흐릿해지는 비행 시에는 1/1000–1/2000으로 조이세요. RAW로 촬영하고, 화이트 밸런스나 그림자 디테일이 이상적이지 않을 때는 브라케팅을 사용하고, 속사 촬영을 위해 두 번째 카드를 준비해 두세요.
담백한 얼음 배경에 선명하게 보이는 새, 햇빛이 비치는 능선 뒤의 실루엣, SF 영화 같은 느낌을 주는 넓고 기발한 풍경, 이렇게 세 가지 모티프를 추구할 것이다. 눈을 조각하고 프레임에 질감을 더하는 강한 바람을 찾은 다음 바람이 잦아들고 색이 따뜻해지는 12월에 맞춰 촬영 시간을 조정한다. 다른 곳에 있다면 구름이 걷히는 순간을 포착하여 색상 대비를 극대화하고 얼음 가장자리의 보석 같은 풍경을 드러낸다.
거리를 유지하고 방해를 최소화하십시오. 사람들이 몰려들면 간섭이 가장 적은 곳을 선택하고 피사체가 시야에 들어올 때까지 자연적인 엄폐물 뒤에서 기다리십시오. 지역 규칙과 정찰 노트를 신뢰하고, 윤리적이고 신뢰할 수 있는 작업을 위해 둥지 통로에 오래 머무르지 마십시오.
원격 옵션으로 남극은 당신의 모든 덱을 더 큰 스케일로 조용히 바꿔놓을 수 있지만, 고산 얼음 궁전 주변의 더 가까운 장소에서도 그에 못지않은 드라마를 연출할 수 있습니다. 비하인드 스토리를 위해, 당신은 타이트한 인물 사진, 중간 거리 액션 샷, 광대한 결정 환경을 보여주는 파노라마까지 3단계 계획을 세울 것입니다.
반드시 확보하고 싶은 숏들을 간결하게 정리해 두세요: 세 컷의 소장용 사진, 독수리 뒤 실루엣, 4분의 3 초상화, 그리고 분위기를 담아내는 긴 파노라마. 바람이 갑자기 거세지면 신속하게 조정하세요. 삼각대를 받치고, ISO를 높이고, 새가 더 안전하고 예측 가능한 궤도로 움직이도록 하세요. 이러한 접근 방식은 놀라운 순간들을 담은 신뢰할 수 있는 아카이브를 구축하는 데 매우 효과적이며, 12월에도 일관성 있고 반복 가능한 워크플로우를 만드는 데 도움이 될 것입니다.
아이슬란드 겨울 풍경: 최적 경로, 날씨, 촬영 목록
Plan a 남해안 일주 레이캬비크에서 비크, 요쿨살론을 거쳐 다시 돌아오는 여정. 짐을 챙기세요. 카메라 다재다능한 lens 광활한 전망을 위한 빠른 옵션도 있습니다. 블루 아워에는 삼각대가 필수입니다. 사진 그리고 별 구간. 도로와 날씨 변화에 따라 계획을 변경할 준비를 하세요. 구름이 걷히고 산이 모습을 드러내는 순간이 항상 있습니다. 바로 그때입니다. 아이코닉한, 숨 막힐 듯 아름다운 장면들이 눈앞에 펼쳐집니다. 해수면이나 절벽 끝에서 기회를 포착하고, 늦은 저녁 시간을 위해 배터리를 조금 남겨 두세요. 이 여행은 당신에게 다음과 같은 보상을 선사할 것입니다. 사진 수년간 촬영한 후에도 시간이 흘러도 변치 않는 느낌을 줍니다. 하늘을 관찰하고, 바람을 주시하며, 얼음, 현무암, 눈 덮인 산등성이 사이에서 숨겨진 구도를 찾아낼 시간을 가지세요. 피사체와 풍경이 어우러져 프레임 안에서 포착할 수 있을 겁니다.
경로 옵션에는 다음이 포함됩니다. 사우스 코스트 서킷 셀랴란드스포스, 스코가포스, 비크 인근의 검은 모래 해변, 그리고 요쿨살론과 인근 다이아몬드 해변을 지나갑니다. 변화를 주기 위해, 스내펠스네스 키르큐펠 폭포와 극적인 해안선이 있는 반도 - 포착할 만한 그림 같은 분위기. 여건이 맞으면 베스트피르디르 험준한 산과 외딴 평온함을 제공하지만, 폭풍우 속 도로에서는 주의가 필요합니다. 겨울에는 낮 시간이 짧으니, 2~3 windows 푸른 시간대와 맑은 하늘을 최대한 활용할 수 있도록 사진. 섬 기후는 예측 불허일 수 있습니다.; even 짧은 주문으로 새로운 것을 드러낼 수 있습니다. subject 아이디어, 그러면 당신은 완전히 새로운 다양성 반짝이는 얼음부터 바람에 조각된 눈까지, 질감과 분위기가 다채롭게 어우러져 있습니다.
날씨의 변수는 대서양 전선에 달려 있습니다. 바람의 방향과 구름층을 추적하십시오. 산에는 빛이 드리우고, 동적 하늘이 펼쳐지고, 모든 장면이 느껴지는 숨 막힐 듯한. 맑은 밤에는 별 경로와 잠재적인 오로라; 낮은 ISO, 긴 노출, 그리고 안정적인 삼각대를 사용하여 포착하세요. 시간마다 예보를 확인하세요. 순간적인 개임이 이슬비를 연못 위의 반사되는 얼음으로 바꿀 수 있기 때문입니다. 폭풍우 중에는 장비를 보호하고 안전을 염두에 두고 이동하세요. 궂은 날씨를 견디는 것이 당신의 사진 그리고 끊임없이 긴장하게 만들죠. 부드러운 새벽에는 빛이 표면에 닿을 때 얼음이 벽옥색으로 빛날 수 있습니다. 늘 새로운 것을 발견할 수 있죠. 늘 새로운 것을 발견할 수 있습니다. 모든 바람 속에서 작은 새로움을 발견할 수 있다는 말이 있습니다. 인내심을 가지세요.
사진 목록: 멀리 보이는 상징적인 산; 바다 기둥에 앉은 까마귀; 얼음 덩어리가 있는 검은 모래 해변; 날씨가 허락하면 접근 가능한 얼음 동굴; 푸른 얼음 조각이 떠다니는 빙하 석호; 새벽 햇살에 빛나는 물보라가 이는 폭포; 현무암 기둥과 용암 지형; 해 질 녘 피오르드 실루엣; 유리처럼 맑은 물에 비치는 반영; 규모를 강조하는 넓은 파노라마; 서리와 고드름 클로즈업; 봉우리를 감싸는 별의 궤적; 눈 결정체와 갓 내린 눈 위의 발자국과 같은 작은 디테일. 넓게, 중간, 타이트 프레임으로 전환하여 커버 다양성 across a 여행. Cards of memory or captions can document progress while you assemble 사진 ready for sharing.
Guidance for enduring results: dress for frost and wind, keep gear warm and dry in insulated pouches; carry a spare lens and battery; pick locations with safe approaches to water and cliffs; the island rewards curiosity and a willingness to adapt. The journey started with a plan and grows as you find new subjects along the way; there’s always room to give the day a new direction. This could be totally transformative and a lasting testament to light, weather, and time in a place with vast 다양성.
Alaska Denali: Gear, timing, and wildlife-safe distances in snow
Begin with a weather-sealed body and long glass: 600–800 mm is ideal, with a backup 300–600 mm to cover broader scenes. Use a stabilized lens on a robust monopod or small tripod, especially on wind-swept ridges. Carry two spare batteries in an insulated pouch, plus chemical hand warmers. Pack a rain cover, microfiber cloth, and silica gel; shoot RAW to preserve highlights in white landscapes; set white balance around 5500–6500K; expose to preserve midtones, and apply exposure compensation between +1 and +2 EV when snow blows out; bracket when light shifts; keep shutter speeds around 1/1000–1/2000 s for wildlife action; in deep snow, use f/7.1–f/8 to keep subject sharp; adjust ISO to keep noise minimal. Today, ready cameras with longer glass invite calm photographs of eagles and other wildlife, while textures in the scene reveal whimsical details like kalvträsk crust forming on wind-bleached drifts, adding depth to a world-famous landscape.
Timing matters: Denali yields soft light during civil twilight, so schedule shoots in the first and last hours of usable light. In snow months, daylight may shrink to 4–6 hours daily; plan around sun angle. Arrive before dawn to catch animal activity along tundra streams, and stay through the blue hour to capture low-angled beams that sculpt cathedrals of ice and snow. Rely on local weather forecasts to anticipate wind and snowfall; a light breeze can enhance texture in clouds, while longer shadows create depth across the plains.
Wildlife-safe distances: Follow official rules and maintain at least 100 m (328 ft) from grizzly/brown bears and wolves; 50 m (164 ft) from black bears and moose. Increase to 100 m when cubs are present or an animal shows agitation. Use long lenses to fill the frame at distance instead of approaching. If a subject is hiding behind a drift, back away slowly and trust the animal to keep space. Never chase; watch for tracks in the snow indicating a path, and avoid sightings that prompt animals to flee. Maintain standoff to protect both subject and you; if approached, retreat behind a barrier or move to higher ground safely, and stay alert for signs of weather turning harsh.
Audio cues matter: stay quiet, let your shadows stay still, and let the subject reveal itself in the right light. A solid plan acts as a savior against missed opportunities, helping you keep focus on the right moment. Use a telephoto to compress distance, then compose with the trees and wind-sculpted drifts forming a cathedral of snow around the subject, turning each frame into a true photograph worth sharing. Kalvträsk textures, cloud layers, and cold weather lighting elevate the scene, making every shot feel timeless and ready for publication today.
Finland Lapland: Aurora planning, snow forest compositions, and practical lens choices
Base Saariselkä, northern gateway with dark skies and practical access, minimizes night-drive time and increases chances to catch the aurora arc. Pack a reliable tripod, weather-sealed cameras, and a fast wide lens (14-24mm) plus a versatile mid-zoom (24-70mm). Shoot RAW and set manual focus at infinity after focusing on a bright star, and use a remote release to keep per-frame stability.
Aurora planning hinges on space-weather data and cloud forecasts. Check forecasts before sunset, load aurora alerts, and keep presets ready so you can react quickly when the sky clears. Those windows often last several hours; temperatures drop to minus degrees, demanding battery care and quick adjustments to avoid deathly cold delays. Knowing how the light evolves makes the session easier to manage and yields more captured images.
- Aurora scheduling: monitor space weather, study cloud-cover maps, and set alerts to act when criteria align. Aim for least cloud and a dark horizon line to accent the event’s color.
- Snow forest compositions: seek thick blankets of snow resting on evergreen boughs, frost on birch bark, and subtle texture in the white plane; include a canal-like reflection or a distant cabin silhouette to add depth.
- Practical lens choices: start with a 14–24mm zoom (f/2.8) for vast skies, add a 24–70mm for forest textures, then deploy a 70–200mm or 100–300mm to isolate aurora ribbons when they unfold.
- 발견됨
- 워크샵
- 찾기
- 운하
- wanted
- 매력적인
- those
- 제공합니다.
- 구원자
- grandeur
- unless
- 아이작스
- 받는 중
- world-famous
- danis
- 카드
- ~에도 불구하고
- 상트페테르부르크
- meisenheimer
- cameras
- easier
- 포획됨
- images
- 죽음
- 알고 있음
- 두꺼운
- 거기에는
- 좋아요
- actually
- least
- degrees
- 가지다.
- 그림 같은
Banff National Park: Winter safety, accessibility, and landscape framing in powder snow
Start at Moraine Lake overlook at dawn with a sturdy tripod and bracketing to capture texture in powder snow; use 16–35mm, yielding panoramic frames, or 24–70mm, enabling flexible composition. Look for blue shadows that sculpt the lower rocks, and keep batteries warm in a chest pocket, and wear gloves with grip; plan a longer stay as light shifts over the lower slopes, turning the scene vibrant and magical.
Safety first: weather can shift quickly; check weather forecasts, park advisories, and road status before you visit Banff. Stay on marked trails; avoid frozen lake edges; carry avalanche beacon, shovel, and probe if venturing into backcountry; crampons or microspikes help on ice; pack extra layers, water, a compact first aid kit, and comfort items such as heat packs. Death risk exists if guidelines are ignored; never work alone; tell someone your plan and expected return time.
Accessibility and timing: during the cold-season, private vehicles may be restricted to access points; shuttle services operate from banff and lake louise zones; parking at famous viewpoints fills over dawn; unless you arrive very early, you could be delayed. Where to frame: Lake Louise shoreline, Moraine’s valley rim, Bow Falls, and the Icefields corridor offer a long list of vistas, each with a different mood, from mist to crystalline ice. Those landscapes look totally different across weather and light. Actually, you can expect changes by the hour.
Composition specifics: frame a mountain massif with foreground trees to create depth; use a wide panorama to include distant islands or ice shelves; align the horizon slightly above the lower third; experiment with a telephoto to compress distance and highlight jagged edges; capture a sequence that could be stitched into a long panoramic to produce a cohesive collection. Those images become part of a stronger collection produced from multiple visits, including a day with eagle perched on a ridgeline and squirrels near the snow pockets; sitting on a rock, you hear laughs from companions.
Program notes: attend workshops that help you develop technique in cold-season environments; creators from california visit banff for hands-on sessions; that approach creates practical skills you can apply anywhere, while staying safe. The goal: visit with a purpose, capture magical textures, and leave with a vibrant finishing touch to your work; a mindful habit helps during a mire of weather, when you sit or stand, and still laugh at the absurdities of documenting in a snow-blasted world. The lower light of dawn reduces contrast; unless you bracket, you risk blown highlights. The compiled collection, produced over tests and trials, can be shared across a global network that spans the world, including those islands and petersburgs, if you want to reach a broader audience.
| 양상 | 지침 | 노트 |
|---|---|---|
| 액세스 | Icefields Parkway, Lake Louise corridor; plan around dawn; monitor weather and road status; shuttle options available | Parking fills quickly; consider arriving early |
| Gear | Tripod, remote shutter, wide-to-telephoto range, spare batteries kept warm, microspikes, warm gloves | Condensation and battery loss are common in cold |
| 안전 | Avalanche awareness; stay on marked trails; carry beacon, shovel, probe | Death risk exists if rules are ignored; inform someone of plan |
| Framing | Foreground interest, leading lines, panoramic sequences, bracketing | Weather shifts rapidly; be prepared to adapt |
Golden Eagle Winter Photography: Habitats, shooting angles, and ethical considerations
Begin with a dedicated hideout along waterways in the banff region and stayed well before dawn. They stayed almost every morning, taking advantage of light and calm air. What you want is a clean line to a perched eagle; the picture taken with a 600mm telephoto from concealment yields detail while staying hidden. extended sittings pay off; mornings bring warm light and gentle shadows. In this landscape, gems lie on cliff ledges and along waterways. Competition to secure the best vantage is real, so wear neutral colors and blend close to rock tones. California habitats offer parallel behavior near watercourses, and arctic zones show similar patterns. If you want a reliable setup, consider a hideout overlooking a regular flight line at first light. having heard from locals about a classic site near banff, you can find the exact location by talking to guides; conny heard about it too and joined the early mornings routine.
Angles should emphasize dynamic wingwork. Position the camera at eye level or slightly below a perch to reveal the arch of the wings; a long lens compresses the landscape while keeping the subject dominant. From a hideout, shoot with a mix of close framing and wider context to tell the scene–what the eagle does in a single flight adds momentum to the sequence. extended bursts work well when the bird banks or lifts; aim 1/1000s–1/2000s, with ISO adjusted to preserve color in muted cold-season light. mornings and, when possible, blue hour deliver dramatic contrast that reads as instagrammable. If you find yourself chasing a dynamic moment, keep the wildlife at distance and avoid repositioning them; they allow natural behavior to unfold.
Ethical practice centers on distance, respect, and compliance. Maintain a safe distance; never bait or lure, avoid nests during breeding season, respect rules and conditions; later, you can confirm details with park staff. wearing muted camo and moving slowly helps minimize disturbance. The goal is to document behavior without altering it; damage to birds or habitat is unacceptable. If the bird shows agitation, delay the session and withdraw to a safe hideout; your presence should be offering a window into natural behavior, not a source of stress.
Gear and settings: telephoto 300–600mm, tripod or a gimbal, and a sturdy carry setup. Keep extra batteries warm in pockets, and protect lenses from condensation in arctic cool. In california or banff contexts, morning light reveals feather patterns and eye detail; consider a sequence that captures the greatest moments in extended blocks of time. Use a wide aperture only when necessary, otherwise opt for f/7.1–f/9 to balance depth of field with sharpness. If weather shifts, waiting it out yields a dynamic tableau that is instagrammable and educational.
 모스크바 분수 – 고전 조각부터 현대적인 디자인까지">
 에펠탑 조명 – 파리 야간 조명 팁">
 러시아의 가장 놀라운 암석 지형 10곳 – 멋진 사진 갤러리">
 Moscow 2018 – Ultimate Guide to Top Sights, Events, and Culture">
 12 Ingenious Discoveries from a Year of UC Research">
 Moscow Art Nouveau Architectural Ceramics – Tiles, Ornament, and Iconic Buildings">
 Most Scenic Greenhouses to Explore in Moscow">
 Quiet Fishing Spots in Moscow – Best Peaceful Angling Locations for Relaxation">
 Moscow Bridge – History, Architecture, and Visiting Tips">
 Moscow’s Best Swimming Holes – Top Spots for a Refreshing Summer Swim">