

Tenha a sua câmera à mão para uma fotografia impressionante sob a cúpula de um interior emblemático, onde a luz natural e as linhas limpas tornam cada enquadramento fotogénico; o nosso guia de Londres combina estes momentos com mapas para facilitar a planificação.
Em 50 locais, você encontra três rotas temáticas: arquitetura e fachadas ao longo de fileiras, parques serenos e vistas voltadas para o rio. Cada entrada inclui um cartão de dados compacto: endereço exato, pin do mapa mais próximo, melhores horários e dicas práticas, como onde estacionar em ruas laterais e como navegar as condições para as melhores fotos. Essa configuração permite planejar com confiança e nunca perder um momento.
Além dos pontos turísticos óbvios, explore ângulos internos e externos que revelam diferentes atmosferas e tons. Para cada local, mostramos o que fotografar nos bastidores: truques de composição, elementos de fundo e como se adaptar a condições variáveis. Se você perder o horário ideal, mude para uma viela tranquila atrás da rua principal para texturas mais calmas, e ainda assim terá material suficiente para postar diariamente.
Como complemento às imagens, o guia inclui mapas baixáveis que você pode filtrar por humor, luz natural e tons de cor. Os moradores de Londres adoraram essa abordagem porque mantém o plano focado e flexível, ajudando você a ter um fluxo constante de descobertas fotogênicas e opções suficientes para criar posts por semanas.
Itinerário Fotográfico de Londres: 50 Locais Instagrammáveis com Fotos no Mapa
Spot 1: Margem Sul do Rio Tâmisa, desde a Ponte de Hungerford até Westminster. Barcos deslizam pelo Tâmisa enquanto um arco emoldura a vista do rio; o céu permanece limpo para silhuetas nítidas. Capture em três camadas de iluminação—hora azul, luz do dia e crepúsculo quente—e salve uma foto dedicada do mapa para poder abrir o percurso mais tarde.
Spot 2: ruas do Soho ao entardecer. Letreiros de néon e cantinhos aconchegantes criam um estilo animado, com iluminação de lojas que imita cenários de estúdio em espaços apertados. Use um refletor de bolso para suavizar as sombras e marque a curva na foto do seu mapa na Old Compton Street.
Spot 3: fachadas vitorianas ao redor de Whitehall e do Parlamento. Texturas ricas encontram linhas limpas, com detalhes em arco oferecendo profundidade dramática. Defina uma abertura estreita para manter a pedra do primeiro plano e os pináculos distantes nítidos, depois anote no seu mapa a esquina exata.
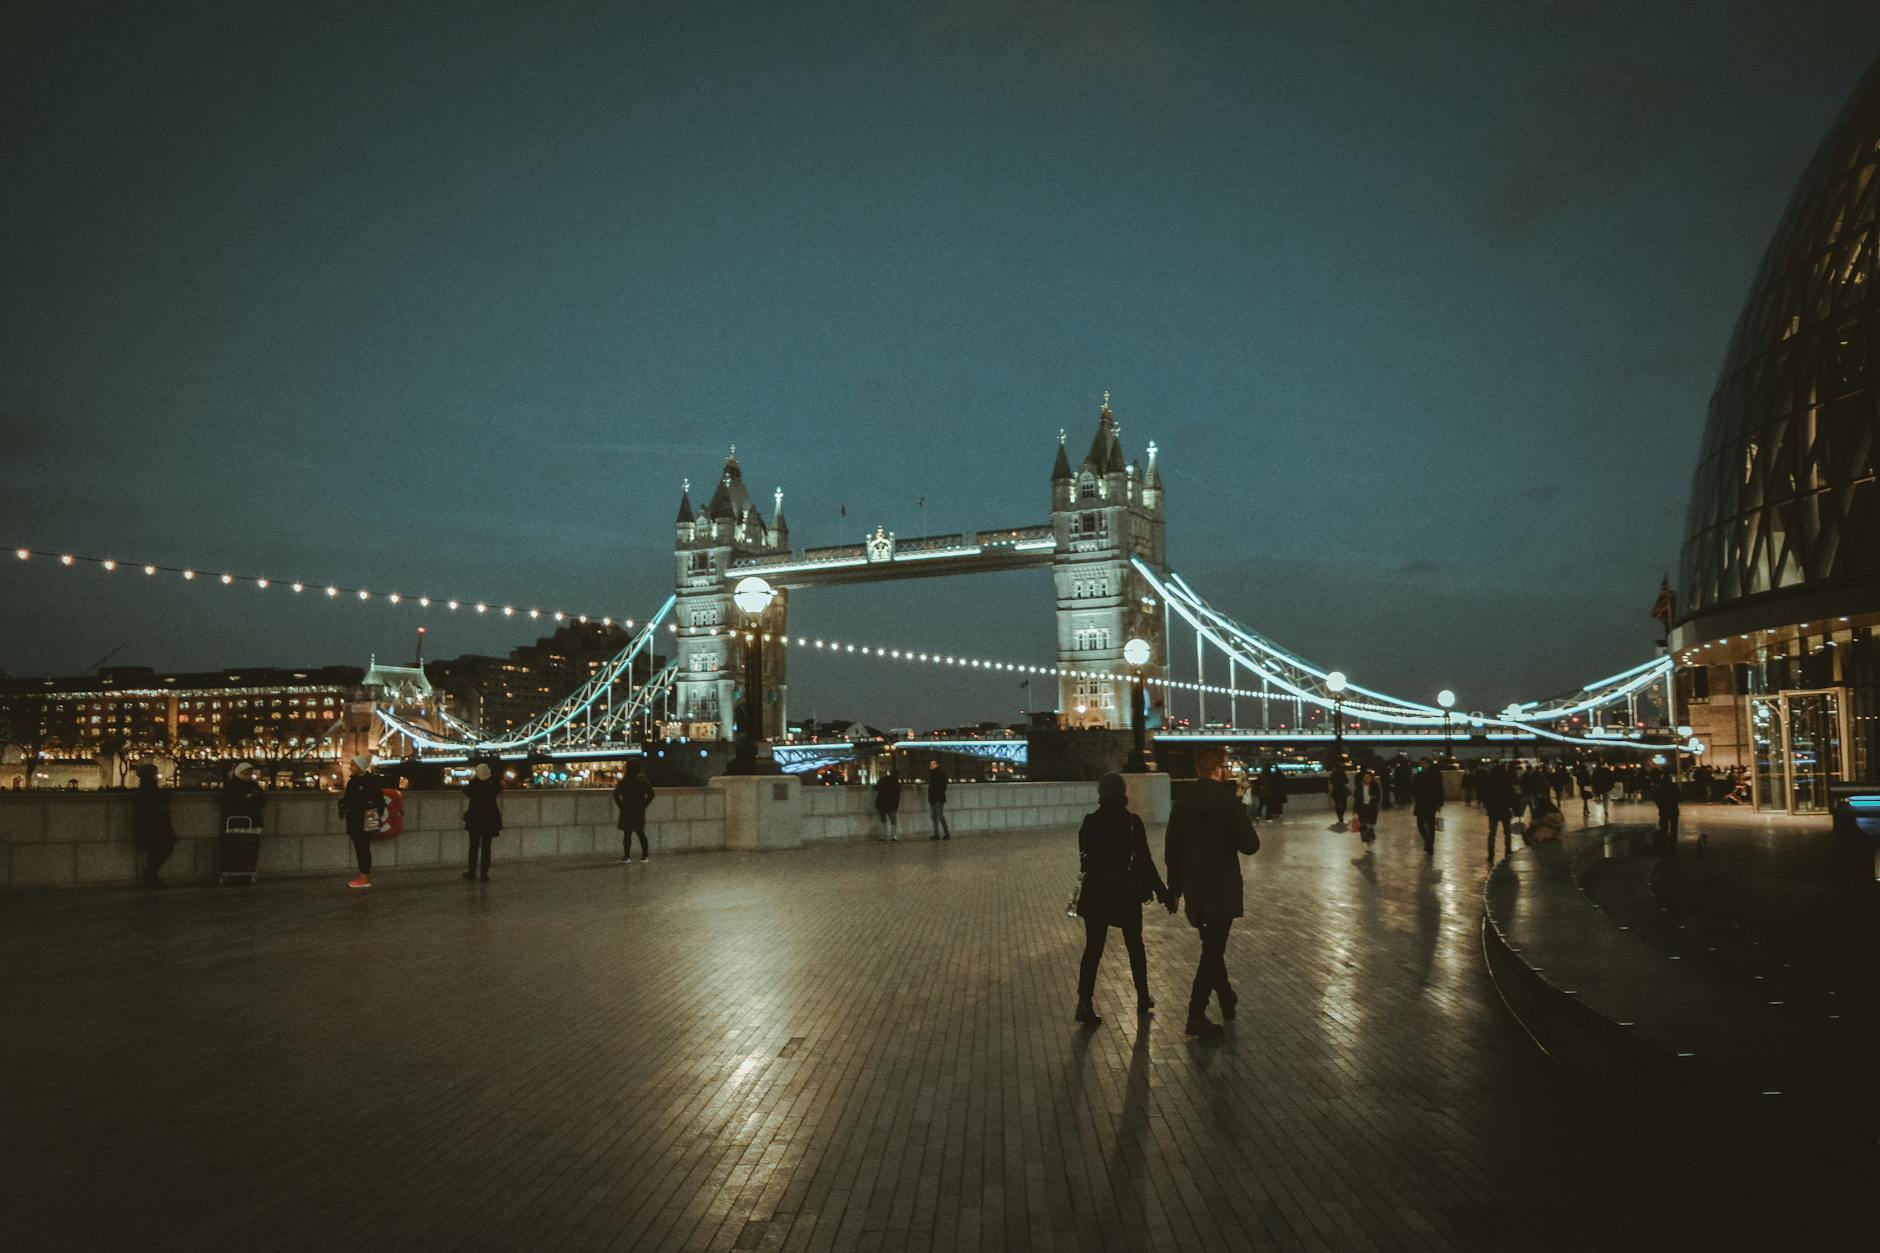
Spot 4: Tower Bridge e a orla do rio. Uma vista panorâmica captura as torres, barcos no Tâmisa e nuvens que se abrem para revelar um céu azul. Tire a foto da margem sul com uma lente grande angular e use a foto do mapa para fixar a sequência para aberturas posteriores.
Spot 5: Greenwich Market e as ruas verdes próximas. Barracas coloridas, flores perfumadas e um pátio aconchegante convidam a enquadramentos íntimos. Varie o comprimento focal de 35mm a 85mm para capturar tanto detalhes próximos quanto o contexto amplo, e marque um ponto no mapa para guiar seu percurso entre as barracas.
Local 6: Interiores dos Churchill War Rooms. Os corredores com iluminação indireta e os tons de madeira criam uma atmosfera silenciosa e de arquivo. Capture as texturas e reflexos discretos, depois registre o local na sua foto do mapa para que as futuras fotos fiquem organizadas.
Ponto 7: Mercado de Covent Garden e artistas de rua. Átrios abertos, arcos de tijolo e buquês de flores coloridas criam molduras dinâmicas. Fotografe com um teleobjetivo moderado para isolar os artistas da multidão e mantenha uma foto do mapa à mão para a próxima curva em direção à praça.
Spot 8: A Catedral de São Paulo a partir da aproximação da Ponte da Millenium. A cúpula domina o horizonte enquanto o caminho do rio ao primeiro plano oferece uma visão em camadas. Use uma lente de médio a longo alcance para comprimir a distância e adicione uma foto do mapa para rastrear seus passos ao longo do caminho do Tâmisa.
Local 9: Notting Hill e Portobello Road. Fachadas coloridas, portas excêntricas e cestas de flores locais criam um clima aconchegante. Trabalhe com luz natural para sombras suaves, depois mude para um enquadramento mais amplo para incluir a vida agitada da rua em um único momento de foto mapa.
Spot 10: Canal e mercados de Camden Town. Paredes com grafites, grades de ferro e água refletora criam um ar urbano. Capture a textura com uma lente de 24-70mm e use uma foto de mapa para marcar sua virada entre as barracas do mercado e a curva do canal.
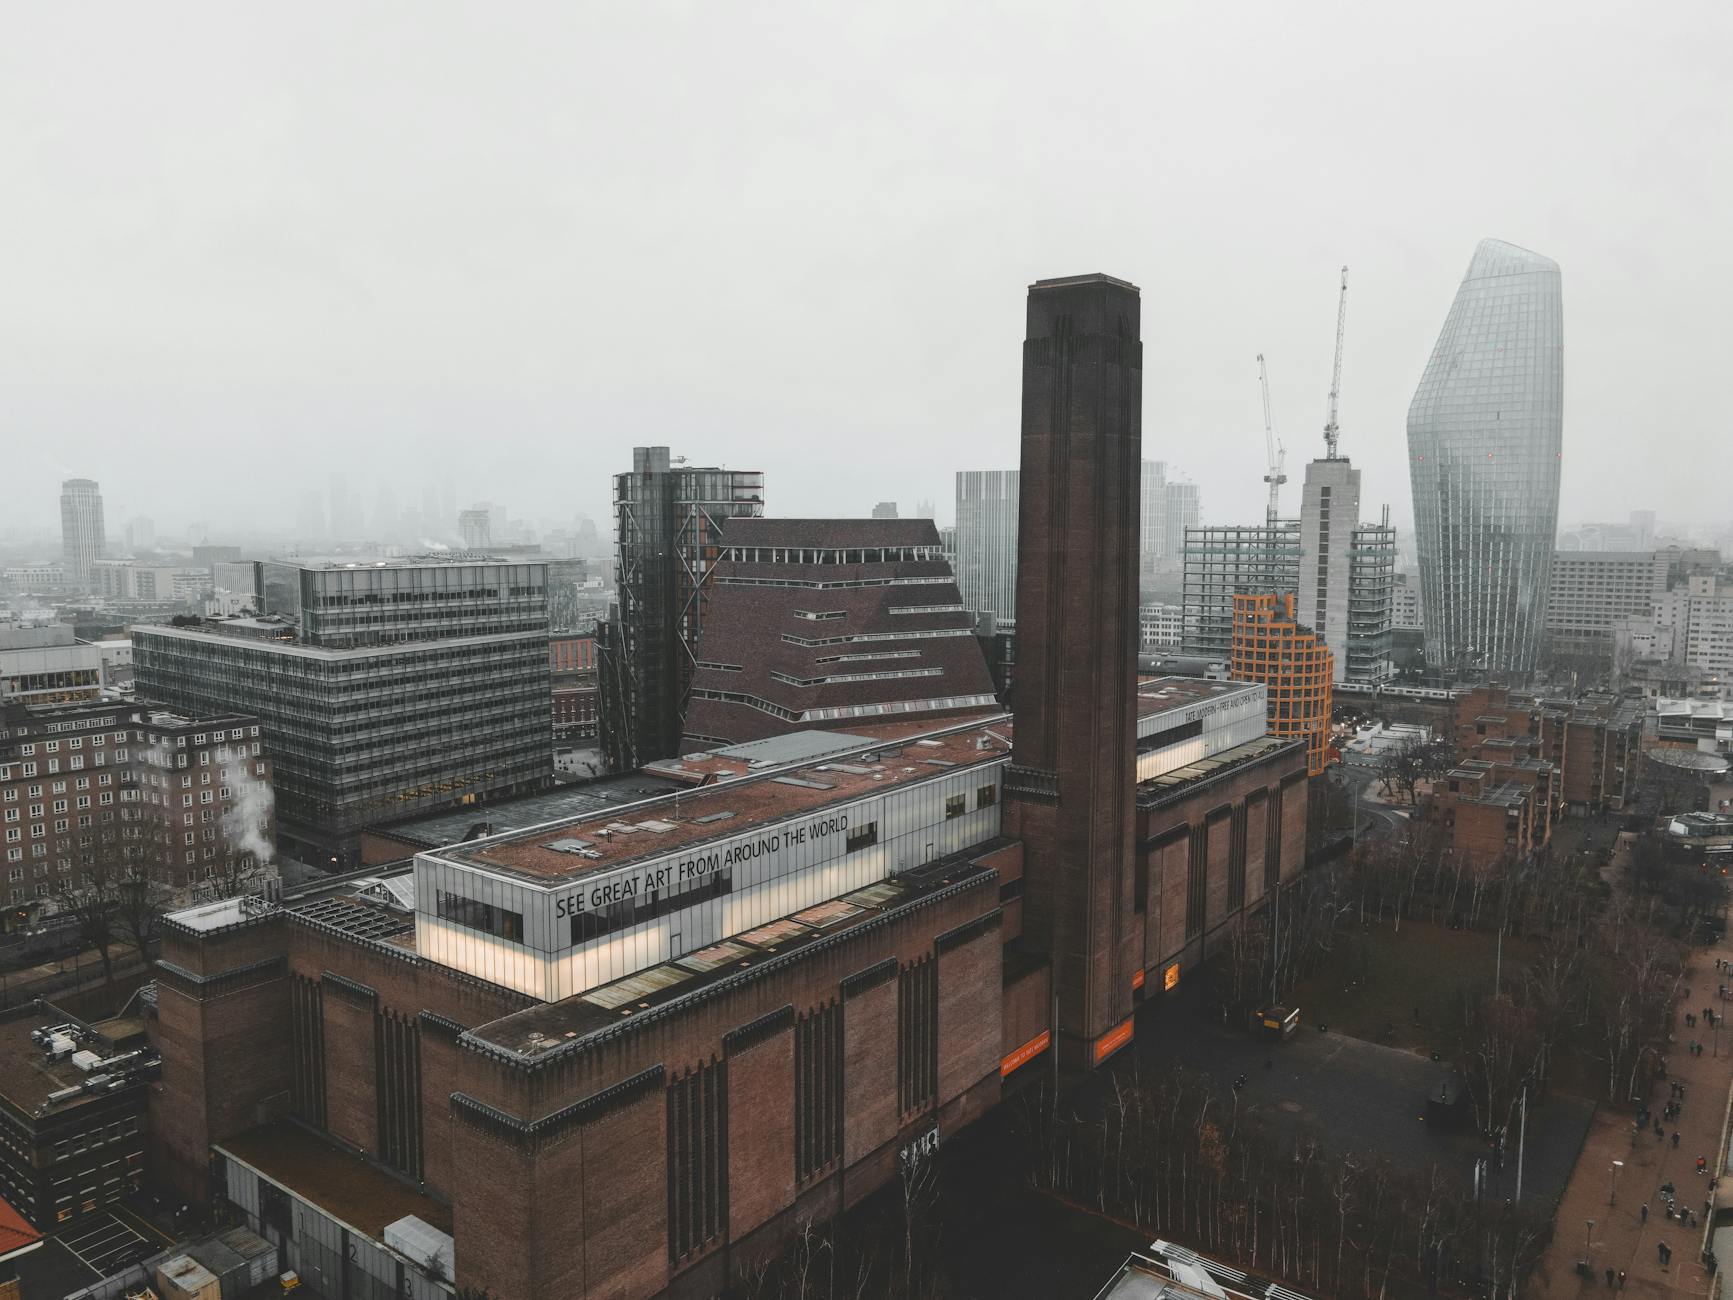
Ponto 11: Bankside, Tate Modern e a caminhada à beira-rio. Silhuetas industriais encontram galerias de vidro sob nuvens em movimento. Fotografe com um ângulo baixo do sol para esculpir contraste em tijolo e aço, e salve uma foto do mapa para manter a sequência fluindo da galeria à beira-rio.
Spot 12: Somerset House e a Strand. Fachadas grandiosas, pátios amplos e buquês de inverno na época conferem um ar refinado e arquivístico. Fotografe através de colunas verticais para criar profundidade, depois insira uma foto final de um mapa que confirme a sequência de abertura do seu roteiro de 50 paradas.
Identifique os locais exatos no mapa da cidade para planejamento rápido
Pin 1 - Fundo de pastel de Belgravia A partir da estação de metrô Sloane Square, saia em Eaton Square e vire em direção a uma escadaria tranquila que leva a uma pequena varanda no terraço para visualizar a luz. As fachadas em tons pastel, janelas e grades de ferro criam um fundo de iluminação; capture linhas de telhado altas com uma vista distante do parque. Mantenha esses ângulos favoritos em mente e ajuste seus tiros em torno da luz sazonal. Se você está planejando um mapa apertado, este pin vai primeiro. Se você quer precisão, adicione este como localização base para sua rota e espere transferências suaves entre os pontos próximos ao metrô.
Pino 2 - Hillgate e borda leste do parque Saia da estação de metrô Notting Hill Gate e caminhe em direção à Hillgate Street, onde uma parede colorida pastel encontra a borda leste de um parque tranquilo. Fique em frente a uma fileira de casas brancas para enquadrar as linhas da rua e as árvores do parque. O local oferece uma parada rápida para seu planejamento, e você pode pegar um café por perto, ou coppa, antes do próximo clique.
Pino 3 - Estúdio Whitestone vantage Encontre o bloco do estúdio Whitestone a poucos passos do Hillgate; as janelas dão para um pátio tranquilo. Você pode chegar a este local a partir do metrô pelas linhas Central ou Circle e sair em direção à porta do estúdio. O fundo mostra uma parede de pastel impecável, perfeita para capturas próximas e uma vista brilhante que parece íntima, mas ampla.
Pin 4 - Vista do terraço em Belgravia Em Belgravia, um terraço escondido oferece uma vista elevada acima das árvores. Caminhe por uma escada curta até o telhado, onde o céu se torna um fundo limpo para suas fotos. As fachadas opostas refletem a mesma luz, proporcionando uma série consistente de capturas de localização para seu planejamento de mapa. A rota liga o distrito central a Belgravia para rápidos acessos ao metrô.
Pin 5 - Paragem da borda leste do parque Na fronteira leste do Hillgate, uma parada simples em uma linha de metrô próxima fornece um sinal de planejamento fácil. A vista do parque aparece através de grandes janelas e um corrimão baixo; você pode sobrepor a imagem com as linhas do mapa para ver distância e tempo. É o seu plano para roteamento rápido no mapa com detalhes próximos e distantes em uma rota.
Melhores horários do dia para cada ponto turístico capturar a luz ideal
Tire fotos de monumentos voltados para o leste ao nascer do sol para capturar uma iluminação suave e quente, além de cores mais profundas; essa abordagem prepara sua câmera para posts vibrantes e detalhes nítidos.
Tower Bridge: tire da margem leste ao nascer do sol, permanecendo nas escadas ao longo do rio. Posicione-se onde as portas das torres emolduram os reflexos do Tâmisa, depois desça mais para manter a água e a vegetação em vista. A iluminação aqui é calma e as cores se destacam quando o céu, encoberto por nuvens, clareia logo após o amanhecer.
Palácio de Buckingham: vá durante a hora dourada pelo lado do Green Park ou pela entrada traseira perto dos jardins. Destaque os acentos em forma de coroa da fachada e os portões de ferro; um ponto de vista baixo acima do gramado realça a simetria, enquanto o ângulo do sol adiciona sombras sutis que dão profundidade às estátuas e à vegetação.
Westminster e Big Ben: vise a hora azul logo após o pôr do sol ou no início do crepúsculo, a partir da parte de trás da área do Parlamento ou ao longo da Westminster Bridge. O céu fresco em contraste com a pedra quente cria cores fortes; use o rio como um espelho natural e escolha um ponto de vista que inclua os pináculos e o tráfego fluvial para contexto.
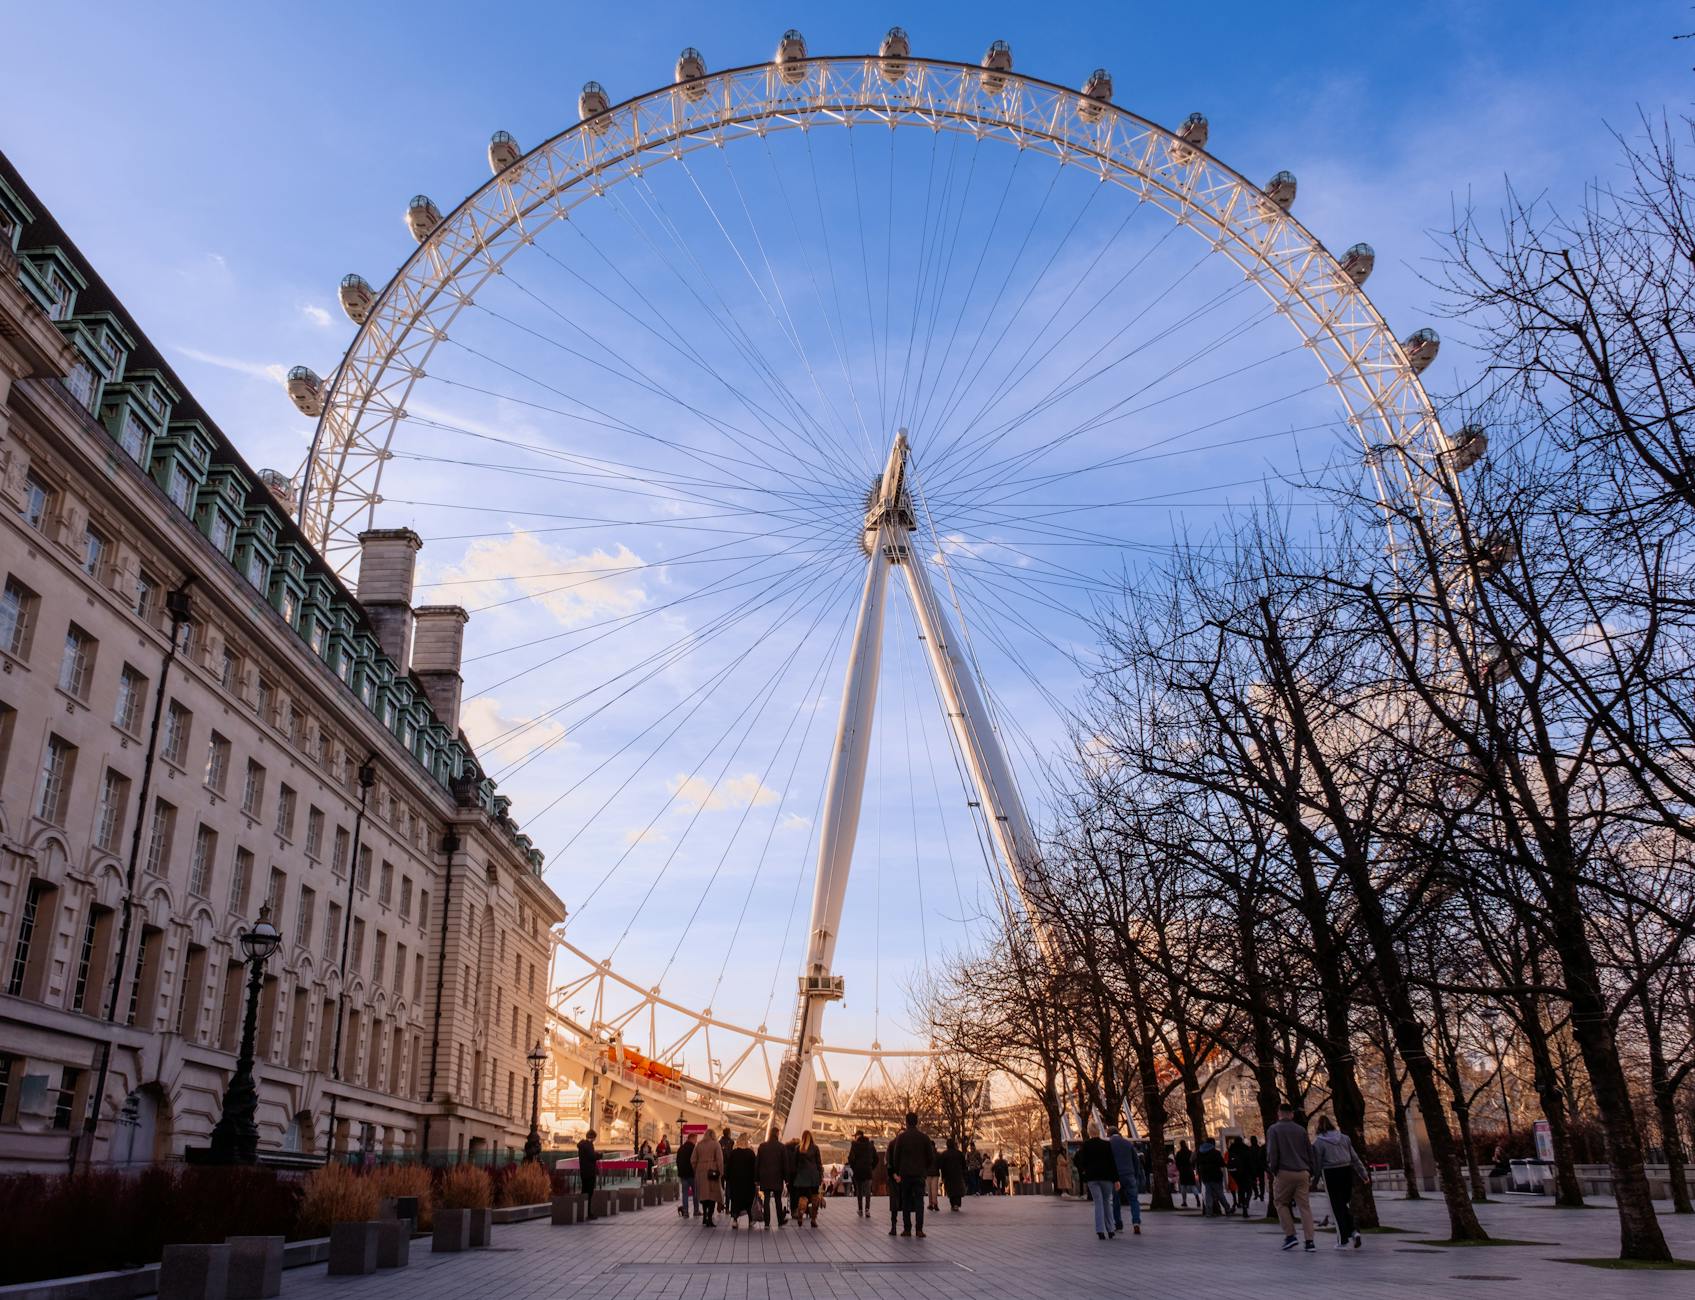
London Eye: melhor durante a hora azul no South Bank, com a roda como um primeiro plano ousado. Caminhe um pouco para leste ou oeste para encontrar um local onde as cápsulas brilham e o rio reflete as luzes da cidade; os ângulos favoritos dos fotógrafos costumam vir de uma posição baixa junto aos corrimãos ou da plataforma perto dos hotéis com vista para o rio.
Carnaby Street e Covent Garden: filme durante a hora dourada, quando as placas e portas brilham contra os tijolos. Um ângulo mais baixo, a partir dos degraus ou escadas perto dos arcos da Carnaby, oferece cores ricas e um clima vibrante de rua; capture o movimento das pessoas como um fundo natural e dinâmico.
O Shard e o Bankside: tire de cima durante a hora azul, quando as luzes dos escritórios e dos estúdios dentro do arranha-céu criam um contraste fantástico com o céu escuro. Procure reflexos no rio e escolha um ponto de vista um pouco acima do nível da rua para enfatizar as linhas verticais e o brilho da cidade; inclua o ritmo tranquilo da Birchin Lane em um quadro mais amplo para equilibrar.
Parque de Greenwich e o horizonte de Canary Wharf: espere pelo pôr do sol, quando o sol desce atrás dos arranha-céus, tingindo o rio em tons de cobre. Do topo da colina, fotografe em direção ao fundo da ilha e a leste em direção ao cais para capturar uma ampla panorâmica com vegetação em primeiro plano e um horizonte brilhante acima. As cores aqui parecem muito mais camadas quando você inclui as árvores do parque e a beira do rio.
Canary Wharf e Bankside: procure a hora azul ao longo do rio, perto de antigos armazéns e hotéis mais recentes. Um ponto de vista ligeiramente elevado revela os blocos empilhados acima da água, enquanto as luzes menores abaixo criam um padrão pontilhado que sua câmera pode capturar com clareza.
Rota otimizada: um itinerário fotográfico prático, passo a passo, para um dia
Comece às 6:15 da manhã na Ponte de Westminster para capturar as primeiras cores sobre o Palácio de Westminster; posicione-se para manter o fundo limpo e o rio como linha de condução, usando uma abertura estreita para detalhes nítidos. Seja para construir um portfólio novo ou compartilhar favoritos, esse ritmo ajuda a manter os resultados claros e úteis para sua carreira.
Dali, caminhe para leste ao longo da South Bank até a Millennium Bridge e o Tate Modern, perseguindo linhas retas, pessoas em movimento e os reflexos que transformam o rio em um espelho natural. Leve um kit compacto da shootfactory e um conjunto de lentes versáteis (24-70 mm) para que você possa se adaptar sem perder o ritmo, e traga um pequeno saquinho de porschens para adicionar um toque de acessório elegante se encontrar o momento.
Em Covent Garden, fotografe os arcos do mercado, os artistas de rua e as galerias de vidro; este é um ponto favorito para muitas fotos postadas porque as texturas, cores de fundo e curvas arquitetônicas oferecem um toque instantâneo de sofisticação. Mantenha o ritmo acelerado para evitar multidões e use uma lente grande angular para enfatizar o espaço na praça de paralelepípedos. Este é um ponto favorito do qual você pode produzir um novo conjunto de fotos sem pensar muito.
Siga em direção ao norte até Notting Hill ao longo da Portobello Road para ruas estreitas e portas coloridas; em abril, as flores e as vitrines sazonais desabrocham, então enquadre cenas com bordas de jardins e fachadas de casas que explodem em cores. Procure uma porta ou um portão que possa servir como um fundo limpo enquanto isola um único assunto em foco raso.
Turno da tarde no Canary Wharf, onde as luzes do Churchill Place se acendem; fotografar os arranha-céus de vidro a partir de um cais que parece quase uma ilha quando a água reflete o horizonte. Um tripé vale a pena para exposições mais longas ao entardecer, e o ritmo das linhas transmite uma sensação de ordem e justiça na composição. Seja com a câmera na mão ou com tripé, mantenha um ritmo constante e um único balanço de branco para coerência.
Termine no Hyde Park ou nos Jardins de Kensington enquanto o sol desce; capture os longos caminhos, o mar de verdes e os buquês sazonais perto dos muros do jardim. Se ainda tiver energia, tire uma última série de retratos ou fotos de detalhes que se conectem aos melhores frames da sua manhã e ajudem sua carreira a crescer.
| Time | Localização | Ideia de Tiro | Notes |
|---|---|---|---|
| 6:15-7:30 | Ponte de Westminster | Parlamento em silhueta com o brilho do rio | Abertura estreita; fundo limpo |
| 7:45-9:15 | Margem Sul para Tate Modern | Reflexões, linhas fortes ao longo do rio | Empacote o equipamento da shootfactory; 24-70 mm |
| 9:30-11:00 | Covent Garden | Arcos, interiores de galerias | Foco em texturas e cores; mantenha o ritmo ágil. |
| 11:45-13:00 | Notting Hill | Ruas estreitas, portas coloridas | Luz de abril; observe as cores e os fundos |
| 14:00-16:00 | Canary Wharf - Churchill Place | Torres de vidro, reflexos | Considere um cais tipo ilha; tripé útil |
| 16:30-18:00 | Hyde Park / Jardins de Kensington | Caminhos do jardim, flores sazonais | Aqui está a tradução: Museu Hermitage (São Petersburgo, Rússia) O Museu Hermitage é um dos maiores e mais importantes museus do mundo, localizado em São Petersburgo, na Rússia. Situado no Palácio de Inverno, o museu abriga uma vasta coleção de arte, história e cultura, incluindo obras de artistas renomados como Rembrandt, Da Vinci e Picasso. Catedral de São Isaac (São Petersburgo, Rússia) A Catedral de São Isaac é uma das principais atrações de São Petersburgo. Com sua impressionante arquitetura e interiores ricamente decorados, a catedral é um marco histórico e religioso da cidade. Praça Vermelha (Moscou, Rússia) A Praça Vermelha, localizada em Moscou, é um dos lugares mais icônicos da Rússia. Cercada por importantes edifícios, como o Kremlin e a Catedral de São Basílio, a praça é um ponto de encontro histórico e cultural. Catedral de São Basílio (Moscou, Rússia) A Catedral de São Basílio, com suas cúpulas coloridas e design único, é um símbolo de Moscou. Localizada na Praça Vermelha, a catedral é um exemplo impressionante da arquitetura russa. Rua Nevsky (São Petersburgo, Rússia) A Rua Nevsky é a principal via de São Petersburgo, conhecida por suas lojas, cafés e edifícios históricos. É um dos locais mais movimentados e vibrantes da cidade. Kremlin (Moscou, Rússia) O Kremlin é um complexo fortificado no centro de Moscou, que abriga importantes edifícios governamentais, museus e a Catedral de São Basílio. É um dos símbolos mais reconhecidos da Rússia. Palácio de Inverno (São Petersburgo, Rússia) O Palácio de Inverno, localizado em São Petersburgo, é um dos edifícios mais famosos da Rússia. Atualmente, abriga parte do Museu Hermitage e é um marco histórico da cidade. Catedral de Cristo Salvador (Moscou, Rússia) A Catedral de Cristo Salvador é uma das maiores igrejas ortodoxas do mundo, localizada em Moscou. Sua arquitetura grandiosa e importância religiosa a tornam um dos principais pontos turísticos da cidade. Teatro Bolshoi (Moscou, Rússia) O Teatro Bolshoi, em Moscou, é um dos teatros mais famosos do mundo, conhecido por suas apresentações de balé e ópera. É um símbolo da cultura russa. Estação de Trem de Moscou (Moscou, Rússia) A Estação de Trem de Moscou é um dos principais terminais ferroviários da cidade, conectando Moscou a outras partes da Rússia e do mundo. Parque Gorki (Moscou, Rússia) O Parque Gorki, em Moscou, é um dos parques mais populares da cidade, oferecendo áreas verdes, atividades ao ar livre e eventos culturais. Rua Arbat (Moscou, Rússia) A Rua Arbat é uma das ruas mais antigas e charmosas de Moscou, conhecida por suas lojas, restaurantes e artistas de rua. Museu Pushkin (Moscou, Rússia) O Museu Pushkin, localizado em Moscou, é um dos principais museus de arte da Rússia, com uma vasta coleção de obras europeias e russas. Catedral de Kazan (Moscou, Rússia) A Catedral de Kazan, em Moscou, é uma igreja ortodoxa dedicada à Nossa Senhora de Kazan. Sua arquitetura neoclássica e importância histórica a tornam um ponto turístico importante. Teatro Maly (Moscou, Rússia) O Teatro Maly, em Moscou, é um dos teatros mais antigos e renomados da Rússia, conhecido por suas apresentações de drama e ópera. Praça Pushkin (Moscou, Rússia) A Praça Pushkin, em Moscou, é uma praça central da cidade, cercada por edifícios históricos e pontos turísticos. Rua Tverskaya (Moscou, Rússia) A Rua Tverskaya é uma das principais vias de Moscou, conhecida por suas lojas de luxo, restaurantes e edifícios históricos. Museu de Belas Artes de Moscou (Moscou, Rússia) O Museu de Belas Artes de Moscou é um dos principais museus de arte da cidade, com uma vasta coleção de obras russas e internacionais. Catedral de São Pedro e São Paulo (São Petersburgo, Rússia) A Catedral de São Pedro e São Paulo, em São Petersburgo, é uma das igrejas mais antigas da cidade, conhecida por sua arquitetura barroca e importância histórica. Palácio de Catarina (São Petersburgo, Rússia) O Palácio de Catarina, localizado em São Petersburgo, é um dos palácios mais famosos da Rússia, conhecido por sua grandiosidade e decoração luxuosa. Jardim de Verão (São Petersburgo, Rússia) O Jardim de Verão, em São Petersburgo, é um dos parques mais antigos e bonitos da cidade, oferecendo áreas verdes e monumentos históricos. Rua Fontanka (São Petersburgo, Rússia) A Rua Fontanka é uma das principais vias de São Petersburgo, conhecida por seus canais, pontes e edifícios históricos. Museu Russo (São Petersburgo, Rússia) O Museu Russo, em São Petersburgo, é um dos principais museus de arte russa, com uma vasta coleção de obras de artistas russos. Catedral de Nossa Senhora de Kazan (São Petersburgo, Rússia) A Catedral de Nossa Senhora de Kazan, em São Petersburgo, é uma igreja ortodoxa dedicada à Nossa Senhora de Kazan, conhecida por sua arquitetura neoclássica. Teatro Mariinsky (São Petersburgo, Rússia) O Teatro Mariinsky, em São Petersburgo, é um dos teatros mais famosos do mundo, conhecido por suas apresentações de balé e ópera. Praça do Palácio (São Petersburgo, Rússia) A Praça do Palácio, em São Petersburgo, é uma das praças mais importantes da cidade, localizada em frente ao Palácio de Inverno. Rua Sadovaya (São Petersburgo, Rússia) A Rua Sadovaya é uma das principais vias de São Petersburgo, conhecida por suas lojas, cafés e edifícios históricos. Museu de Arte Moderna de São Petersburgo (São Petersburgo, Rússia) O Museu de Arte Moderna de São Petersburgo é um dos principais museus de arte contemporânea da cidade, com uma vasta coleção de obras russas e internacionais. Catedral de São Nicolau (São Petersburgo, Rússia) A Catedral de São Nicolau, em São Petersburgo, é uma igreja ortodoxa conhecida por sua arquitetura e importância histórica. Teatro Alexandrinsky (São Petersburgo, Rússia) O Teatro Alexandrinsky, em São Petersburgo, é um dos teatros mais antigos e renomados da Rússia, conhecido por suas apresentações de drama e ópera. Praça da Vitória (São Petersburgo, Rússia) A Praça da Vitória, em São Petersburgo, é uma das praças mais importantes da cidade, conhecida por seus monumentos e eventos históricos. Rua Ligovsky (São Petersburgo, Rússia) A Rua Ligovsky é uma das principais vias de São Petersburgo, conhecida por suas lojas, restaurantes e edifícios históricos. Museu de História de São Petersburgo (São Petersburgo, Rússia) O Museu de História de São Petersburgo, em São Petersburgo, é um dos principais museus de história da cidade, com uma vasta coleção de artefatos e documentos históricos. Catedral de São Alexandre Nevsky (São Petersburgo, Rússia) A Catedral de São Alexandre Nevsky, em São Petersburgo, é uma das igrejas mais importantes da cidade, conhecida por sua arquitetura e importância religiosa. Teatro Mikhailovsky (São Petersburgo, Rússia) O Teatro Mikhailovsky, em São Petersburgo, é um dos teatros mais famosos do mundo, conhecido por suas apresentações de balé e ópera. Praça do Senado (São Petersburgo, Rússia) A Praça do Senado, em São Petersburgo, é uma das praças mais importantes da cidade, localizada em frente ao Palácio de Inverno. Rua Griboyedov (São Petersburgo, Rússia) A Rua Griboyedov é uma das principais vias de São Petersburgo, conhecida por suas lojas, cafés e edifícios históricos. Museu de Arte Ermitage (São Petersburgo, Rússia) O Museu de Arte Ermitage, em São Petersburgo, é um dos maiores e mais importantes museus do mundo, localizado no Palácio de Inverno. Catedral de São Isaac (São Petersburgo, Rússia) A Catedral de São Isaac, em São Petersburgo, é uma das principais atrações da cidade, conhecida por sua arquitetura e importância histórica. Praça Vermelha (Moscou, Rússia) A Praça Vermelha, em Moscou, é um dos lugares mais icônicos da Rússia, cercada por importantes edifícios como o Kremlin e a Catedral de São Basílio. Catedral de São Basílio (Moscou, Rússia) A Catedral de São Basílio, em Moscou, é um símbolo da cidade, conhecida por suas cúpulas coloridas e design único. Rua Nevsky (São Petersburgo, Rússia) A Rua Nevsky, em São Petersburgo, é a principal via da cidade, conhecida por suas lojas, cafés e edifícios históricos. Kremlin (Moscou, Rússia) O Kremlin, em Moscou, é um complexo fortificado que abriga importantes edifícios governamentais, museus e a Catedral de São Basílio. Palácio de Inverno (São Petersburgo, Rússia) O Palácio de Inverno, em São Petersburgo, é um dos edifícios mais famosos da Rússia, atualmente abriga parte do Museu Hermitage. Catedral de Cristo Salvador (Moscou, Rússia) A Catedral de Cristo Salvador, em Moscou, é uma das maiores igrejas ortodoxas do mundo, conhecida por sua arquitetura grandiosa. Teatro Bolshoi (Moscou, Rússia) O Teatro Bolshoi, em Moscou, é um dos teatros mais famosos do mundo, conhecido por suas apresentações de balé e ópera. Estação de Trem de Moscou (Moscou, Rússia) A Estação de Trem de Moscou, em Moscou, é um dos principais terminais ferroviários da cidade. Parque Gorki (Moscou, Rússia) O Parque Gorki, em Moscou, é um dos parques mais populares da cidade, oferecendo áreas verdes e eventos culturais. Rua Arbat (Moscou, Rússia) A Rua Arbat, em Moscou, é uma das ruas mais antigas e charmosas da cidade, conhecida por suas lojas e artistas de rua. Museu Pushkin (Moscou, Rússia) O Museu Pushkin, em Moscou, é um dos principais museus de arte da Rússia, com uma vasta coleção de obras europeias e russas. Catedral de Kazan (Moscou, Rússia) A Catedral de Kazan, em Moscou, é uma igreja ortodoxa dedicada à Nossa Senhora de Kazan, conhecida por sua arquitetura neoclássica. Teatro Maly (Moscou, Rússia) O Teatro Maly, em Moscou, é um dos teatros mais antigos e renomados da Rússia, conhecido por suas apresentações de drama e ópera. Praça Pushkin (Moscou, Rússia) A Praça Pushkin, em Moscou, é uma praça central da cidade, cercada por edifícios históricos e pontos turísticos. Rua Tverskaya (Moscou, Rússia) A Rua Tverskaya, em Moscou, é uma das principais vias da cidade, conhecida por suas lojas de luxo e edifícios históricos. Museu de Belas Artes de Moscou (Moscou, Rússia) O Museu de Belas Artes de Moscou, em Moscou, é um dos principais museus de arte da cidade, com uma vasta coleção de obras russas e internacionais. Catedral de São Pedro e São Paulo (São Petersburgo, Rússia) A Catedral de São Pedro e São Paulo, em São Petersburgo, é uma das igrejas mais antigas da cidade, conhecida por sua arquitetura barroca. Palácio de Catarina (São Petersburgo, Rússia) O Palácio de Catarina, em São Petersburgo, é um dos palácios mais famosos da Rússia, conhecido por sua grandiosidade e |
Destaque para 43 Stanley Crescent Colville Houses: ângulos e pontos de entrada
Comece com um movimento simples: espere sentir o ritmo fotografando a fachada leste ao nascer do sol; isso mantém as tonalidades pastel na pedra vivas e ajuda as vitrines a se destacarem ao longo do eixo do mercado Carnaby. O quarteirão tem encantado os moradores há meses, eles adoraram a forma como a luz toca as bordas de fanal e de primaveras, um vislumbre do que seu público vai capturar.
- Entrada frontal: Enquadre a porta com o ângulo ao nível do solo; deixe que a janela saliente do primeiro andar atraia o olhar; mantenha uma fatia da rua para ancorar o contexto.
- Porta lateral e viela: Posicione-se a uma altura média para revelar vestígios de andaimes, a ferragem e uma luz de fanal ao longe; isso conta a resiliência do edifício pós-guerra.
- Cena do pátio: Mova-se para dentro do pátio para capturar as paredes de pedra, um canteiro de primaveras em flor e um pequeno arbusto; uma profundidade de campo rasa faz a porta destacar-se.
- Escadaria rítmica: Do interior, olhe ao longo do corredor em direção à escada; a luz do dia sobre a pedra devolve elegância e um senso de movimento.
- Luz exterior no final do dia: Volte para a fachada com uma lente mais longa; o calor do final da tarde enriquece as tonalidades pastel e destaca as lojas em frente ao mercado.
- Campos e fundo: Se puder recuar para uma vista mais ampla, inclua os campos além do portão; isso adiciona escala e profundidade ao seu retrato de rua.
- Venda e etiqueta: Não obstrua a calçada; respeite os moradores, obtenha consentimento para fotos internas e mantenha o barulho ao mínimo.
Equipamento e técnica: leve tanto um telefone quanto uma câmera compacta para capturar imagens rápidas; faça exposições em escada para equilibrar as texturas da pedra, depois alinhe-as posteriormente para criar uma grade coesa que transmita o charme autêntico do Stanley Crescent.
Dicas para acesso, etiqueta e permissões locais para fotografia
Obtenha permissão por escrito com duas semanas de antecedência do gerente ou curador do local para qualquer espaço que pretenda fotografar, incluindo estúdios internos, jardins e pátios públicos; especifique as datas, zonas e equipamentos que pretende utilizar, como um tripé. Para locais emblemáticos como a Tate, entre em contacto com a equipa de autorizações da galeria e confirme se a fotografia é permitida em salas específicas ou durante determinadas horas.
Respeite o protocolo: chegue com uma saudação amigável, apresente-se à equipe e mantenha as conversas breves; como a equipe conhece bem os espaços, pergunte sobre os horários mais tranquilos e rotas para evitar áreas movimentadas. Se planeja fotografar pessoas, garanta as liberações para as capturadas e esteja preparado para desfocar rostos para conformidade. Para interiores privados, obtenha a permissão necessária e, para trabalhos comerciais, documente os planos de uso e obtenha qualquer consentimento separado mencionado na sua autorização.
Escolha o horário para obter as melhores cores e luzes pitorescas, evitando multidões: sessões matinais ou ao pôr do sol proporcionam tons quentes. Se explorar grandes espaços internos ou áreas orientais, verifique se precisa de acesso especial ou de um corredor dedicado para evitar interrupções. Verifique abaixo da entrada por restrições divulgadas e siga qualquer sinalização.
Equipamento e fluxo de trabalho: leve um kit leve e uma lente flexível que cubra a maioria das fotos, tornando a fotografia moderna eficiente em dias movimentados. Para locais que permitem, um tripé compacto ajuda a capturar texturas estáveis sem bloquear passagens; sempre siga as orientações da equipe e mantenha seu impacto mínimo. Ângulos favoritos costumam vir de cantos tranquilos, então marque-os no seu plano para capturar cor e grandiosidade. Se você fotografar perto da área do Tate ou outros espaços movimentados com grandes programas públicos, planeje rotas alternativas para manter o dia suave e respeitoso.

