

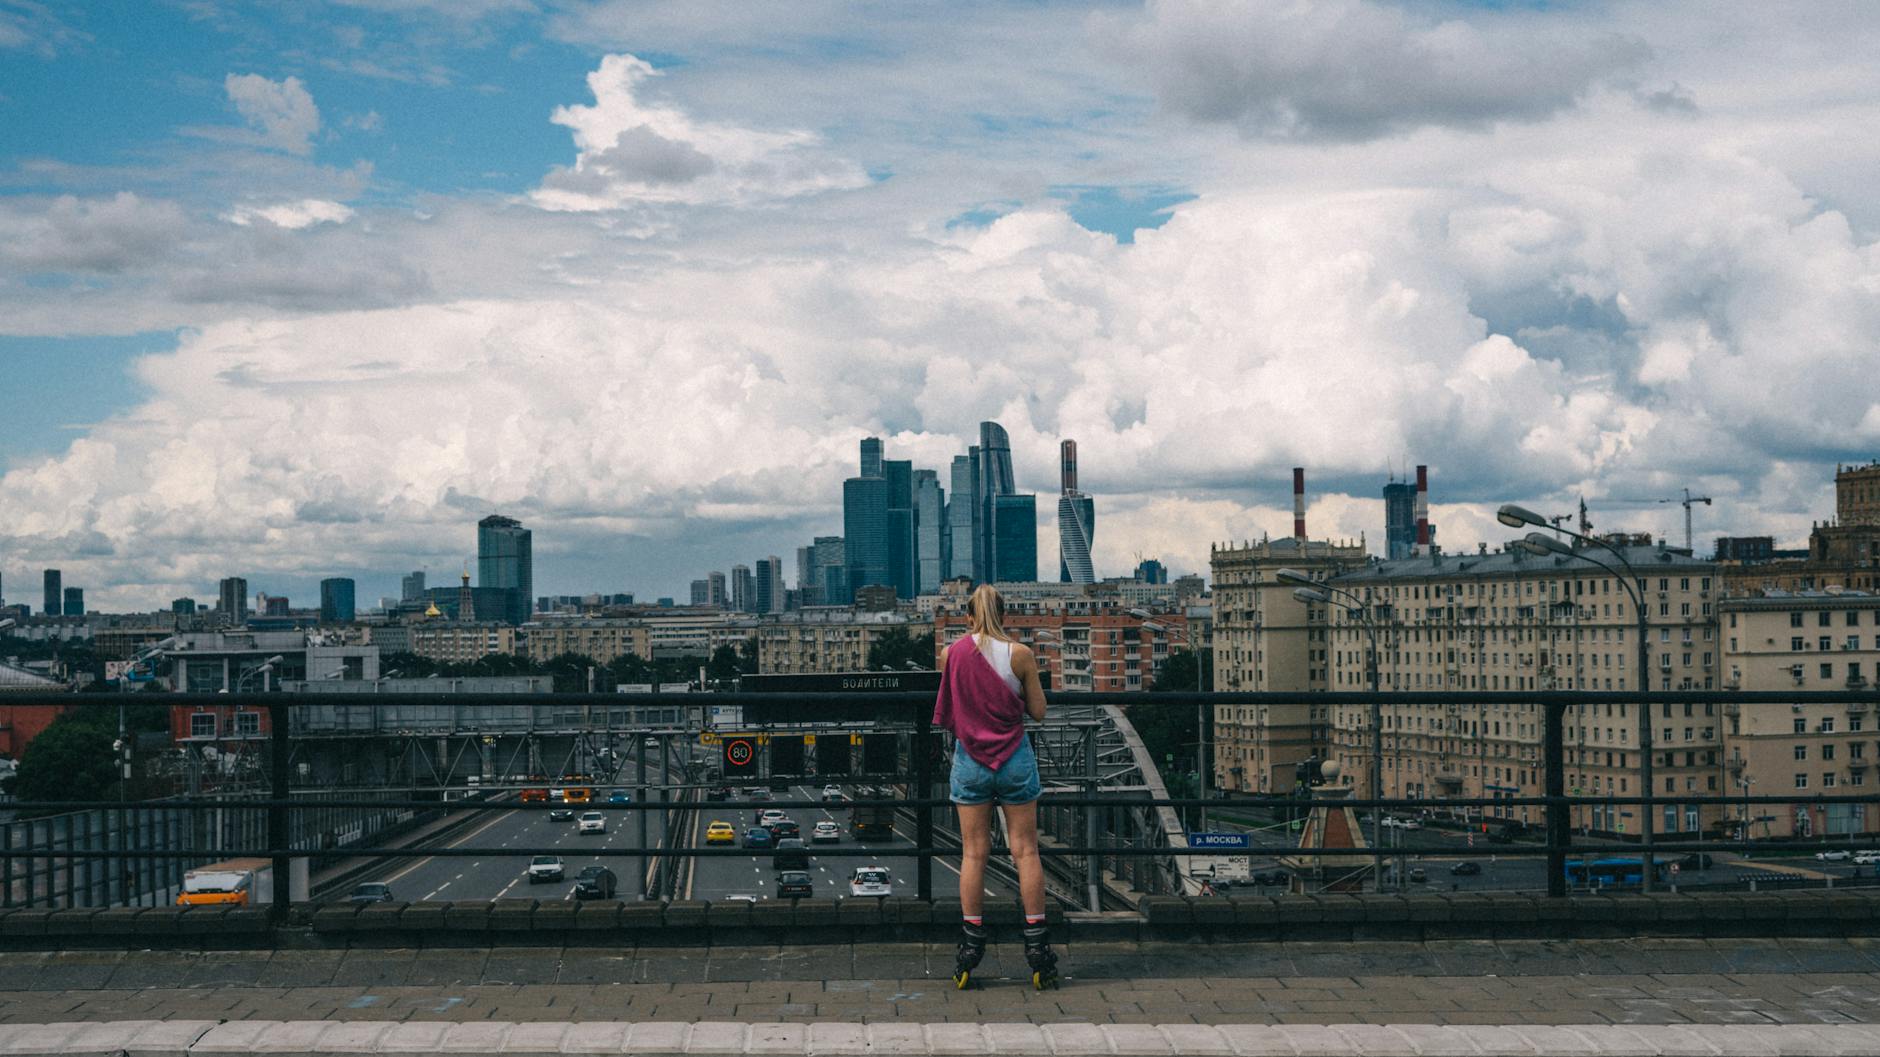
Commencez par le mirador d'Alfama à l'heure dorée pour ancrer votre parcours visuel. De là, la capitale portugaise sur le Tage révèle des façades de carreaux roses et des collines qui s'élèvent derrière une maison simple. Soyez patient ; le premier cadre doit sembler définitif et intentionnel, pas précipité.
Parcourez les quartiers de Baixa, Chiado, Graça et Estrela le long des rues animées, puis montez vers les points de vue élevés pour des contrastes d'échelle. Dans chaque quartier, vous trouverez de multiples textures : des panneaux d'azulejos, des balcons et des escaliers qui racontent des siècles de vie quotidienne sans crier les clichés. Lorsque vous légendez, mentionnez les noms des quartiers pour donner du contexte.
Restez près du front de mer à côté du Cais do Sodré et regardez la lumière glisser sur l'eau, contrastant le stuc blanc avec les toits roses. La brise côtière apporte un mouvement naturel aux cadres alors que les bateaux dérivent ; l'ambiance peut être impressionnante même dans la foule.
Quand la lumière change, remarquez comment les tons havane s'épanouissent sur les carreaux et le plâtre. Les petites cours et la manière dont les cloisons des escaliers projettent des ombres racontent une histoire sans gestes bruyants. Concentrez-vous sur la façon dont une seule façade de maison capte le soleil, puis se fond en motifs sur le cadre suivant.
Pour élargir votre perception des lieux, comparez le rythme ici avec les ruelles bondées de Mumbai, les marchés du Guatemala ou les fjords aperçus dans des paysages lointains. De telles références vous empêchent de reproduire des angles familiers et vous incitent à créer une série d'images plus personnelle à travers les villes et les quartiers.
La patience et une touche légère avec le matériel vous aident à rester fidèle à la lumière. Sans vous précipiter, vous pouvez découvrir des silhouettes subtiles, des portes et des fenêtres qui se composent en une narration à travers plusieurs moments.
Revenez à l'heure bleue pour prolonger l'arc : vous verrez un changement naturel de couleur à travers les carreaux, les rails de fer et les reflets du port. Dans ce calme, les espaces entre les quartiers révèlent une méthode personnelle plutôt qu'un portrait générique de cette capitale côtière.
Mes 10 Endroits Préférés pour la Photographie de Rue à Lisbonne et Guide des Souks du Maroc
Les ruelles d'Alfama baignées de la lumière de l'aube : commencez ici ; ce qu'il faut chercher, c'est la lumière qui se déverse sur les escaliers et les murs blancs. Les ruelles orientées au nord offrent des occasions évidentes pour photographier la vie quotidienne, tandis que les femmes sur les balcons apportent une touche élégante de couleur. Cela devient rapidement l'un de mes préférés.
Baixa-Chiado autour de la Praça do Comércio : de larges avenues et des façades en granit créent une géométrie épurée ; photographiez à travers la place tandis que les tramways grincent et que les voitures circulent sur la route. Que vous photographiez en grand angle ou en gros plan, vous trouverez des favoris dans les lignes marquées et les portraits près des vendeurs de rue.
3) Les ruelles aux azulejos de Mouraria : rues nommées, virages serrés et traditions locales ; photographier ici révèle des histoires humaines et des femmes vendant des artisanats. Ce quartier est un terrain idéal pour des aventures à travers des coins ensoleillés et ombragés ; les poses longues aident à flouter les passants tandis que les carreaux encadrent la scène.
4) Graça et Senhora do Monte surplombent : des terrasses élégantes encadrent la ville ; les points de vue au nord permettent d'observer les toits, offrant des contrastes marqués à associer aux scènes de rue.
5) Les textures de LX Factory : un quartier industriel avec des murs en brique, des fresques murales et de petits studios ; cet endroit offre des opportunités de gros plans sur les enseignes, la mode et la vie de rue. Soyez attentif à la brise du fleuve qui fait ressortir les couleurs.
6) Le quartier du Time Out Market et les promenades adjacentes le long de la rivière : on y voit des locaux et des visiteurs se mêler près des stands ; cette zone se prête aux clichés rapides et spontanés ainsi qu'aux ombres dramatiques sous le soleil de l'après-midi. Un lieu idéal pour les contrastes entre les gens et l'architecture.
7) Marché aux puces de Feira da Ladra : textures et portraits parmi les étals de brocante ; le rythme est évident - tentes, pièces de monnaie, écharpes - offrant de nombreuses découvertes utiles pour montrer les questions d'argent et le commerce quotidien. Photographier ici fait le lien entre les traditions anciennes et nouvelles.
8) Itinéraire du tram 28 à travers les collines de Graça et de Baixa : la route serpente entre les piétons et les voitures ; capturez le mouvement avec un temps de pose lent, ou cadrez les passagers descendant aux arrêts. Cette ligne emblématique est un test pour le timing et la composition, que vous photographiez des images fixes ou des actions.
9) Le front de mer de Belém et ses monuments : les reflets de l'eau s'associent à la tour et aux arbres du rivage ; cette zone convient bien aux longues expositions et aux portraits avec un point focal. Si vous rêvez de cascades, prévoyez une excursion à Madère pour comparer les ambiances au-delà de la côte.
10) Les jardins du Príncipe Real et les ruelles adjacentes : les scènes nocturnes brillent de néons et de lanternes ; des coins tranquilles offrent des espaces pour des positions de prise de vue élégantes, et vous verrez des locaux se promener, des couples discuter, et des visiteurs errer après le coucher du soleil.
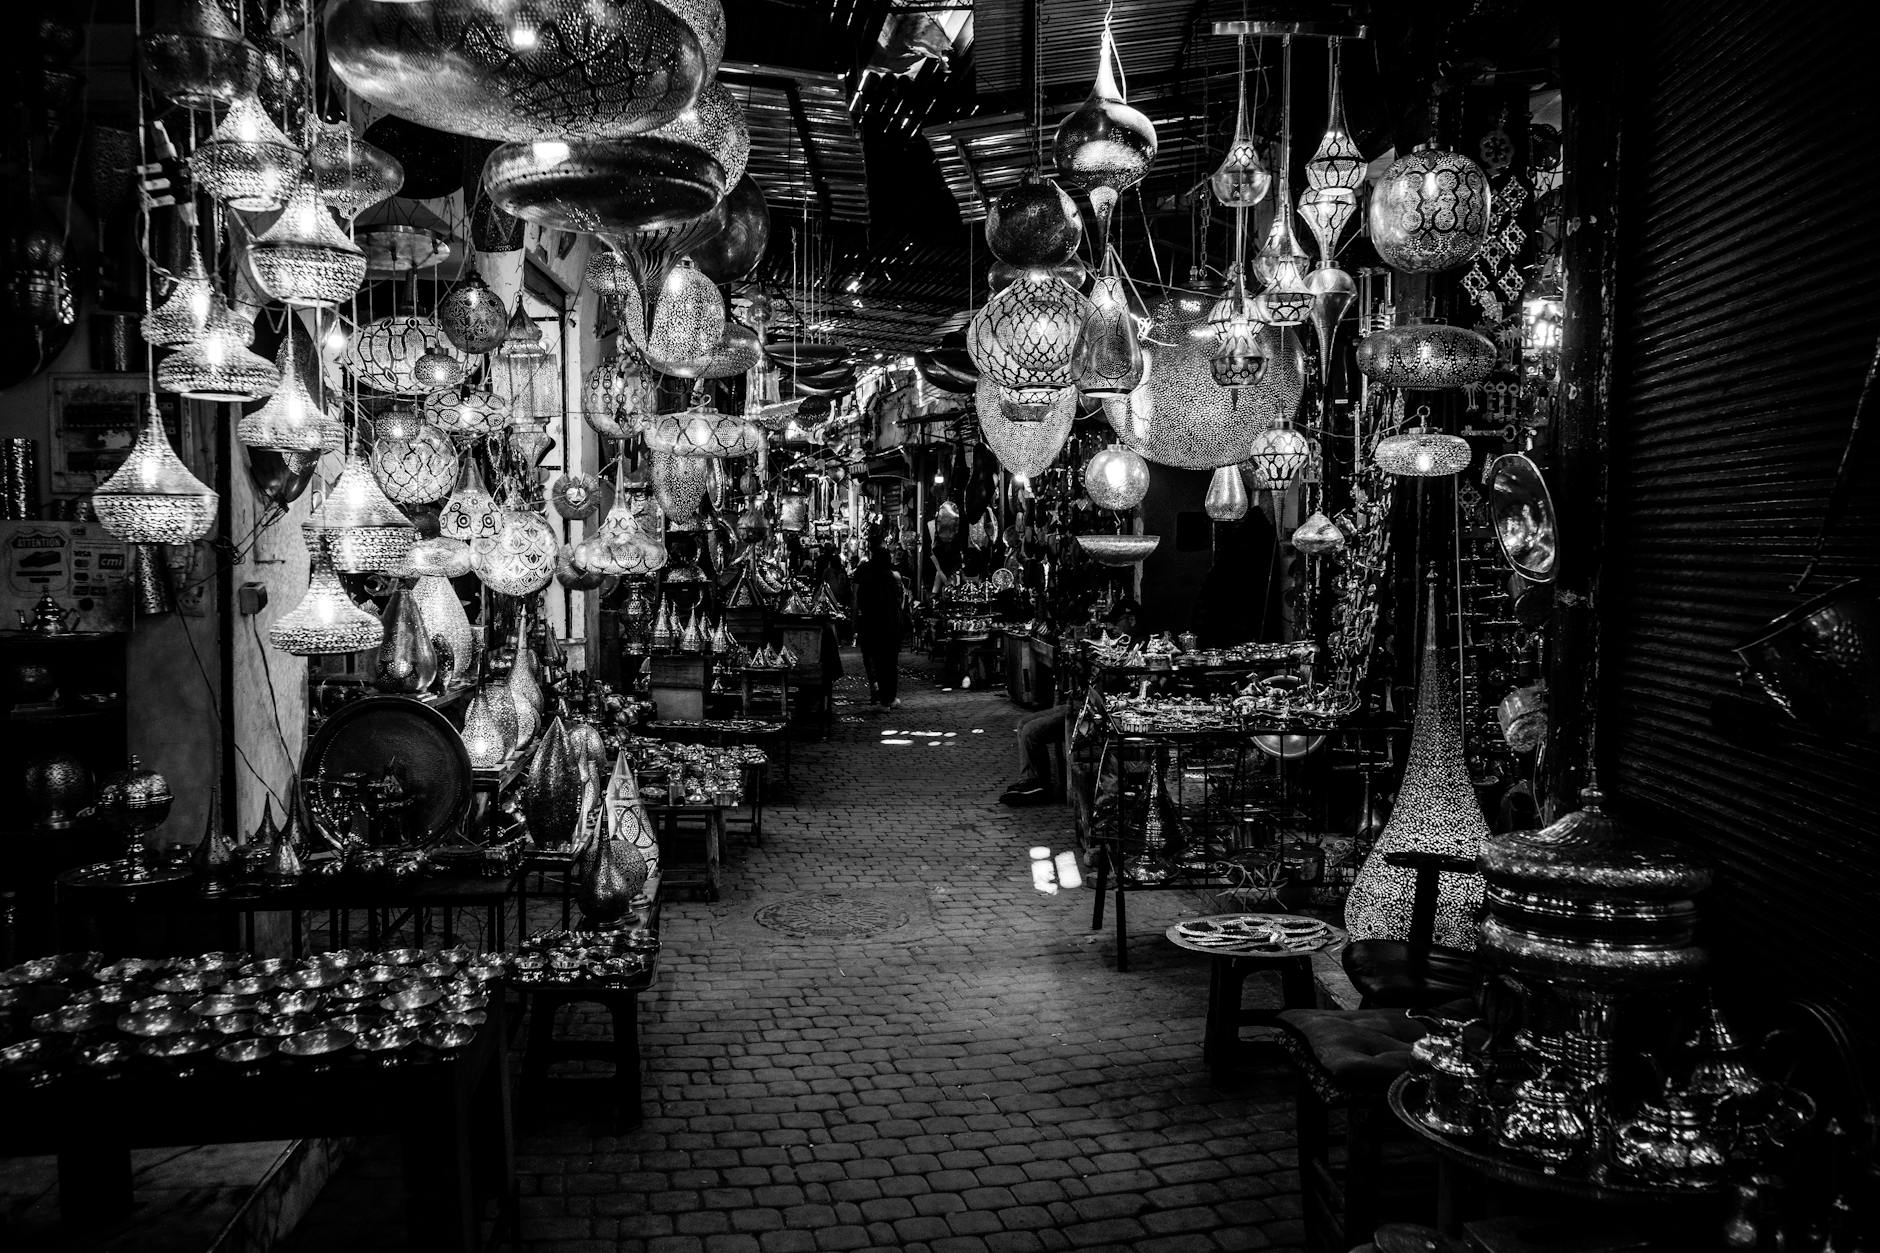
Guide des souks du Maroc : À Marrakech, sur la place Jemaa el-Fna, à Fès, dans la rue Talaa Kebira, et dans la médina de Rabat, vous trouverez des artisanats traditionnels, du cuir, des épices et des textiles, avec de nombreuses occasions de capturer des moments spontanés parmi les foules. Que vous voyagiez seul ou accompagné, les vendeuses et les commerçants du quotidien offrent une multitude de moments à photographier ; ce pays incarne la tradition nord-africaine dans des palettes vibrantes. Pour l'organisation, consultez Expedia pour les options de vol, et recherchez les blogs de voyage du Guatemala pour des angles frais. Si vous souhaitez un mot pour guider vos négociations, emportez de la petite monnaie ; les prix sont négociables, et la négociation enrichit l'immersion. Pour une comparaison, vous pouvez vous référer aux villes alpines de la Suisse ou à une promenade le long de l'Hudson aux États-Unis, puis tester l'ambiance dans les réseaux de métro pour le rythme urbain. Au-delà des souks, la route serpente à travers les marchés et les cascades, et les quartiers du nord semblent souvent plus élégants ; une simple phrase pour briser la glace peut débloquer de nouveaux clichés.
Meilleurs moments pour photographier Lisbonne : l'aube, l'heure bleue et les considérations de foule
Préférez l'aube depuis un point de vue en hauteur, puis glissez vers l'heure bleue pour un changement cinématographique. Arrivez 20 à 30 minutes en avance pour choisir un angle de vue et laisser la vie de la rue s'apaiser ; un peu de patience est récompensée par des tons plus purs et une texture plus riche. Utilisez une gamme d'objectifs pour couvrir les façades imposantes et les détails intimes, et prévoyez le bloc suivant pour capturer les changements au-delà de la première lumière à différents moments.
L'aube éclaire les collines au-dessus du vieux quartier, révélant des toits en tuiles et des balcons décoratifs qui brillent. L'heure bleue accentue le contraste entre les ruelles sombres et les lampes chaudes, idéale pour les longues expositions si vous avez un trépied. Les marchés commencent à s'animer après le lever du soleil mais restent calmes pendant la première demi-heure, permettant aux habitants de traverser les portes et les arcades sans encombrer votre cadre.
Le timing de l'heure bleue varie selon la saison ; prévoyez 15 à 25 minutes de dérive des couleurs. Comme la lumière change rapidement, pour un résultat net en prise de vue à la main, utilisez ISO 100-400, f/4-f/8, 1/60-1/125 s ; pour les reflets sur des pierres ou des flaques mouillées, allongez le temps d'obturation avec un trépied. L'ambiance peut évoquer une scène de film calme ; le dernier scintillement de la lumière peut être capturé avec une exposition plus longue pour conserver les détails dans les ombres, et l'ambiance de l'aurore boréale peut vous inspirer à mettre en valeur les bords lumineux plus fortement. Si la lumière s'estompe, passez à une exposition plus longue pour conserver les détails dans les ombres.
Considérations liées à la foule : en semaine, les matinées sont plus calmes ; les week-ends attirent les locaux sur les marchés et les points de vue, prévoyez donc un second passage vers 9-10 h pour saisir le rythme humain. Si vous souhaitez garder un cadre épuré, photographiez depuis des points en hauteur ou utilisez les reflets dans les vitrines pour masquer les trottoirs animés ; sinon, intégrez les passants comme des éléments dynamiques plutôt que des obstacles. Les heures plus tardives peuvent apporter une énergie vibrante, alors soyez flexible et patient.
Matériel et préparation : gardez un équipement léger avec un zoom flexible et un objectif prime rapide ; testez l'exposition par défaut et passez en manuel. Établissez des listes d'angles préférés et de parcours ultérieurs dans le quartier. Votre plan peut s'inspirer des listes Viator et des cours italiennes, des centres culturels, des ambiances du fleuve Hudson, voire des marchés du Guatemala ou des rivages du Vanuatu pour élargir votre sens de la composition. Pensez à quelques séries autour d'anciennes arches, de grottes et d'angles rappelant des grottes, ainsi que de vitrines réfléchissantes pour reproduire la gamme d'ambiances, y compris les glaciers en mémoire pour accentuer les textures. Votre approche doit allier patience et rapidité pour maximiser les prises de vue à l'aube et pendant l'heure bleue, puis vous adapter lorsque les foules grossissent. Si vous souhaitez élargir votre carte mentale, imaginez des scènes des ruelles tranquilles de Kusatsu ou des tableaux de rue inspirés de Chau, et voyez comment ces textures se transposent dans le paysage urbain.
10 lieux à Lisbonne : conseils d'accès, points de vue et notes pratiques
Prenez le métro jusqu'à Baixa-Chiado pour atteindre le centre rapidement, puis promenez-vous dans les collines pour rejoindre les belvédères ; un objectif à longue focale permet de capturer les textures en profondeur, et un bon compact vous tient prêt pour les prises de vue rapides ; éloignez-vous des foules en arrivant à l'aube et en laissant le trafic s'estomper.
1) Miradouro de Santa Luzia (Alfama) : accès depuis le quartier de la cathédrale par des escaliers pentus ; l'endroit est incroyablement atmosphérique à l'aube, quand ils se rassemblent en petits groupes ; les murs carrelés encadrent le fleuve, et la foule à la manière des capilanos ajoute de l'échelle ; utilisez un objectif plus long pour zoomer sur les détails serrés et capturer le drame.
2) Château de Saint-Georges : promenez-vous le long des remparts extérieurs pour des vues profondes et panoramiques sur le centre-ville ; la silhouette est impressionnante, avec des dômes et des flèches qui ponctuent la vieille ville ; arrivez tôt pour éviter la foule et passez à un objectif plus long pour des toits plus serrés.
3) Ascenseur de Santa Justa : montez dans l'ascenseur en fer pour accéder à la terrasse du Carmo, puis accédez à la plateforme d'observation pour une vue panoramique sur la ville ; c'est incroyablement pratique pour passer d'un point de vue élevé à un autre ; arrivez avant 9h00 pour éviter les files d'attente et vous assurer d'apercevoir les flèches de la cathédrale au loin.
4) Miradouro da Senhora do Monte (Graça) : la montée depuis le tramway est longue, mais la récompense est un panorama profond sur le centre ; restez pour le coucher du soleil lorsque la lumière devient un or éclatant ; apportez un trépied si vous en avez un ; les promenades sur la colline offrent plusieurs points de vue.
5) Terreiro do Paço et front de mer : la terrasse face au Tage offre de larges lignes droites de bateaux et de circulation le long de l'eau ; la scène s'étend à la tombée de la nuit ; trouvez un endroit confortable sur le quai et faufilez-vous entre les ombres pour saisir le rythme de la ville.
6) Le front de mer de Belém : le MAAT, le monastère des Hiéronymites et la tour forment un trio classique ; la lumière est bonne en fin d'après-midi ; accès en tramway depuis le centre ou en métro jusqu'à Cais do Sodré, puis une courte marche ; le site offre un espace généreux pour capturer le fleuve, le pont et le ciel ; ces incontournables sont largement considérés parmi les meilleurs points de vue.
7) Parque das Nações : une promenade moderne et étendue le long du fleuve, avec de larges allées et une ligne d'horizon de tours ; l'accès par ascenseur aux terrasses surélevées vous permet de photographier le pont et les bateaux ; comme le quartier est plus récent, on y trouve des lignes plus épurées et des perspectives plus dégagées pour les images de la ville.
8) Le parc forestier de Monsanto : un paysage vallonné de forêts et de vues sur la ville à travers les pins ; prévoyez des randonnées plus longues, vérifiez la météo et gardez un appareil compact prêt pour des prises de vue grand angle ; les ponts du type Capilano et les sentiers sinueux donnent une impression d'échelle, et vous pouvez découvrir des grottes d'ombre sous les branches qui font paraître la ville plus petite.
9) Avenida da Liberdade et les terrasses alentour : des avenues calmes bordées de façades raffinées ; la lumière de fin d'après-midi brille au centre et vous pouvez capturer des lignes symétriques avec un objectif ; observez la circulation, puis plongez dans georgias pour une pause rapide et un nouveau regard.
10) Jardim do Torel : une terrasse discrète offrant une vue dégagée sur la ville ; accessible par des marches progressives, idéale pour des clichés à l'heure dorée dans une ambiance paisible ; apportez un objectif grand-angle pour encadrer les portes et balcons ; prévoyez une marche plus longue pour rentrer au métro et éviter la chaleur, chau.
Maroc : souks et médinas - étiquette, autorisations photo et cadrage sécurisé
Bonjour ! Souriez, soyez respectueux envers les locaux et demandez toujours avant de prendre des photos de personnes. Dans les ruelles encombrées, un petit signe de tête maintient le flux fluide et réduit les tensions parmi la foule.
Au centre d'un marché animé, l'encadrement compte plus que la vitesse. Utilisez des textures contrastées - des tissus colorés contre des écrans en bois sculpté ou du plâtre rose contre des arches carrelées - pour raconter une histoire sans exclure personne. Cet équilibre architectural vous aide à saisir la scène comme un tout cohérent.
Photo permissions : approchez les vendeurs près des entrées ou des stands et expliquez votre intention en une ou deux phrases en français ou en arabe si possible. Si le consentement est donné, photographiez en grand angle pour inclure le contexte ; sinon, respectez le geste et passez à une scène plus large qui se concentre sur l'environnement plutôt que sur les visages.
Respectez les lieux de culte : à l'extérieur des mosquées et des salles de prière, parlez à voix basse, évitez les flashs et demandez avant de prendre des photos à l'intérieur. Laissez les locaux vous guider ; beaucoup accepteront des portraits extérieurs qui montrent la vie quotidienne autour de la cour ou de la fontaine.
Voici la traduction : Conseils pour le cadrage : emportez un kit léger et planifiez des itinéraires qui minimisent les perturbations. Emportez un jeu d'objectifs permettant des prises de vue en grand format à distance si nécessaire ; cela garde votre cadre propre et réduit les risques de photographier une personne qui ne souhaite pas être prise en photo. Les marchés de l'intérieur des terres révèlent souvent des scènes plus intimes que les corridors côtiers ; au-delà des allées principales, on ressent une ambiance différente dans chaque ruelle - un autre moment, une autre couleur, une autre arche rose. Si votre itinéraire vous mène également sur la côte, gardez la même approche.
Des notes pratiques : si vous ressentez un malaise, éloignez-vous calmement. Cette planète récompense la tact. Les photographes voyageurs qui considèrent les locaux tendent à établir la confiance et à obtenir de meilleures photos. Les voyageurs canadiens, par exemple, sont souvent bien accueillis s'ils restent patients et évitent de bloquer les passages étroits.
Voici la traduction : Les éléments centraux comme les portes sculptées, les arches roses et les étals de tissus animent votre série. En planifiant à l'avance, vous repartirez avec un ensemble de photos cohérentes et respectueuses, et non des tentatives précipitées nécessitant des retouches pour sauver le cadre.
| Action | Voici la traduction en français : Comment faire | Benefit |
|---|---|---|
| Demandez avant les gros plans | Bonjour ! Je suis prêt à traduire votre texte en français de qualité native. Voici la traduction : --- Texte original : "Visit Saint Isaac's Cathedral in Saint Petersburg, then explore the Hermitage Museum. Afterward, head to Moscow and stop by the Kremlin. Don't miss the Tretyakov Gallery and the Bolshoi Theatre. For shopping, go to GUM department store. Try borscht at Café Pushkin. Stay at the Four Seasons Hotel, located at 22/1, Tverskoy Boulevard." Traduction : Visitez la cathédrale Saint-Isaac à Saint-Pétersbourg, puis explorez le musée de l'Ermitage. Ensuite, rendez-vous à Moscou et faites un tour au Kremlin. Ne manquez pas la galerie Tretiakov et le théâtre Bolchoï. Pour faire du shopping, allez au grand magasin GUM. Goûtez la borscht au Café Pouchkine. Logez à l'hôtel Four Seasons, situé au 22/1, boulevard Tverskoï. --- Dites-moi si vous souhaitez des ajustements ! | Réduit les conflits et renforce la confiance |
| Voici la traduction en français : À éviter les mineurs sans tuteurs. | Trouvez des scènes larges alternatives si le consentement n'est pas accordé. | Protège la vie privée et la dignité |
| Respectez les lieux de culte | Voici la traduction en français : Photographiez uniquement les caractéristiques extérieures. N'utilisez pas de flash. | Maintenir la sécurité et le respect |
| Déplacez-vous discrètement dans les foules | Voici la traduction : Gardez votre équipement compact ; ne bloquez pas les passages. | Voici la traduction en français : Des plans plus fluides et des prises de vue améliorées. |
Matériel et réglages pour les rues animées : objectifs, ISO, obturateur et stabilisation
Commencez avec un objectif prime équivalent 35 mm et stabilisé ; pour vous, cela offre une perception naturelle qui s'intègre parmi les foules et les façades des places. Utilisez une sensibilité ISO de 400 à 800 en plein jour, de 800 à 1600 à l'ombre, et maintenez la vitesse d'obturation entre 1/125 et 1/250s pour figer le mouvement tout en conservant une impression de dynamique dans la foule.
- Objectifs : choisissez un objectif standard à focale fixe dans la gamme 28-35 mm pour une perspective naturelle, ou ajoutez un compact 50 mm pour des moments plus serrés. Un zoom léger (environ 24-70 mm) offre une flexibilité plein format sans vous ralentir. En milieu urbain dense, une option grand-angle de 24 mm vous permet de cadrer la scène d'un seul souffle unique tout en gardant l'arrière-plan lisible.
- ISO et obturation : en lumière du jour avec des zones d'ombre, privilégiez ISO 200-400 et 1/250s. En cas d'affluence ou de variations lumineuses, augmentez à ISO 800-1600 et 1/200s. Pour le crépuscule ou les éclairages néon, ISO 1600-3200 avec 1/125s préserve les silhouettes tout en évitant le flou des piétons en mouvement.
- Ouverture et profondeur : photographiez à f/4-f/5,6 pour garder à la fois l'action au premier plan et les éléments contextuels en jeu ; les ouvertures plus larges isolent un seul sujet, tandis que la fermeture du diaphragme ajoute la texture environnante que les spectateurs remarquent parmi les rues animées.
- Stabilisation : activez la stabilisation optique ou par objectif si disponible, et comptez sur la stabilité du corps en deuxième ligne de défense. Sur les trottoirs étroits, calez les coudes, rapprochez l'appareil photo et prenez des rafales courtes pour exploiter les micro-mouvements pour un effet naturel de mouvement.
- Technique : privilégiez un capteur plein format si possible pour des ombres plus propres dans une foule ; sinon, une option APS-C avec des longueurs focales équivalentes fonctionne bien. Utilisez la mise au point continue avec de petites zones de mise au point pour les mouvements soudains, et préconcentrez-vous à une distance où vous attendez que l'action se déroule.
- Vue et cadrage : maintenez le point de vue au niveau des yeux ou légèrement en dessous pour conserver le réalisme ; un angle légèrement plus bas révèle la texture du pavage et des devantures de magasins, tandis qu'un angle plus élevé met l'accent sur le mouvement des personnes. Choisissez un cadre carré ou rectangulaire en fonction de l'équilibre de la scène, en optant pour une perspective qui semble naturelle plutôt que mise en scène.
- Voici la traduction en français : Workflow et rythme : adoptez un rythme soutenu (3 à 5 images par seconde) lors des moments d'action, revoyez uniquement les images clés et étiquetez les commentaires pour une sélection ultérieure. Parmi les foules, la cohérence forge une réputation de résultats fiables ; partagez vos notes avec les followers qui adorent voir comment vous travaillez dans les rues animées.
- Couleur et ambiance : sous des ciels bleus éclatants ou des nuits néon, calibrez la balance des blancs autour de 5200-5600K en lumière naturelle et ajustez pour des teintes plus chaudes en éclairage artificiel. Un rendu naturel est souvent plus fascinant que des scènes trop stylisées ; conservez quelques clichés qui montrent l'environnement tel qu'il est, pas seulement le sujet.
- Logistique : transporter deux corps ou un seul corps avec deux objectifs pour minimiser les changements d'équipement sur les avenues fréquentées ; garder un équipement étanche prêt pour les averses soudaines courantes dans les villes côtières et les climats tropicaux. Les lieux connus pour leur forte affluence profitent d'un kit compact qui reste discret.
- L'état d'esprit et l'accueil : lorsque vous publiez, vos commentaires peuvent refléter la manière dont vous gérez l'espace et le temps ; répondez poliment aux critiques et affinez en continu votre approche. Dans les zones célèbres pour leur vie de rue, une méthode constante et respectueuse vous aide à vous fondre parmi les locaux et les visiteurs, en construisant une réputation positive.
Lors de la planification des itinéraires, il faut tenir compte des différents environnements - l'heure bleue, les places carrées ou les cours ombragées - qui nécessitent de légers ajustements de l'ISO et de la vitesse d'obturation. Parmi les itinéraires populaires, un équipement compact et bien équilibré vous permet de rester énergique pour profiter du processus et maintenir un flux de travail fluide, que vous soyez à Manhattan, en Afrique ou dans une ville côtière sous des cieux boréals. Le même équipement et les mêmes réglages fonctionnent pour des dizaines de zones familières et bien connues, ainsi que pour de petites ruelles, vous permettant de livrer une vue unique et parfaitement cadrée à chaque fois que vous posez le pied sur le trottoir.
Post-traitement pour les photos de rues de Lisbonne et du Maroc : couleur, contraste et organisation
Commencez avec un moniteur calibré et un flux de travail RAW en deux étapes : corrigez d'abord l'exposition, puis la couleur. Une règle concrète : définissez une balance des blancs neutre, contrôlez les lumières et laissez les ombres être récupérées. Cette approche évite un mauvais écrêtage et s'est avérée efficace ; c'est une méthode préférée depuis des années, surtout pour les voyages, notamment lors des transitions entre des scènes côtières et des marchés animés. Si vous ne l'avez pas encore essayée, c'est une base fiable pour commencer.
Stratégie de gradation des couleurs : divisez le travail en une ambiance globale et des ajustements locaux. Commencez par une légère augmentation de la chaleur des tons moyens pour les scènes de style marocain, puis appliquez une teinte plus froide aux ciels et aux ombres. La palette résultante offre un contraste entre chaleur et fraîcheur, une raison pour laquelle les monteurs choisissent souvent le look occidental tout en gardant les couleurs naturelles. Pour les accents bleus comme les carreaux et les enseignes, maintenez la saturation contrôlée pour préserver les détails. Cette liste d'étapes vous aide à trouver le bon équilibre tout en explorant la couleur.
Utilisez des masques pour cibler les visages, les mains et les surfaces texturées. Renforcez la netteté là où la texture compte (pierre, tissu), mais atténuez le bruit dans les coins sombres. Pour les intérieurs dans les magasins animés ou les wagons de métro, appliquez une netteté sélective aux bords et une touche de couleur aux reflets tungstène. Si vous n'avez pas encore établi une référence, effectuez un passage de correction d'objectif pour garder la perspective propre.
Organisation et flux de travail : renommez les fichiers de manière cohérente, ajoutez des mots-clés tels que *côtiers*, *marchés*, *arcades*, *voyageurs*. Créez des collections pour les contrastes entre les ombres bleutées et les lumières chaudes, et maintenez une routine *avant / pendant / après* pour comparer les retouches. Enregistrez les JPEGs exportés avec un profil léger tout en conservant les RAWs dans un archive dédiée. Cela constituera une base solide pour un accès à long terme ; j'espère que cela vous sera utile et que vous l'adapterez à vos préférences.
Nuit et notes en faible lumière : lors de la prise de vue dans des couloirs sombres ou des tunnels de métro, photographiez en RAW à ISO 1600-3200 ; en post-production, appliquez une réduction de bruit douce sur les canaux rouge et bleu, et utilisez les corrections d'objectif pour corriger la perspective. Évitez de trop accentuer les peaux ; utilisez un flou modéré uniquement sur les bords.
Voici une liste de contrôle rapide à suivre lors de l'édition : ajuster la balance des blancs pour maintenir une couleur neutre sous un éclairage mixte ; examiner l'histogramme avant et pendant le traitement des couleurs ; surveiller les tons de peau et les saignements de couleur sur les enseignes des magasins ; envisager un passage de correction de lentille pour corriger les distorsions de perspective.
À la recherche de magie dans les contrastes : comparez avec des séquences mondialement célèbres pour définir votre propre style sans copier. Les itinéraires en voiture et les marchés offrent des scènes dynamiques ; explorer différents styles fait partie du processus. Passez d'un plan à l'autre pour tester la continuité ; l'objectif est une couverture cohérente sur une séquence de prises de vue. Le ton doit sembler authentique, cherchant à équilibrer des ombres chaudes avec des reflets froids, tout en restant fidèle au sujet.
Les références aux îles Lofoten et à Hohenschwangau peuvent inspirer une ambiance et une structure colorées, mais la technique de base reste la même : maintenir l'harmonie des couleurs, un contraste approprié et une organisation nette.


