 10 delle Formazioni Rocciose Più Incredibili della Russia – Una Galleria Fotografica Mozzafiato">

Open during opening hours and shoot at dawn or blue hour to capture the best contrasts and comfortable times for your crew. This approach preserves texture and yields natural color without harsh shadows.
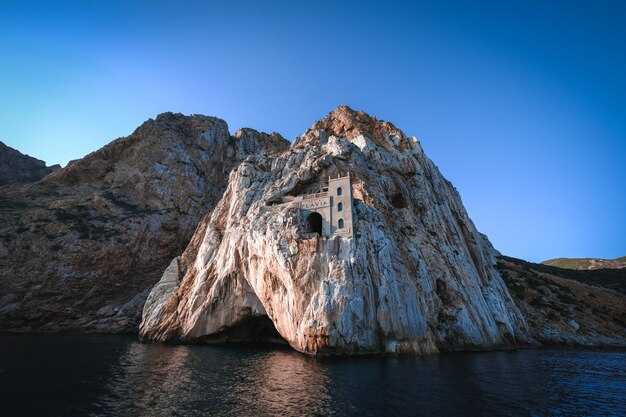
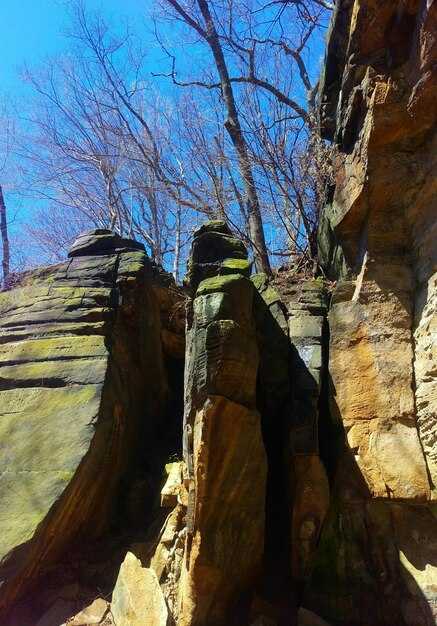
In this part, the Kutuzovskie ridge hosts dramatic lines and towering pillars that define the skyline. The grottoes and wind-worn arches serve as backdrops with scale that is noto to attract landscape photographers; the sites are situato across several valleys, including the zubeydesheth pocket, which adds significant mystery to compositions. The surfaces offer fantastic texture, however, access can be seasonal and depends on local rules.
For practical planning, consult reddit threads and theluxvault guides. They provide field-tested tips on measuring distances, weather windows, and safety, helping you build a schedule of highlights e significant viewpoints. The terrain remains comfortable when you pace yourself and carry water.
Each site offers multiple backdrops; a single trip can be a part of a broader sequence. Locations span varied elevations, with dramatic shifts in texture between stone columns and cliff shelves. The light opening of morning or late afternoon reveals contrasts that elevate the shots without over-processing, and careful framing keeps the day’s opening in focus.
Plan with respect for the places; coordinate the route and revisit options di nuovo if weather cooperates. Share progress with the community, tag the spots to help others discover them, and always comply with local rules to preserve the sites for future visits.
Practical guide to visiting and photographing Russia’s rock formations
Hire a local guide to arrange access and safety; reviews from trekkers help validate routes, then map a two-day loop around a handful of dramatic stone outcrops. Getting permits ahead saves time; plan to arrive well before dawn for the first light, then return in the afternoon when winds soften and shadows sweep across the cliffs.
Best seasons run from late spring to early autumn, relatively predictable weather, and longer days. Erosion has carved sweeping shapes over years, so each site offers a different character. Shade pockets under arches steady the camera and reduce glare, while elevated overlooks reveal the entire panorama and scale of the formations.
Getting around relies on local towns as bases; stay in family-run accommodations or join local tours to reach trailheads. Camps are common near protected spaces, while some communities keep small free campsites near the edge of forests. When you visit, show respect for peoples and their spaces; move slowly on trails to minimize impact and keep noise low for both wildlife and other visitors. National parks charge modest fees, and part of those funds support conservation efforts; budget accordingly to support the places you’re enjoying.
Equipment and technique matter as much as luck. Use a lightweight tripod, a wide-to-standard zoom, and a weather-sealed bag to protect gear from dust and spray. Shoot during the golden hours–dawn and late afternoon–to capture dramatic silhouettes, then bracket exposures to handle high-contrast skies. Bring a polarizer to tame glare on sunlit faces and to deepen the hue of distant ridges; in gusty afternoons, shield the camera and use a faster shutter to freeze wind-blown details.
Site etiquette and safety cannot be skipped. Winds on exposed ledges can change quickly; keep a safe distance from edge drops and erosion gullies. Respect shade lines and avoid loitering near fragile arches that look ready to crumble. If you’re new to these landscapes, try a two-stage approach: begin with a day in the national park area, then a second day to revisit the most photogenic angles when light changes. For added context, compare with Bandarban-like clusters you’ve seen elsewhere; the motley variety of shapes often tells the same story of nature’s stubborn, patient work over years.
- Getting there: base in a local town, join a short-led tour to nearby outcrops, then shuttle to trailheads.
- Best practice: arrive early, use a tripod, and shoot slowly to frame sweeping horizons and intimate textures.
- Camping and lodging: mix camp nights with nights in small inns; this helps you stay flexible for weather shifts and afternoon light.
- Conservation: stay on marked paths, pack out every crumb (including snacks like cheese), and avoid disturbing any features or wildlife.
- Day 1: arrive at first base, hike to a prominent pillar group, capture close-up textures in shade, then shoot long-range silhouettes at sunset.
- Day 2: dawn shoot from a higher vantage, return to a second cluster for dramatic sky lines, and end with a wide-angle sweep that includes the entire field.
Keep these parts of the experience in mind: the local culture, the weathered surfaces, and the quiet spaces that reward patient observation. With careful planning, you’ll document images that reflect the site’s true scale, its people, and the way erosion slowly etches drama into stone–then share those stories with fellow travelers through well-curated reviews and memories that last years.
Exact locations and access routes for each formation
Start at the official park gate and hire a local guide if you’re unfamiliar with rugged routes; use marked trails and request a current map at the kiosk, which often offers free options.
Spot A: Lena Pillars on the Lena River. Location: in the Sakha Republic, along the eastern bank of the Lena River, within a protected nature area that translates to a narrow corridor of towers and boulder rows. Access: fly into Yakutsk, then drive to the park entrance on the river and embark on a river or land route; several sections require a short boat leg during high water, while others are reachable by a straightforward hike from the gate. Morning light makes the weathering textures glow, and you’ll spot birds and small mammals in the surrounding ecosystems that slowly shift with the seasons. The main approach runs through a valley of stones and hills; stay on the wide, signed route and refer to the map for the spot you want to photograph. The upper viewpoints can be done in a day, with rooms in nearby settlements for overnight stays; beware that some sections are exposed and you may be in the shadow under taller pillars near the bridge over the lower stream. Photo opportunities are abundant, with several viewpoints available and no entry fee for the base routes.
Spot B: Stolby Rock Columns near Krasnoyarsk. Location: a cluster of classic spires within a protected urban reserve just outside Krasnoyarsk city limits, consisting of several named towers plus unnamed spires. Access: take a regional train or bus to the city, then a short municipal bus or taxi toward the Stolby parking zone; follow the blue trail markers to the main lookout, then pick among several looping routes that weave among the columns. The ascent belongs to a well-trodden route that has room for variation; wildlife in the area includes small birds and herbivores that avoid crowds if you move slowly. The scenery translates into a stark contrast of weathered stones against the city skyline; many visitors park buildings and cafés along the roadside, which is convenient for a morning warm-up. For a free, self-guided option, start from the lower trailhead and climb to the first overlook, then return via the bridge overlooks that cross small creeks.
Spot C: Kungur Stone City (Kungur Stone Town) in Perm Krai. Location: near Kungur town, within a karst plateau that consists of clustered limestone towers and arches. Access: drive from Perm along a regional road to Kungur, then walk or take a local guide-led hike to the rock field; many routes loop around the hilltops and through a network of hollows and caverns. The formation style is classical in its columnar arrangement and the caves nearby reveal ancient weathering patterns; on the morning path, you’ll hear rivers nearby and see birds overhead. Wildlife is common, and visitors often encounter deer in the surrounding forest margins; stay on designated paths to avoid disturbing habitat that hosts native ecosystems. Bring a compact photo setup for close-ups of the stone textures, and plan several short stops to admire the room-like alcoves between spires.
Spot D: Shoria Hills Outcrops in the South Ural foothills. Location: a belt of rocky hills lying to the west of the Urals, consisting of jagged ridges and rounded knolls with stone staircases of varying heights. Access: reach the nearest rail hub (Miass or Chebarkul) and transfer to a forest road that leads to the lower trailhead; from there follow a marked route through a pine forest until you reach the most dramatic towers. The area features wildlife typical of the taiga and several small streams that feed seasonal rivers; the morning air is crisp and the light highlights the sculpture-like forms of weathered stones. The route includes a few switchbacks that offer views over the valley, with several spots to pause and photograph the spires.
Spot E: Kamchatka Peninsula rock columns near the coastline. Location: a coastal range in the far east, consisting of volcanic and sedimentary outcrops that stand above the shore. Access: fly into Petropavlovsk-Kamchatsky, then hire a local guide who can arrange transport to the foothill trailheads; travel time may require a boat transfer to the head of some canyons. The landscape is rugged and slowly sculpted by weathering, with weather patterns that translate to dramatic morning mists and steamy creeks near the base. The site offers a mix of sea spray, wildlife sightings, and a sparse but beautiful backdrop of stony forms and hills; consider a second day to explore more distant towers, as routes can be several kilometers long. Bridge crossings over streams and small rivers are common, and some spots lie under overhanging shelves that create natural rooms for resting and sketching a photo sequence.
Spot F: Altai Range stone pinnacles in the borderlands of Russia and Mongolia. Location: a high plateau zone consisting of cervices, gullies, and spire-like rocks in the western Altai. Access: approach from Gorno-Altaysk or Barnaul, then connect to a marked trail into the foothills; permits may be required in certain protected zones, so refer to local park offices for current rules. The outcrops display a striking contrast of white and gray minerals set against a blue sky; slowly they rise from wooded slopes into open hills, creating a landscape that feels classical in its timeless geometry. Morning visits are best to catch the soft light on the stones and to observe the animals that inhabit the surrounding ecosystems.
Spot G: Baikal Basin arched rocks near the lake’s eastern shore. Location: in the Lake Baikal vicinity, where rock arches and towers sit along the moraine and shoreline. Access: reach Irkutsk or Ust-Barguzin and use local guides to access the trailheads along forest roads; several routes converge at lookout points that translate to dramatic photos of the arches with the lake in the background. The terrain consists of gravelly shorelines and fringing hills, with wildlife that includes waterfowl and riverine species; you’ll see slow weathering patterns that reveal the geology’s evolution and a room-like space beneath some arched spans that make for an atmospheric portrait.
Spot H: Karelia granite outcrops near the border with Finland. Location: a mosaic of cliffs and boulders tucked into forested hills just inland from the White Sea region. Access: drive to the regional capitals and take forest roads toward the designated park zones; several trailheads lead into intact pockets of granite towers. This area is known for its free-standing blocks and tabular caps, which provide ample room for exploring on foot and for capturing the light at dawn. Wildlife is present in the surrounding delta ecosystems, and keep an eye out for birds that roost among the ledges; harassed by crowds in peak hours, many visitors prefer the calmer morning window to earn the best shots.
Spot I: Ural Tabletop group near the Trans-Ural foothills. Location: a set of flat-topped monoliths scattered across a broad upland, with several buttresses and narrow gorges. Access: take a long-distance bus to the nearest town, then a local shuttle toward the trailhead; several routes offer different vantage points. The bars and columns provide a stark, stubborn beauty that translates to a classical composition; the rocks slowly weather into rounded edges that contrast with the straight lines of the surrounding hills and any old buildings in the nearby settlement. The area is typical for day trips, with wildlife and easy viewing of several outcrops that are ideal for a morning photo session.
Spot J: Khibiny Massif rock spires on the Kola Peninsula. Location: a northern arc that features rugged, dark stone towers amid tundra and lichens. Access: fly to Murmansk, then drive to the foothill zones and connect with a guided trek; several routes interlink the major towers, and one can observe the landscape from the crest of a ridge after a steady climb. The walk passes through a zone where wildlife is active at dawn, and you’ll often find spots with a room-like shelter under a shelf that provides shelter on windy days. The scenery is beautiful in a stark, northern light, with free trails available during the low season and private guides available for more challenging segments.
Best seasonal timings for lighting, weather, and crowds
Plan visits during late spring or early autumn for the best balance of light, weather, and crowds. This window, called shoulder season, is a thing that yields unique, directional light across hills and lakes, translating into warm tones on stone faces. Shots consisting of wide panoramas and close textures look dramatic as millions of photons pool on surfaces. Access at bases and trailheads improves here, and streets near towns stay calmer. Here they became iconic viewpoints for a visitor and locals alike. A few routes hide a hideout in a canyon near zubeydesheth. For planning, consult theluxvault for maps and itineraries. The offering of these months tends to be huge.
Lighting windows are best at dawn or dusk, with golden hour lasting about 60 minutes after sunrise and before sunset. Across russia, light changes rapidly, but the color translates into warm tones on stone walls, creating a unique mood for every shot. Photos taken in these windows often consist of broad skies and texture-rich surfaces, revealing details that vanish at noon.
Crowd management: midweek mornings tend to be calmer; plan to shoot between nine and eleven to minimize congestion, and avoid weekends and school holidays when visitor numbers spike. Last light sessions can attract larger groups as well, so aim for the earlier window when possible.
Access and logistics: begin from bases along the main routes. Verify permits and access rules for protected zones; keep to marked trails and follow signs. theluxvault offers quieter detours and safe hideouts such as caves near the center. For those with limited time, a one-day loop from a nearby town keeps streets manageable and transit between viewpoints short.
Gear and etiquette: wear athletic_shoe; pack layers; bring water; carry a compact tripod for long exposures; choose lenses for both wide vistas and tight textures; protect gear from dust and moisture; and keep a spare memory card for millions of frames of photos. Always commemorate the landscapes, and remember that this thing requires patience to make the nine-season rhythm of the locales pay off, especially at the last light when the sky exposes its true hues.
Impostazioni della fotocamera, composizione e attrezzatura per paesaggi impervi
Monta sempre la fotocamera su un treppiede robusto e scatta in RAW in modalità manuale; usa la luce disponibile e fai attenzione al movimento. Inizia con ISO 100, esponi per le luci e mantieni l'otturatore tra 1/125s e 1/320s per scene di arrampicata stabili. Usa un'apertura intorno a f/8 - f/11 per mantenere la profondità dal primo piano alle cime distanti; per i dettagli in primo piano, scendi a f/5.6–f/8 e alza l'ISO a 200–400 se il vento o il movimento richiedono un tempo di scatto più veloce.
La composizione dipende da un forte primo piano, una chiara profondità e dalla scala. Posiziona una linea guida verso la media o lunga distanza, evita di centrare l'orizzonte e prova inquadrature sia da angolazioni basse che quasi a terra. Includi un elemento di riferimento come un edificio fatiscente o una struttura abbandonata per comunicare le dimensioni; in un paesaggio di rovine di Chufut-Kale o di roccia di Bandarban, questo aggiunge drammaticità e aiuta a commemorare il luogo per gli spettatori, inclusi i bambini.
L'equipaggiamento essenziale include un corpo macchina sigillato contro le intemperie, due schede di memoria e uno zaino di livello militare. Un obiettivo grandangolare (14–24 mm) copre le scene più impervie, con uno zoom tele (70–200 mm) per i dettagli distanti. Aggiungi un polarizzatore circolare per accentuare i cieli, un filtro ND graduato da 2–3 stop per gli orizzonti ad alto contrasto e un treppiede robusto con colonna centrale reversibile. Tieni i tappi degli obiettivi quando ti sposti tra i punti e porta con te un piccolo kit di pulizia; in condizioni ambientali vicino a Mosca o in altri luoghi remoti, i tempi di inattività sono rari, quindi preparati.
Registra i dati per ogni fotogramma in un semplice log: posizione, data, meteo e impostazioni; questa annotazione virtuale aiuta a riprodurre l'atmosfera in seguito e le note di contesto sull'approccio rafforzano l'apprendimento. Siti come chufut-kale e bandarban offrono luci variegate, quasi esigendo un rapido adattamento per catturare l'atmosfera e la storia di ogni luogo.
| Aspetto | Recommendation |
|---|---|
| Modalità | Manuale, RAW |
| ISO | 100–200 in piena luce; fino a 400 quando ombra o movimento lo richiedono |
| Aperture | f/8–f/11 per un'ampia nitidezza; f/5.6–f/8 per un primo piano accentuato |
| Shutter | 1/125–1/320s; se necessario, usa il bracketing per HDR |
| Obiettivi | Grandangolare (14–24mm) per scene maestose; medio (24–70mm) per i dettagli; tele (70–200mm) per la compressione |
| Filtri | Polarizzatore per scurire il cielo; ND Grad 2-3 stop per orizzonti luminosi |
| Stabilità | Treppiede; scatto remoto o autoscatto per ridurre il tremolio |
| White balance | Automatizza, modifica in post-produzione se necessario |
Permessi, sicurezza e normative locali che dovreste conoscere
Verifica i requisiti di permesso prima di pianificare qualsiasi escursione; contatta l'ente parco locale o l'ufficio di gestione del territorio per confermare i permessi necessari, le scadenze, la dimensione massima del gruppo e le finestre di accesso.
Indossare calzature robuste, rimanere sui sentieri tracciati ed evitare di camminare su sporgenze instabili dove le superfici di arenaria possono sfaldarsi e le aree costituite da pietra friabile; il tempo può cambiare rapidamente, quindi monitorare le previsioni ed evitare tratti con pietra instabile.
Alcuni siti ricadono all'interno di territori protetti il cui accesso è limitato a gruppi guidati; tuttavia, sia a Bandarban che a Chufut-Kale, le regole stabiliscono che non ci si può avventurare al di fuori dei sentieri segnalati e si deve rimanere con una guida autorizzata; solo questa disposizione consente di preservare le loro texture naturali e protegge le texture di arenaria che caratterizzano i siti situati in queste regioni.
Per la fotografia, porta un treppiede compatto e tieni l'attrezzatura sotto controllo; dove sono presenti superfici in legno, evita di appoggiare l'attrezzatura sul legno umido per evitare scivolamenti; se è presente una passerella, rimani su di essa; l'attrezzatura lasciata incustodita è una calamita per i furti e può danneggiare le superfici delicate; la formazione in materia di escursionismo sicuro e maneggio dell'attrezzatura è utile, soprattutto su sporgenze esposte.
Le domande vengono in genere presentate tramite portali ufficiali e moderni o presso le stazioni dei ranger locali; prevedere almeno due settimane per l'elaborazione; portare con sé una copia stampata del permesso, una copia dell'itinerario e il contatto del responsabile; le tariffe, se presenti, vengono pagate online o al momento del ritiro; alcune zone richiedono una guida autorizzata e un permesso giornaliero soltanto, per orientarsi in aree delicate. Queste misure offrono un buon controllo e devono essere rispettate.
Sul posto, segui le normative affisse, evita di arrampicarti su aree con pietre smosse o sporgenze instabili e preserva il territorio portando via tutta l'immondizia; usa l'acqua solo da fonti designate; mantenere il tuo gruppo compatto ti aiuta a reagire rapidamente se sorge un pericolo; questi paesaggi rivelano splendide tonalità dorate all'alba e al tramonto, offrendo una buona visuale mentre cammini, e devi rispettare i luoghi a cui stai accedendo.
Se hai bisogno di maggiori informazioni, contatta gli uffici turistici ufficiali o gli uffici del parco; le guide possono spiegare le norme locali per la regione di Lena e Chufut-Kale; verifica sempre lo stato attuale prima di partire, poiché le normative possono cambiare con le stagioni; questo approccio garantisce una buona sicurezza e preserva il territorio per i futuri visitatori.
Pianificazione intelligente dell'itinerario per visitare tutti e 10 i siti
Inizia con Manpupuner per un blocco di tre giorni per assicurarti la fotografia dell'alba e i percorsi di trekking, poi attraversa la fascia di formazioni in un unico anello. Assumi venditori locali per guide e permessi di accesso, leggi le recensioni in anticipo e ritira i permessi in loco, ove possibile. Pianifica le mattinate per la luce dell'alba, evita i sentieri affollati e dedica giorni alterni all'escursionismo e alla bicicletta per mantenere un ritmo costante.
-
Manpupuner – pilastri di pietra che si ergono dalla pianura; partite all'alba per una luce soffusa e silhouette nitide. Considerate due giorni interi se volete fotografare sia i pilastri che i circostanti campi di detriti; usate un'attrezzatura da trekking compatta e portate con voi una borsa fotografica resistente alle intemperie. L'accesso è preferibile tramite un percorso guidato; prenotate in anticipo tramite fornitori affidabili e confermate gli orari dell'alba.
-
Cluster centrale – esposizioni di forme colonnari stagliate contro il cielo aperto; pianifica una visita di un giorno con partenza a tarda mattinata per godere di una luce più soffusa sui volti. Il terreno è irregolare ma percorribile con calzature adeguate; una breve e panoramica escursione è il riscaldamento ideale per le sezioni più impegnative successive.
-
Affioramenti settentrionali – tre guglie distinte visibili da un singolo punto panoramico; arrivare a metà mattinata per ridurre le ombre e portare un treppiede per ampi paesaggi. L'accesso può richiedere un tragitto su strada accidentata seguito da una camminata a passo svelto; organizzare guide per facilitare il percorso e ridurre al minimo il rischio di ritardi.
-
Cresta di uscita – strette cenge con profili spettacolari; un sentiero di due ore si collega a un punto di osservazione più alto dove la fotografia beneficia della retroilluminazione. Porta con te un kit compatto e valuta l'opzione di una mountain bike per l'avvicinamento, se hai il permesso e il supporto locale.
-
Altopiano meridionale – archi naturali e facciate in pietra ad alto contrasto; pianificare un obiettivo nel tardo pomeriggio per catturare tonalità calde. Il sito è raggiungibile con un veicolo leggero fino a un punto di partenza del sentiero, quindi un'escursione costante di un'ora fino alle attrazioni principali.
-
Gruppo sulla linea di cresta – diversi pilastri allineati in un arco poco profondo; utilizzare una sessione mattutina per catturare le lunghe ombre, quindi passare a primi piani della texture. L'accesso è ottimale con un breve circuito di trekking che rispetta le superfici fragili.
-
Pilastri della valle Esker – formazioni che si ergono bruscamente dal fondovalle; una giornata intera qui permette di sfruttare molteplici punti di osservazione e di dedicarsi a una fotografia lenta e accurata. Portare acqua e snack adatti a lunghe sessioni di esposizione; considerare un ritmo di corsa per un rapido giro di perlustrazione, se le condizioni lo consentono.
-
Affioramenti della piattaforma costiera – esposizioni scolpite dal vento e dalla pioggia lungo la costa; visita all'alba o al tramonto per massimizzare la saturazione del colore sulle facce di pietra. L'accesso richiede un sentiero costiero, con la sicurezza del passo in primo piano; una bici leggera può accorciare l'avvicinamento nelle belle giornate.
-
Torri del bacino interno: colonne naturali che si ergono da un bacino più piatto; prevedi mezza giornata per immortalare sia il profilo distante della città sia le trame intime sui lati delle colonne. I venditori nei punti di partenza vicini possono organizzare un breve trasferimento via mare o via terra in caso di cambiamenti meteorologici.
-
Regione panoramica finale – un gruppo di pilastri più piccoli che offrono angolazioni intime e degne di essere ripetute; riservare mezza giornata per le revisioni dell'ultimo minuto e per colmare eventuali lacune nella luce. Questo segmento conclusivo è ideale per una sessione fotografica retrospettiva e per salutare un grande arco attraverso i dieci siti.
Consigli generali: mirare a tre finestre di picco di luce per sito (alba, tarda mattinata e ora d'oro), quindi adattarsi al meteo. Portare con sé un treppiede leggero, diverse schede di memoria e batterie di ricambio, poiché sono a portata di mano milioni di fotogrammi lungo il percorso. Per la logistica, bloccare l'accesso con guide certificate e controllare le recensioni prima di ogni trasferimento; pianificare giorni cuscinetto per le variazioni meteorologiche e delle condizioni stradali. Se si preferisce un ritmo più lento, ridurre a otto siti e prolungare ogni sosta a un'intera giornata, quindi inserire un giorno di riposo dopo l'inizio a Manpupuner. Verificare sempre le regole di accesso correnti e mantenere flessibile la propria idea per tenere conto delle aperture stagionali delle strade e degli orari dei fornitori.
") La stravagante street art di Mosca – Dove trovarla (FOTO)">
La stravagante street art di Mosca – Dove trovarla (FOTO)">
 I migliori punti fotografici di Mosca per foto mozzafiato nel 2025">
 20 Gemme nascoste di Mosca e segreti meglio custoditi - Una guida locale insolita">
 Giro dei pub vecchia scuola di Mosca – Bar classici, gemme nascoste e vita notturna">
 Mosca – Città di villeggiatura – Viaggi di lusso, benessere e cultura nella capitale russa">
 Guida alla località di Tallulah Falls – Come visitare le gole di Tallulah, punti di accesso e i migliori punti panoramici">
 Le tratte dei traghetti più belle d'Europa - Viaggi panoramici lungo la costa">
 La guida definitiva alle piste da slittino – Un elenco di pendii nel 419">
 Mystical Moscow Multimedia – Arte immersive, cultura e tecnologia nella capitale russa">
 Le chiese gioiello nascoste più mozzafiato d'Europa">