 10 of Russia’s Most Amazing Rock Formations – A Stunning Photo Gallery">

Open during opening hours and shoot at dawn or blue hour to capture the best contrasts and comfortable times for your crew. This approach preserves texture and yields natural color without harsh shadows.
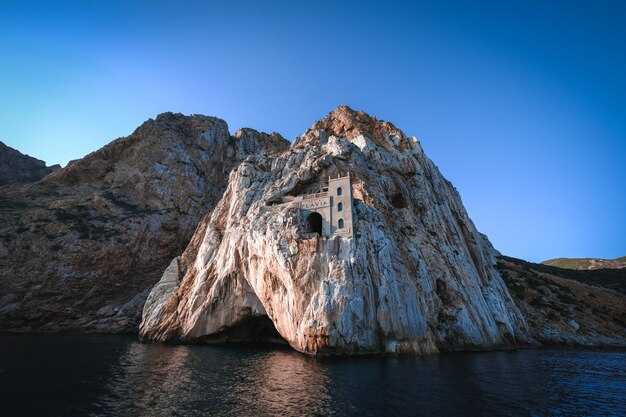
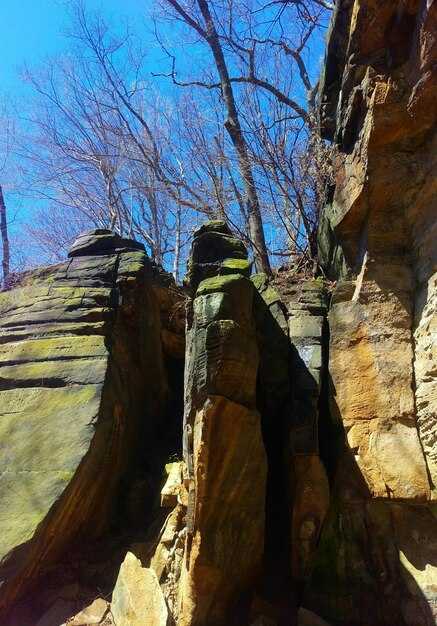
In this part, the Kutuzovskie ridge hosts dramatic lines and towering pillars that define the skyline. The grottoes and wind-worn arches serve as backdrops with scale that is known to attract landscape photographers; the sites are situé across several valleys, including the zubeydesheth pocket, which adds significatif mystery to compositions. The surfaces offer fantastic texture, however, access can be seasonal and depends on local rules.
For practical planning, consult reddit threads and theluxvault guides. They provide field-tested tips on measuring distances, weather windows, and safety, helping you build a schedule of highlights et significatif viewpoints. The terrain remains comfortable when you pace yourself and carry water.
Each site offers multiple backdrops; a single trip can be a part of a broader sequence. Locations span varied elevations, with dramatic shifts in texture between stone columns and cliff shelves. The light opening of morning or late afternoon reveals contrasts that elevate the shots without over-processing, and careful framing keeps the day’s opening in focus.
Plan with respect for the places; coordinate the route and revisit options encore if weather cooperates. Share progress with the community, tag the spots to help others discover them, and always comply with local rules to preserve the sites for future visits.
Practical guide to visiting and photographing Russia’s rock formations
Hire a local guide to arrange access and safety; reviews from trekkers help validate routes, then map a two-day loop around a handful of dramatic stone outcrops. Getting permits ahead saves time; plan to arrive well before dawn for the first light, then return in the afternoon when winds soften and shadows sweep across the cliffs.
Best seasons run from late spring to early autumn, relatively predictable weather, and longer days. Erosion has carved sweeping shapes over years, so each site offers a different character. Shade pockets under arches steady the camera and reduce glare, while elevated overlooks reveal the entire panorama and scale of the formations.
Getting around relies on local towns as bases; stay in family-run accommodations or join local tours to reach trailheads. Camps are common near protected spaces, while some communities keep small free campsites near the edge of forests. When you visit, show respect for peoples and their spaces; move slowly on trails to minimize impact and keep noise low for both wildlife and other visitors. National parks charge modest fees, and part of those funds support conservation efforts; budget accordingly to support the places you’re enjoying.
Equipment and technique matter as much as luck. Use a lightweight tripod, a wide-to-standard zoom, and a weather-sealed bag to protect gear from dust and spray. Shoot during the golden hours–dawn and late afternoon–to capture dramatic silhouettes, then bracket exposures to handle high-contrast skies. Bring a polarizer to tame glare on sunlit faces and to deepen the hue of distant ridges; in gusty afternoons, shield the camera and use a faster shutter to freeze wind-blown details.
Site etiquette and safety cannot be skipped. Winds on exposed ledges can change quickly; keep a safe distance from edge drops and erosion gullies. Respect shade lines and avoid loitering near fragile arches that look ready to crumble. If you’re new to these landscapes, try a two-stage approach: begin with a day in the national park area, then a second day to revisit the most photogenic angles when light changes. For added context, compare with Bandarban-like clusters you’ve seen elsewhere; the motley variety of shapes often tells the same story of nature’s stubborn, patient work over years.
- Getting there: base in a local town, join a short-led tour to nearby outcrops, then shuttle to trailheads.
- Best practice: arrive early, use a tripod, and shoot slowly to frame sweeping horizons and intimate textures.
- Camping and lodging: mix camp nights with nights in small inns; this helps you stay flexible for weather shifts and afternoon light.
- Conservation: stay on marked paths, pack out every crumb (including snacks like cheese), and avoid disturbing any features or wildlife.
- Day 1: arrive at first base, hike to a prominent pillar group, capture close-up textures in shade, then shoot long-range silhouettes at sunset.
- Day 2: dawn shoot from a higher vantage, return to a second cluster for dramatic sky lines, and end with a wide-angle sweep that includes the entire field.
Keep these parts of the experience in mind: the local culture, the weathered surfaces, and the quiet spaces that reward patient observation. With careful planning, you’ll document images that reflect the site’s true scale, its people, and the way erosion slowly etches drama into stone–then share those stories with fellow travelers through well-curated reviews and memories that last years.
Exact locations and access routes for each formation
Start at the official park gate and hire a local guide if you’re unfamiliar with rugged routes; use marked trails and request a current map at the kiosk, which often offers free options.
Spot A: Lena Pillars on the Lena River. Location: in the Sakha Republic, along the eastern bank of the Lena River, within a protected nature area that translates to a narrow corridor of towers and boulder rows. Access: fly into Yakutsk, then drive to the park entrance on the river and embark on a river or land route; several sections require a short boat leg during high water, while others are reachable by a straightforward hike from the gate. Morning light makes the weathering textures glow, and you’ll spot birds and small mammals in the surrounding ecosystems that slowly shift with the seasons. The main approach runs through a valley of stones and hills; stay on the wide, signed route and refer to the map for the spot you want to photograph. The upper viewpoints can be done in a day, with rooms in nearby settlements for overnight stays; beware that some sections are exposed and you may be in the shadow under taller pillars near the bridge over the lower stream. Photo opportunities are abundant, with several viewpoints available and no entry fee for the base routes.
Spot B: Stolby Rock Columns near Krasnoyarsk. Location: a cluster of classic spires within a protected urban reserve just outside Krasnoyarsk city limits, consisting of several named towers plus unnamed spires. Access: take a regional train or bus to the city, then a short municipal bus or taxi toward the Stolby parking zone; follow the blue trail markers to the main lookout, then pick among several looping routes that weave among the columns. The ascent belongs to a well-trodden route that has room for variation; wildlife in the area includes small birds and herbivores that avoid crowds if you move slowly. The scenery translates into a stark contrast of weathered stones against the city skyline; many visitors park buildings and cafés along the roadside, which is convenient for a morning warm-up. For a free, self-guided option, start from the lower trailhead and climb to the first overlook, then return via the bridge overlooks that cross small creeks.
Spot C: Kungur Stone City (Kungur Stone Town) in Perm Krai. Location: near Kungur town, within a karst plateau that consists of clustered limestone towers and arches. Access: drive from Perm along a regional road to Kungur, then walk or take a local guide-led hike to the rock field; many routes loop around the hilltops and through a network of hollows and caverns. The formation style is classical in its columnar arrangement and the caves nearby reveal ancient weathering patterns; on the morning path, you’ll hear rivers nearby and see birds overhead. Wildlife is common, and visitors often encounter deer in the surrounding forest margins; stay on designated paths to avoid disturbing habitat that hosts native ecosystems. Bring a compact photo setup for close-ups of the stone textures, and plan several short stops to admire the room-like alcoves between spires.
Spot D: Shoria Hills Outcrops in the South Ural foothills. Location: a belt of rocky hills lying to the west of the Urals, consisting of jagged ridges and rounded knolls with stone staircases of varying heights. Access: reach the nearest rail hub (Miass or Chebarkul) and transfer to a forest road that leads to the lower trailhead; from there follow a marked route through a pine forest until you reach the most dramatic towers. The area features wildlife typical of the taiga and several small streams that feed seasonal rivers; the morning air is crisp and the light highlights the sculpture-like forms of weathered stones. The route includes a few switchbacks that offer views over the valley, with several spots to pause and photograph the spires.
Spot E: Kamchatka Peninsula rock columns near the coastline. Location: a coastal range in the far east, consisting of volcanic and sedimentary outcrops that stand above the shore. Access: fly into Petropavlovsk-Kamchatsky, then hire a local guide who can arrange transport to the foothill trailheads; travel time may require a boat transfer to the head of some canyons. The landscape is rugged and slowly sculpted by weathering, with weather patterns that translate to dramatic morning mists and steamy creeks near the base. The site offers a mix of sea spray, wildlife sightings, and a sparse but beautiful backdrop of stony forms and hills; consider a second day to explore more distant towers, as routes can be several kilometers long. Bridge crossings over streams and small rivers are common, and some spots lie under overhanging shelves that create natural rooms for resting and sketching a photo sequence.
Spot F: Altai Range stone pinnacles in the borderlands of Russia and Mongolia. Location: a high plateau zone consisting of cervices, gullies, and spire-like rocks in the western Altai. Access: approach from Gorno-Altaysk or Barnaul, then connect to a marked trail into the foothills; permits may be required in certain protected zones, so refer to local park offices for current rules. The outcrops display a striking contrast of white and gray minerals set against a blue sky; slowly they rise from wooded slopes into open hills, creating a landscape that feels classical in its timeless geometry. Morning visits are best to catch the soft light on the stones and to observe the animals that inhabit the surrounding ecosystems.
Spot G: Baikal Basin arched rocks near the lake’s eastern shore. Location: in the Lake Baikal vicinity, where rock arches and towers sit along the moraine and shoreline. Access: reach Irkutsk or Ust-Barguzin and use local guides to access the trailheads along forest roads; several routes converge at lookout points that translate to dramatic photos of the arches with the lake in the background. The terrain consists of gravelly shorelines and fringing hills, with wildlife that includes waterfowl and riverine species; you’ll see slow weathering patterns that reveal the geology’s evolution and a room-like space beneath some arched spans that make for an atmospheric portrait.
Spot H: Karelia granite outcrops near the border with Finland. Location: a mosaic of cliffs and boulders tucked into forested hills just inland from the White Sea region. Access: drive to the regional capitals and take forest roads toward the designated park zones; several trailheads lead into intact pockets of granite towers. This area is known for its free-standing blocks and tabular caps, which provide ample room for exploring on foot and for capturing the light at dawn. Wildlife is present in the surrounding delta ecosystems, and keep an eye out for birds that roost among the ledges; harassed by crowds in peak hours, many visitors prefer the calmer morning window to earn the best shots.
Spot I: Ural Tabletop group near the Trans-Ural foothills. Location: a set of flat-topped monoliths scattered across a broad upland, with several buttresses and narrow gorges. Access: take a long-distance bus to the nearest town, then a local shuttle toward the trailhead; several routes offer different vantage points. The bars and columns provide a stark, stubborn beauty that translates to a classical composition; the rocks slowly weather into rounded edges that contrast with the straight lines of the surrounding hills and any old buildings in the nearby settlement. The area is typical for day trips, with wildlife and easy viewing of several outcrops that are ideal for a morning photo session.
Spot J: Khibiny Massif rock spires on the Kola Peninsula. Location: a northern arc that features rugged, dark stone towers amid tundra and lichens. Access: fly to Murmansk, then drive to the foothill zones and connect with a guided trek; several routes interlink the major towers, and one can observe the landscape from the crest of a ridge after a steady climb. The walk passes through a zone where wildlife is active at dawn, and you’ll often find spots with a room-like shelter under a shelf that provides shelter on windy days. The scenery is beautiful in a stark, northern light, with free trails available during the low season and private guides available for more challenging segments.
Best seasonal timings for lighting, weather, and crowds
Plan visits during late spring or early autumn for the best balance of light, weather, and crowds. This window, called shoulder season, is a thing that yields unique, directional light across hills and lakes, translating into warm tones on stone faces. Shots consisting of wide panoramas and close textures look dramatic as millions of photons pool on surfaces. Access at bases and trailheads improves here, and streets near towns stay calmer. Here they became iconic viewpoints for a visitor and locals alike. A few routes hide a hideout in a canyon near zubeydesheth. For planning, consult theluxvault for maps and itineraries. The offering of these months tends to be huge.
Lighting windows are best at dawn or dusk, with golden hour lasting about 60 minutes after sunrise and before sunset. Across russia, light changes rapidly, but the color translates into warm tones on stone walls, creating a unique mood for every shot. Photos taken in these windows often consist of broad skies and texture-rich surfaces, revealing details that vanish at noon.
Crowd management: midweek mornings tend to be calmer; plan to shoot between nine and eleven to minimize congestion, and avoid weekends and school holidays when visitor numbers spike. Last light sessions can attract larger groups as well, so aim for the earlier window when possible.
Access and logistics: begin from bases along the main routes. Verify permits and access rules for protected zones; keep to marked trails and follow signs. theluxvault offers quieter detours and safe hideouts such as caves near the center. For those with limited time, a one-day loop from a nearby town keeps streets manageable and transit between viewpoints short.
Gear and etiquette: wear athletic_shoe; pack layers; bring water; carry a compact tripod for long exposures; choose lenses for both wide vistas and tight textures; protect gear from dust and moisture; and keep a spare memory card for millions of frames of photos. Always commemorate the landscapes, and remember that this thing requires patience to make the nine-season rhythm of the locales pay off, especially at the last light when the sky exposes its true hues.
Réglages de l'appareil photo, composition et équipement pour les paysages accidentés
Montez toujours votre appareil photo sur un trépied robuste et photographiez en RAW en mode manuel ; utilisez la lumière disponible et faites attention au mouvement. Commencez à ISO 100, exposez pour les hautes lumières et maintenez l’obturateur entre 1/125 s et 1/320 s pour des scènes de rochers stables. Utilisez une ouverture d’environ f/8 à f/11 pour conserver la profondeur de l’avant-plan aux pics éloignés ; pour les détails de l’avant-plan, descendez à f/5,6–f/8 et augmentez l’ISO à 200–400 si le vent ou le mouvement exigent un tempo d’obturation plus rapide.
La composition repose sur un premier plan fort, une profondeur claire et une échelle. Placez une ligne conductrice vers le milieu ou l'arrière-plan, évitez de centrer l'horizon et testez des cadres en contre-plongée et près du sol. Incluez un élément de référence tel qu'un bâtiment délabré ou une structure abandonnée pour rendre compte de la taille ; dans un paysage de ruines de Chufut-Kale ou de rochers de Bandarban, cela ajoute du drame et aide à commémorer le lieu pour les spectateurs, y compris les enfants.
L'équipement essentiel comprend un boîtier étanche, deux cartes mémoire et un sac à dos de qualité militaire. Un objectif grand angle (14–24 mm) couvre les scènes accidentées, avec un télézoom (70–200 mm) pour les détails lointains. Ajoutez un polariseur circulaire pour intensifier le ciel, un filtre ND gradué de 2–3 stops pour les horizons à fort contraste, et un trépied robuste avec une colonne centrale réversible. Gardez les bouchons d'objectif en place lorsque vous vous déplacez entre les endroits et emportez un petit kit de nettoyage ; sur le terrain, près de Moscou ou d'autres endroits isolés, les temps d'arrêt sont rares, alors soyez prêt.
Enregistrez les données de chaque image dans un simple journal : lieu, date, météo et paramètres ; cette prise de notes virtuelle aide à reproduire l'ambiance plus tard, et les notes source concernant l'approche renforcent l'apprentissage. Des sites comme Tchoufout-Kalé et Bandarban offrent une lumière variée, exigeant presque une adaptation rapide pour capturer l'ambiance et l'histoire de chaque lieu.
| Aspect | Recommendation |
|---|---|
| Mode | Manuel, RAW |
| ISO | 100–200 par forte luminosité ; jusqu'à 400 en cas d'ombre ou de mouvement |
| Ouverture | f/8–f/11 pour une netteté générale ; f/5,6–f/8 pour un premier plan prononcé |
| Obturateur | 1/125–1/320 s ; Surexposition pour HDR si nécessaire |
| Objectifs | Grand angle (14–24 mm) pour les scènes grandioses ; standard (24–70 mm) pour les détails ; téléobjectif (70–200 mm) pour la compression |
| Filtres | Polariseur pour intensifier les bleus du ciel ; ND gradué 2–3 stops pour les horizons lumineux |
| Stabilité | Trépied ; déclencheur à distance ou retardateur pour réduire le tremblement |
| White balance | Auto, à ajuster en post-production si nécessaire |
Permis, sécurité et réglementations locales à connaître
Vérifiez les exigences en matière de permis avant de planifier un trek ; contactez le service local des parcs ou le bureau de gestion des terres pour confirmer les permis nécessaires, les dates limites, la taille maximale des groupes et les fenêtres d'accès.
Portez des chaussures robustes, restez sur les sentiers balisés et évitez de marcher sur les corniches instables où les textures de grès peuvent s'écailler, ainsi que les zones constituées de pierres détachées ; le temps peut changer rapidement, surveillez donc les prévisions et évitez les sections avec des pierres instables.
Certains sites se trouvent à l'intérieur de territoires protégés dont l'accès est limité aux groupes guidés ; cependant, à Bandarban comme à Chufut-Kale, les règles stipulent que vous ne pouvez pas vous aventurer hors des sentiers balisés et que vous devez rester avec un guide agréé ; seul cet arrangement permet de préserver leurs textures naturelles et protège les textures de grès qui caractérisent les sites situés dans ces régions.
Pour la photographie, apportez un trépied compact et gardez votre matériel sous contrôle ; là où il y a des surfaces en bois, évitez de poser votre matériel sur du bois humide pour éviter qu'il ne glisse ; si une promenade en bois est aménagée, restez dessus ; le matériel laissé sans surveillance attire les voleurs et peut endommager les surfaces délicates ; une formation à la randonnée sécuritaire et à la manipulation du matériel est utile, surtout sur les corniches exposées.
Les demandes sont généralement soumises via des portails officiels et modernes ou aux postes de garde locaux ; prévoyez au moins deux semaines pour le traitement ; ayez sur vous un permis imprimé, une copie de votre itinéraire et les coordonnées du chef de groupe ; les frais, le cas échéant, sont payés en ligne ou lors du retrait ; certaines zones exigent un guide agréé et un permis journalier uniquement, pour trouver votre chemin dans les zones sensibles. Ces mesures permettent un bon contrôle et doivent être respectées.
Sur place, respectez les réglementations affichées, évitez de grimper sur les zones avec des pierres détachées ou des rebords instables, et préservez le territoire en emportant tous vos déchets ; utilisez uniquement l'eau provenant de sources désignées ; gardez votre groupe compact pour réagir rapidement en cas de danger ; ces paysages révèlent de magnifiques teintes dorées à l'aube et au crépuscule, offrant de belles vues pendant que vous marchez, et vous devez respecter les lieux auxquels vous accédez.
Si vous avez besoin de plus d'informations, contactez les centres d'accueil officiels ou les bureaux des parcs ; les guides peuvent expliquer les règles locales pour la région de Lena et Tchoufout-Kalé ; vérifiez toujours les statuts actuels avant de partir, car les réglementations peuvent changer selon les saisons ; cette approche assure une bonne sécurité et préserve le territoire pour les futurs visiteurs.
Planification d'itinéraire intelligente pour couvrir les 10 sites
Commencer par Manpupuner pour un bloc de trois jours afin d'assurer la photographie au lever du soleil et les itinéraires de randonnée, puis parcourir la ceinture de formations en une seule boucle. Engager des fournisseurs locaux pour les guides et les permis d'accès, lire les critiques à l'avance et récupérer les permis sur place lorsque cela est possible. Prévoir les matinées pour la lumière du lever du soleil, éviter les sentiers fréquentés et consacrer des jours alternés à la randonnée et au vélo pour maintenir un rythme régulier.
-
Manpupuner – piliers de pierre formés qui s'élèvent de la plaine ; partez à l'aube pour une lumière douce et des silhouettes nettes. Prévoyez deux jours complets si vous souhaitez photographier à la fois les piliers et les champs d'éboulis environnants ; utilisez un équipement de randonnée compact et emportez un sac photo étanche. L'accès est préférable par un itinéraire guidé ; réservez tôt auprès de fournisseurs de confiance et confirmez les heures de lever du soleil.
-
Groupe central – des présentations de formes colonnaires se détachant sur le ciel ouvert ; prévoyez une visite d'une journée avec un départ en fin de matinée pour profiter d'une lumière plus douce sur les visages. Le terrain est accidenté mais praticable avec des chaussures appropriées ; une courte randonnée pittoresque constitue un échauffement idéal pour les sections plus exigeantes qui suivront.
-
Affleurements nord – trois flèches distinctes visibles depuis un seul point de vue ; arrivez en milieu de matinée pour réduire les ombres et apportez un trépied pour les vastes paysages. L'accès peut nécessiter un trajet sur une route accidentée suivi d'une randonnée soutenue ; faites appel à des guides pour faciliter l'itinéraire et minimiser les risques liés au timing.
-
Crête de sortie – étroites corniches aux profils spectaculaires ; un sentier de deux heures permet de rejoindre un point de vue plus élevé où la photographie profite du contre-jour. Prévoyez un équipement compact et envisagez une option vélo pour l'approche si vous avez l'autorisation et le soutien local.
-
Plateau sud – arches naturels et façades de pierre aux forts contrastes ; prévoir une cible en fin d’après-midi pour capter les teintes chaudes. Le site est accessible en véhicule léger jusqu’à un point de départ de sentier, puis une randonnée régulière d’une heure jusqu’aux principaux points d’intérêt.
-
Groupe de crête – plusieurs piliers alignés en un arc peu profond ; profitez d'une séance matinale pour capturer de longues ombres, puis passez à des gros plans de la texture. L'accès est optimal grâce à un court circuit de randonnée qui respecte les surfaces fragiles.
-
Piliers de la vallée d'Esker – formations qui s'élèvent abruptement du fond de la vallée ; une journée complète sur place permet de profiter de multiples points de vue et de réaliser des photos soignées en prenant son temps. Prévoyez de l'eau et des en-cas adaptés aux longues séances de pose ; envisagez une reconnaissance rapide en courant si les conditions le permettent.
-
Affleurements du plateau continental – tableaux sculptés par le vent et la pluie le long du littoral ; à visiter au lever ou au coucher du soleil pour optimiser la saturation des couleurs sur les parois rocheuses. L'accès nécessite un sentier côtier, où la sécurité du pied est primordiale ; un vélo léger peut raccourcir l'approche les jours de beau temps.
-
Tours intérieures du bassin – colonnes naturelles s'élevant d'un bassin plus plat ; prévoyez une demi-journée pour capturer à la fois la ligne d'horizon lointaine et les textures intimes des faces des colonnes. Les vendeurs aux points de rassemblement à proximité peuvent organiser un court transfert par bateau ou par voie terrestre si le temps change.
-
Dernière zone d'observation – un ensemble de piliers plus petits offrant des angles intimes et dignes d'être reproduits ; réservez une demi-journée pour les dernières vérifications et pour combler les éventuelles lacunes en matière de lumière. Ce segment de conclusion est idéal pour une séance de photographie rétrospective et dit au revoir à un grand arc à travers les dix sites.
Conseils généraux : visez trois fenêtres de lumière optimale par site : lever du soleil, fin de matinée et heure dorée, puis ajustez en fonction de la météo. Apportez un trépied léger, plusieurs cartes mémoire et des batteries de rechange, car des millions de photos sont à portée de main tout au long de la boucle. Pour la logistique, verrouillez l’accès avec des guides certifiés et consultez les avis avant chaque transfert ; prévoyez des jours tampons pour les changements de conditions météorologiques et routières. Si vous préférez un rythme plus lent, réduisez à huit sites et étirez chaque arrêt sur une journée complète, puis insérez une journée de repos après le départ de Manpupuner. Vérifiez toujours les règles d’accès en vigueur et restez flexible pour tenir compte des ouvertures saisonnières des routes et des horaires des fournisseurs.
") Art urbain loufoque de Moscou – Où le trouver (PHOTOS)">
Art urbain loufoque de Moscou – Où le trouver (PHOTOS)">
 Meilleurs spots photo à Moscou pour de superbes photos en 2025">
 20 joyaux cachés et secrets les mieux gardés de Moscou – Un guide local insolite">
 Tournée des bars à l'ancienne à Moscou : Bars classiques, trésors cachés et vie nocturne">
 Moscou – Ville de villégiature – Voyages de luxe, bien-être et culture dans la capitale russe">
 Guide de Tallulah Falls – Comment visiter les Gorges de Tallulah, les points d'accès et les meilleurs points de vue">
 Les plus belles traversées en ferry d'Europe – Itinéraires côtiers pittoresques">
 Le Guide Ultime des Pistes de Luge – Un Récapitulatif des Pentes dans le 419">
 Moscou Mystique Multimédia – Arts immersifs, culture et technologie dans la capitale russe">
 Les plus époustouflantes églises, joyaux cachés, à travers l'Europe">