 10 of Russia’s Most Amazing Rock Formations – A Stunning Photo Gallery">

Open during opening hours and shoot at dawn or blue hour to capture the best contrasts and comfortable times for your crew. This approach preserves texture and yields natural color without harsh shadows.
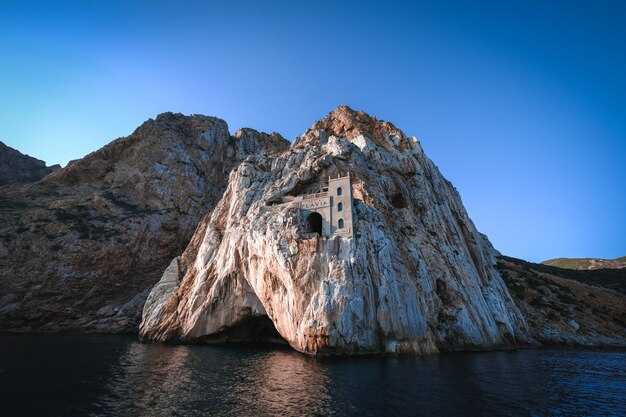
In this part, the Kutuzovskie ridge hosts dramatic lines and towering pillars that define the skyline. The grottoes and wind-worn arches serve as backdrops with scale that is tunnettu to attract landscape photographers; the sites are sijaitsee across several valleys, including the zubeydesheth pocket, which adds significant mystery to compositions. The surfaces offer fantastic texture, however, access can be seasonal and depends on local rules.
For practical planning, consult reddit threads and theluxvault guides. They provide field-tested tips on measuring distances, weather windows, and safety, helping you build a schedule of kohokohdat ja significant viewpoints. The terrain remains comfortable when you pace yourself and carry water.
Each site offers multiple backdrops; a single trip can be a part of a broader sequence. Locations span varied elevations, with dramatic shifts in texture between stone columns and cliff shelves. The light opening of morning or late afternoon reveals contrasts that elevate the shots without over-processing, and careful framing keeps the day’s opening in focus.
Plan with respect for the places; coordinate the route and revisit options taas if weather cooperates. Share progress with the community, tag the spots to help others discover them, and always comply with local rules to preserve the sites for future visits.
Practical guide to visiting and photographing Russia’s rock formations
Hire a local guide to arrange access and safety; reviews from trekkers help validate routes, then map a two-day loop around a handful of dramatic stone outcrops. Getting permits ahead saves time; plan to arrive well before dawn for the first light, then return in the afternoon when winds soften and shadows sweep across the cliffs.
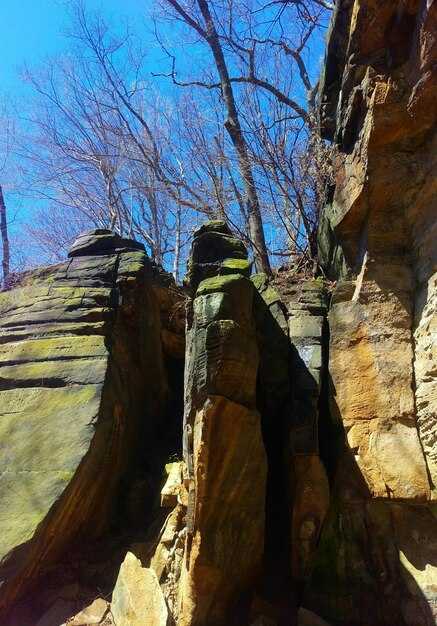
Best seasons run from late spring to early autumn, relatively predictable weather, and longer days. Erosion has carved sweeping shapes over years, so each site offers a different character. Shade pockets under arches steady the camera and reduce glare, while elevated overlooks reveal the entire panorama and scale of the formations.
Getting around relies on local towns as bases; stay in family-run accommodations or join local tours to reach trailheads. Camps are common near protected spaces, while some communities keep small free campsites near the edge of forests. When you visit, show respect for peoples and their spaces; move slowly on trails to minimize impact and keep noise low for both wildlife and other visitors. National parks charge modest fees, and part of those funds support conservation efforts; budget accordingly to support the places you’re enjoying.
Equipment and technique matter as much as luck. Use a lightweight tripod, a wide-to-standard zoom, and a weather-sealed bag to protect gear from dust and spray. Shoot during the golden hours–dawn and late afternoon–to capture dramatic silhouettes, then bracket exposures to handle high-contrast skies. Bring a polarizer to tame glare on sunlit faces and to deepen the hue of distant ridges; in gusty afternoons, shield the camera and use a faster shutter to freeze wind-blown details.
Site etiquette and safety cannot be skipped. Winds on exposed ledges can change quickly; keep a safe distance from edge drops and erosion gullies. Respect shade lines and avoid loitering near fragile arches that look ready to crumble. If you’re new to these landscapes, try a two-stage approach: begin with a day in the national park area, then a second day to revisit the most photogenic angles when light changes. For added context, compare with Bandarban-like clusters you’ve seen elsewhere; the motley variety of shapes often tells the same story of nature’s stubborn, patient work over years.
- Getting there: base in a local town, join a short-led tour to nearby outcrops, then shuttle to trailheads.
- Best practice: arrive early, use a tripod, and shoot slowly to frame sweeping horizons and intimate textures.
- Camping and lodging: mix camp nights with nights in small inns; this helps you stay flexible for weather shifts and afternoon light.
- Conservation: stay on marked paths, pack out every crumb (including snacks like cheese), and avoid disturbing any features or wildlife.
- Day 1: arrive at first base, hike to a prominent pillar group, capture close-up textures in shade, then shoot long-range silhouettes at sunset.
- Day 2: dawn shoot from a higher vantage, return to a second cluster for dramatic sky lines, and end with a wide-angle sweep that includes the entire field.
Keep these parts of the experience in mind: the local culture, the weathered surfaces, and the quiet spaces that reward patient observation. With careful planning, you’ll document images that reflect the site’s true scale, its people, and the way erosion slowly etches drama into stone–then share those stories with fellow travelers through well-curated reviews and memories that last years.
Exact locations and access routes for each formation
Start at the official park gate and hire a local guide if you’re unfamiliar with rugged routes; use marked trails and request a current map at the kiosk, which often offers free options.
Spot A: Lena Pillars on the Lena River. Location: in the Sakha Republic, along the eastern bank of the Lena River, within a protected nature area that translates to a narrow corridor of towers and boulder rows. Access: fly into Yakutsk, then drive to the park entrance on the river and embark on a river or land route; several sections require a short boat leg during high water, while others are reachable by a straightforward hike from the gate. Morning light makes the weathering textures glow, and you’ll spot birds and small mammals in the surrounding ecosystems that slowly shift with the seasons. The main approach runs through a valley of stones and hills; stay on the wide, signed route and refer to the map for the spot you want to photograph. The upper viewpoints can be done in a day, with rooms in nearby settlements for overnight stays; beware that some sections are exposed and you may be in the shadow under taller pillars near the bridge over the lower stream. Photo opportunities are abundant, with several viewpoints available and no entry fee for the base routes.
Spot B: Stolby Rock Columns near Krasnoyarsk. Location: a cluster of classic spires within a protected urban reserve just outside Krasnoyarsk city limits, consisting of several named towers plus unnamed spires. Access: take a regional train or bus to the city, then a short municipal bus or taxi toward the Stolby parking zone; follow the blue trail markers to the main lookout, then pick among several looping routes that weave among the columns. The ascent belongs to a well-trodden route that has room for variation; wildlife in the area includes small birds and herbivores that avoid crowds if you move slowly. The scenery translates into a stark contrast of weathered stones against the city skyline; many visitors park buildings and cafés along the roadside, which is convenient for a morning warm-up. For a free, self-guided option, start from the lower trailhead and climb to the first overlook, then return via the bridge overlooks that cross small creeks.
Spot C: Kungur Stone City (Kungur Stone Town) in Perm Krai. Location: near Kungur town, within a karst plateau that consists of clustered limestone towers and arches. Access: drive from Perm along a regional road to Kungur, then walk or take a local guide-led hike to the rock field; many routes loop around the hilltops and through a network of hollows and caverns. The formation style is classical in its columnar arrangement and the caves nearby reveal ancient weathering patterns; on the morning path, you’ll hear rivers nearby and see birds overhead. Wildlife is common, and visitors often encounter deer in the surrounding forest margins; stay on designated paths to avoid disturbing habitat that hosts native ecosystems. Bring a compact photo setup for close-ups of the stone textures, and plan several short stops to admire the room-like alcoves between spires.
Spot D: Shoria Hills Outcrops in the South Ural foothills. Location: a belt of rocky hills lying to the west of the Urals, consisting of jagged ridges and rounded knolls with stone staircases of varying heights. Access: reach the nearest rail hub (Miass or Chebarkul) and transfer to a forest road that leads to the lower trailhead; from there follow a marked route through a pine forest until you reach the most dramatic towers. The area features wildlife typical of the taiga and several small streams that feed seasonal rivers; the morning air is crisp and the light highlights the sculpture-like forms of weathered stones. The route includes a few switchbacks that offer views over the valley, with several spots to pause and photograph the spires.
Spot E: Kamchatka Peninsula rock columns near the coastline. Location: a coastal range in the far east, consisting of volcanic and sedimentary outcrops that stand above the shore. Access: fly into Petropavlovsk-Kamchatsky, then hire a local guide who can arrange transport to the foothill trailheads; travel time may require a boat transfer to the head of some canyons. The landscape is rugged and slowly sculpted by weathering, with weather patterns that translate to dramatic morning mists and steamy creeks near the base. The site offers a mix of sea spray, wildlife sightings, and a sparse but beautiful backdrop of stony forms and hills; consider a second day to explore more distant towers, as routes can be several kilometers long. Bridge crossings over streams and small rivers are common, and some spots lie under overhanging shelves that create natural rooms for resting and sketching a photo sequence.
Spot F: Altai Range stone pinnacles in the borderlands of Russia and Mongolia. Location: a high plateau zone consisting of cervices, gullies, and spire-like rocks in the western Altai. Access: approach from Gorno-Altaysk or Barnaul, then connect to a marked trail into the foothills; permits may be required in certain protected zones, so refer to local park offices for current rules. The outcrops display a striking contrast of white and gray minerals set against a blue sky; slowly they rise from wooded slopes into open hills, creating a landscape that feels classical in its timeless geometry. Morning visits are best to catch the soft light on the stones and to observe the animals that inhabit the surrounding ecosystems.
Spot G: Baikal Basin arched rocks near the lake’s eastern shore. Location: in the Lake Baikal vicinity, where rock arches and towers sit along the moraine and shoreline. Access: reach Irkutsk or Ust-Barguzin and use local guides to access the trailheads along forest roads; several routes converge at lookout points that translate to dramatic photos of the arches with the lake in the background. The terrain consists of gravelly shorelines and fringing hills, with wildlife that includes waterfowl and riverine species; you’ll see slow weathering patterns that reveal the geology’s evolution and a room-like space beneath some arched spans that make for an atmospheric portrait.
Spot H: Karelia granite outcrops near the border with Finland. Location: a mosaic of cliffs and boulders tucked into forested hills just inland from the White Sea region. Access: drive to the regional capitals and take forest roads toward the designated park zones; several trailheads lead into intact pockets of granite towers. This area is known for its free-standing blocks and tabular caps, which provide ample room for exploring on foot and for capturing the light at dawn. Wildlife is present in the surrounding delta ecosystems, and keep an eye out for birds that roost among the ledges; harassed by crowds in peak hours, many visitors prefer the calmer morning window to earn the best shots.
Spot I: Ural Tabletop group near the Trans-Ural foothills. Location: a set of flat-topped monoliths scattered across a broad upland, with several buttresses and narrow gorges. Access: take a long-distance bus to the nearest town, then a local shuttle toward the trailhead; several routes offer different vantage points. The bars and columns provide a stark, stubborn beauty that translates to a classical composition; the rocks slowly weather into rounded edges that contrast with the straight lines of the surrounding hills and any old buildings in the nearby settlement. The area is typical for day trips, with wildlife and easy viewing of several outcrops that are ideal for a morning photo session.
Spot J: Khibiny Massif rock spires on the Kola Peninsula. Location: a northern arc that features rugged, dark stone towers amid tundra and lichens. Access: fly to Murmansk, then drive to the foothill zones and connect with a guided trek; several routes interlink the major towers, and one can observe the landscape from the crest of a ridge after a steady climb. The walk passes through a zone where wildlife is active at dawn, and you’ll often find spots with a room-like shelter under a shelf that provides shelter on windy days. The scenery is beautiful in a stark, northern light, with free trails available during the low season and private guides available for more challenging segments.
Best seasonal timings for lighting, weather, and crowds
Plan visits during late spring or early autumn for the best balance of light, weather, and crowds. This window, called shoulder season, is a thing that yields unique, directional light across hills and lakes, translating into warm tones on stone faces. Shots consisting of wide panoramas and close textures look dramatic as millions of photons pool on surfaces. Access at bases and trailheads improves here, and streets near towns stay calmer. Here they became iconic viewpoints for a visitor and locals alike. A few routes hide a hideout in a canyon near zubeydesheth. For planning, consult theluxvault for maps and itineraries. The offering of these months tends to be huge.
Lighting windows are best at dawn or dusk, with golden hour lasting about 60 minutes after sunrise and before sunset. Across russia, light changes rapidly, but the color translates into warm tones on stone walls, creating a unique mood for every shot. Photos taken in these windows often consist of broad skies and texture-rich surfaces, revealing details that vanish at noon.
Crowd management: midweek mornings tend to be calmer; plan to shoot between nine and eleven to minimize congestion, and avoid weekends and school holidays when visitor numbers spike. Last light sessions can attract larger groups as well, so aim for the earlier window when possible.
Access and logistics: begin from bases along the main routes. Verify permits and access rules for protected zones; keep to marked trails and follow signs. theluxvault offers quieter detours and safe hideouts such as caves near the center. For those with limited time, a one-day loop from a nearby town keeps streets manageable and transit between viewpoints short.
Gear and etiquette: wear athletic_shoe; pack layers; bring water; carry a compact tripod for long exposures; choose lenses for both wide vistas and tight textures; protect gear from dust and moisture; and keep a spare memory card for millions of frames of photos. Always commemorate the landscapes, and remember that this thing requires patience to make the nine-season rhythm of the locales pay off, especially at the last light when the sky exposes its true hues.
Kameran asetukset, sommittelu ja varusteet karuihin maisemiin
Kiinnitä kamera aina tukevaan jalustaan ja kuvaa RAW-muodossa manuaalitilassa; käytä saatavilla olevaa valoa ja huomioi liike. Aloita ISO-arvolla 100, valota kohokohdat ja pidä suljinaika 1/125 s ja 1/320 s välillä, jotta saat vakaita kallioisia maisemia. Käytä aukkoa noin f/8–f/11 syvyyden säilyttämiseksi etualalta kaukaisiin huippuihin; etualan yksityiskohtiin voit laskea arvoon f/5.6–f/8 ja nostaa ISO-arvon 200–400:aan, jos tuuli tai liike vaatii nopeampaa suljinaikaa.
Kompositio perustuu vahvaan etualaan, selkeään syvyyteen ja mittakaavaan. Sijoita johtava linja keskelle tai kauas, vältä horisontin keskittämistä ja testaa sekä matalia että lähellä maanpintaa olevia kuvakulmia. Sisällytä viite-elementti, kuten rapistunut rakennus tai hylätty rakennelma, välittämään kokoa; esimerkiksi Chufut-Kalén raunioiden tai Bandarbanin kallion maisemassa tämä lisää dramatiikkaa ja auttaa muistamaan paikan katsojille, myös lapsille.
Perusvarusteisiin kuuluvat säänkestävä runko, kaksi muistikorttia ja sotilastason reppu. Laajakulmaobjektiivi (14–24 mm) kattaa karut maisemat, ja telezoom (70–200 mm) kaukaisten yksityiskohtien kuvaamiseen. Lisää pyöröpolarisaatiosuodin taivaan syventämiseen, 2–3 aukon harmaasuodatin suurikontrastisiin horisontteihin ja tukeva jalusta, jossa on käännettävä keskipylväs. Pidä linssinsuojukset paikoillaan siirtyessäsi paikasta toiseen ja pidä mukana pientä puhdistussettiä; Moskovan lähellä tai muissa syrjäisissä paikoissa kenttäolosuhteissa seisokkeja on harvoin, joten ole valmis.
Kirjaa jokaisen kuvan tiedot yksinkertaiseen lokiin: sijainti, päivämäärä, sää ja asetukset; tämä virtuaalinen muistiinpanotekniikka auttaa toistamaan tunnelman myöhemmin, ja источник-muistiinpanot lähestymistavasta vahvistavat oppimista. Esimerkiksi chufut-kale ja bandarban tarjoavat vaihtelevaa valoa, mikä lähes vaatii nopeaa sopeutumista tunnelman ja paikan historian vangitsemiseksi.
| Näkökulma | Suositus |
|---|---|
| Tila | Manuaalinen, RAW |
| ISO | 100–200 kirkkaassa valossa; jopa 400 varjossa tai liikkeen vaatiessa |
| Aperture | f/8–f/11 laajan terävyyden saavuttamiseksi; f/5.6–f/8 korostetulle etualalle |
| Shutter | 1/125–1/320 s; haarukoi HDR:ää varten tarvittaessa |
| Linssit | Laaja (14–24 mm) suuriin maisemiin; keskialue (24–70 mm) yksityiskohtiin; tele (70–200 mm) perspektiivin litistämiseen |
| Suodattimet | Polarisaatiosuotimella syvennät taivasta; ND Grad 2–3 askelta kirkkaille horisonteille |
| Vakaus | Jalusta; kaukolaukaisin tai ajastin tärinän vähentämiseksi |
| Valkotasapaino | Automaattinen, säädä jälkikäteen tarvittaessa |
Luvat, turvallisuus ja paikalliset määräykset, jotka sinun on hyvä tuntea
Selvitä lupa-asiat ennen vaelluksen suunnittelua; ota yhteyttä paikalliseen puistoviranomaiseen tai maa-alueen hallintotoimistoon vahvistaaksesi tarvittavat luvat, määräajat, ryhmän enimmäiskoon ja pääsyajat.
Käytä tukevia jalkineita, pysy merkityillä poluilla ja vältä kävelemistä epävakailla reunamilla, joissa hiekkakiven pinta voi lohkeilla, sekä alueilla, joissa on irtonaista kiveä; sää voi muuttua nopeasti, joten seuraa sääennusteita ja vältä kohtia, joissa on irtonaista kiveä.
Joillakin paikoilla sijaitsee suojellulla alueella, jonne pääsy on rajoitettu vain opastetuille ryhmille. Bandarbanissa ja Chufut-Kalessa säännöt kuitenkin sanovat, että merkityiltä poluilta ei saa poiketa ja mukana on oltava lisensoitu opas. Vain tämä järjestely mahdollistaa niiden luonnollisten rakenteiden säilyttämisen ja suojaa hiekkakivirakenteita, jotka ovat ominaisia näillä alueilla sijaitseville paikoille.
Valokuvaukseen ota mukaan pienikokoinen jalusta ja pidä varusteet hallinnassa; vältä varusteiden asettamista kostealle puulle liukastumisen estämiseksi, jos puupintoja on; pysy pitkospuilla, jos sellaiset ovat; vartioimatta jätetyt varusteet houkuttelevat varkaita ja voivat vahingoittaa herkkiä pintoja; turvallisen vaelluksen ja varusteiden käsittelyn koulutus auttaa, erityisesti paljailla reunamilla.
Hakemukset lähetetään yleensä virallisten, nykyaikaisten portaalien kautta tai paikallisiin puistovartioasemille; käsittelyyn on varattava vähintään kaksi viikkoa; mukana on oltava tulostettu lupa, kopio matkasuunnitelmasta ja johtajan yhteystiedot; mahdolliset maksut maksetaan verkossa tai noudettaessa; jotkin alueet edellyttävät valtuutetun oppaan ja vain päiväluvan, jotta herkkiin sopukoihin löytää perille. Näillä toimenpiteillä varmistetaan hyvä valvonta, ja niitä on noudatettava.
Noudata paikan päällä olevia ohjeita, vältä kiipeilyä alueilla, joissa on irtonaisia kiviä tai epävakaita reunamia, ja suojele aluetta viemällä kaikki roskat pois; käytä vettä vain niistä lähteistä, jotka on osoitettu; ryhmän pitäminen tiiviinä auttaa reagoimaan nopeasti, jos vaara uhkaa; nämä maisemat paljastavat kauniita kullan sävyjä aamunkoitteessa ja hämärässä tarjoten hyvät näkymät kävellessäsi, ja sinun on kunnioitettava paikkoja, joihin pääset.
Jos tarvitset lisätietoja, ota yhteyttä virallisiin vierailijakeskuksiin tai puistojen toimistoihin; oppaat voivat selittää paikallisia sääntöjä Lena-alueelle ja Chufut-Kaleen; tarkista aina ajantasaiset tiedot ennen lähtöä, sillä määräykset voivat muuttua vuodenaikojen mukaan; tämä lähestymistapa takaa hyvän turvallisuuden ja säilyttää alueen tuleville vierailijoille.
Älykäs matkasuunnitelman teko, jotta kaikki 10 kohdetta tulevat katettua
Aloita Manpupunerista kolmen päivän ajaksi auringonnousukuvaus- ja patikointireittien lukitsemiseksi, ja rullaa sitten muodostelmien vyöhykkeen poikki yhdellä silmukalla. Palkkaa paikallisia myyjiä oppaiksi ja käyttölupien hankkimiseksi, lue arvosteluja etukäteen ja nouda luvat paikan päältä, jos mahdollista. Suunnittele aamut auringonnousun valolle, vältä ruuhkaisia reittejä ja omista vuoropäivät patikoinnille ja pyöräilylle pitääksesi tahdin tasaisena.
-
Manpupuner – tasangasta kohoavat kivipilarit; aloita aamunkoitteessa saadaksesi pehmeää valoa ja selkeät siluetit. Varaa kaksi kokonaista päivää, jos haluat kuvata sekä pilarit että ympäröivät kivikot; käytä kompaktia retkeilyvarustusta ja kanna säänkestävää kameralaukkua. Paras tapa päästä perille on opastettu reitti; varaa ajoissa luotettavien myyjien kautta ja varmista auringonnousun ajat.
-
Keskeinen ryhmä – pylväsmäisiä muotoja avointa taivasta vasten; suunnittele yhden päivän vierailu ja aloita myöhään aamupäivällä, jotta ehdit nähdä kasvojen pehmeämmän valaistuksen. Maasto on epätasaista mutta käveltävissä asianmukaisin jalkinein; lyhyt, maisemallinen patikointi on ihanteellinen lämmittely myöhemmille, vaativammille osuuksille.
-
Pohjoiset paljastumat – kolme erillistä huippua näkyvissä yhdeltä näköalapaikalta; saavu aamupäivällä varjojen vähentämiseksi ja ota mukaan jalusta laajoja maisemia varten. Pääsy voi vaatia ajamista huonokuntoisella tiellä, jota seuraa reipas kävely; järjestä oppaat helpottamaan reittiä ja minimoimaan aikatauluriskin.
-
Egressin harjanne – kapeita ulkonemia dramaattisilla muodoilla; kahden tunnin reitti yhdistää korkeampaan näköalapaikkaan, jossa valokuvaus hyötyy taustavalosta. Pidä varustuksesi kompaktina ja harkitse pyöräilyä lähestymiseen, jos sinulla on lupa ja paikallista tukea.
-
Eteläinen ylätasanko – luonnonkaaret ja voimakaskontrastiset kivipinnat; suunnittele myöhäinen iltapäivä, jotta voit tavoittaa lämpimät sävyt. Paikalle pääsee henkilöautolla polun alkupisteeseen, josta on tasainen tunnin mittainen patikointi pääkohteisiin.
-
Harjanteen ryhmä – useita matalaan kaareen järjestettyjä pylväitä; käytä aamu, kun pitkät varjot korostuvat, ja siirry sitten pintakuvioiden lähikuviin. Paikalle pääsee parhaiten lyhyellä vaelluslenkillä, joka kunnioittaa herkkiä pintoja.
-
Eskerlaakson pilarit – laakson pohjasta äkillisesti kohoavia muodostelmia; kokopäiväretki täällä mahdollistaa useita näköalapaikkoja sekä hidasta, huolellista valokuvausta. Pakkaa mukaan vettä ja välipalaa pitkiin valotusaikoihin sopien; harkitse juoksuvauhtia nopeaan tiedustelukierrokseen, jos olosuhteet sen sallivat.
-
Rannikkoalueen kalliopaljastumat – tuulen ja sateen muovaamat näkymät rantaviivalla; vieraile auringonnousun tai -laskun aikaan maksimoidaksesi kivipintojen värikylläisyyden. Pääsy vaatii rantapolun, jossa turvallinen jalansija on ensisijaisen tärkeää; kevyt polkupyörä voi lyhentää lähestymistä hyvinä päivinä.
-
Sisäaltaan tornit – luonnon muovaamia pylväitä, jotka kohoavat tasaisemmasta altaasta; varaa puoli päivää sekä kaukaisen siluetin että pylväiden pintojen läheisten yksityiskohtien kuvaamiseen. Läheisillä lähtöpaikoilla olevat myyjät voivat järjestää lyhyen venekuljetuksen tai maakuljetuksen sään muuttuessa.
-
Viimeinen tarkastelualue – pienempien pylväiden muodostama ryhmä, joka tarjoaa intiimejä ja toistamisen arvoisia kuvakulmia; varaa puoli päivää viime hetken tarkistuksiin ja valon puutteiden korjaamiseen. Tämä loppujakso on ihanteellinen retrospektiiviseen valokuvaussessioon ja jättää jäähyväiset upealle kaarelle kymmenellä eri alueella.
Yleisvinkkejä: tähtää kolmeen valon kannalta parhaaseen ajankohtaan per kohde – auringonnousu, myöhäinen aamupäivä ja kultainen hetki – ja säädä niitä sitten sään mukaan. Ota mukaan kevyt kolmijalka, useita muistikortteja ja vara-akkuja, sillä miljoonat kuvat ovat ulottuvillasi koko reitin varrella. Logistiikan osalta varmista pääsy kohteisiin tarkastettujen oppaiden avulla ja tarkista arvostelut ennen jokaista siirtymää; suunnittele puskuripäiviä sään ja tieolosuhteiden muutoksille. Jos pidät hitaammasta tahdista, vähennä kohteiden määrän kahdeksaan ja venytä jokainen pysähdys täyteen päivään ja pidä sitten lepopäivä Manpupunerin alun jälkeen. Tarkista aina voimassa olevat pääsynsäännöt ja pidä suunnitelmasi joustavana, jotta voit huomioida teiden avautumisen ja palveluntarjoajien aikataulut kausiluonteisesti.
") Moscow’s Wacky Street Art – Where to Find It (PHOTOS)">
Moscow’s Wacky Street Art – Where to Find It (PHOTOS)">
 Parhaat valokuvauspaikat Moskovassa upeisiin vuoden 2025 kuviin">
 20 Moscow Hidden Gems and Best-Kept Secrets – An Offbeat Local Guide">
 Old-School Moscow Pub Crawl – Classic Bars, Hidden Gems & Nightlife">
 Moscow – A Resort City – Luxury Travel, Wellness, and Culture in the Russian Capital">
 Tallulah Falls Location Guide – How to Visit Tallulah Gorge, Access Points, and the Best Viewpoints">
 Europe’s Most Beautiful Ferry Rides – Scenic Coastal Journeys">
 Ultimate Sledding Hill Guide – A Roundup of Slopes in the 419">
 Mystical Moscow Multimedia – Immersive Arts, Culture, and Tech in Russia’s Capital">
 The Most Breathtaking Hidden Gem Churches Across Europe">